This article may contain affiliate links. We may earn a commission when you sign up through our links — at no extra cost to you. Our recommendations are based on independent evaluation and are not influenced by commissions.
TL;DR: Set up a reusable Trello board template by selecting the right structure for your workflow, duplicating it to your workspace, customizing lists and labels, adding automation rules, inviting your team, and running a dry-run project to catch issues before full rollout. Key steps: match workflow type → customize → automate → test.
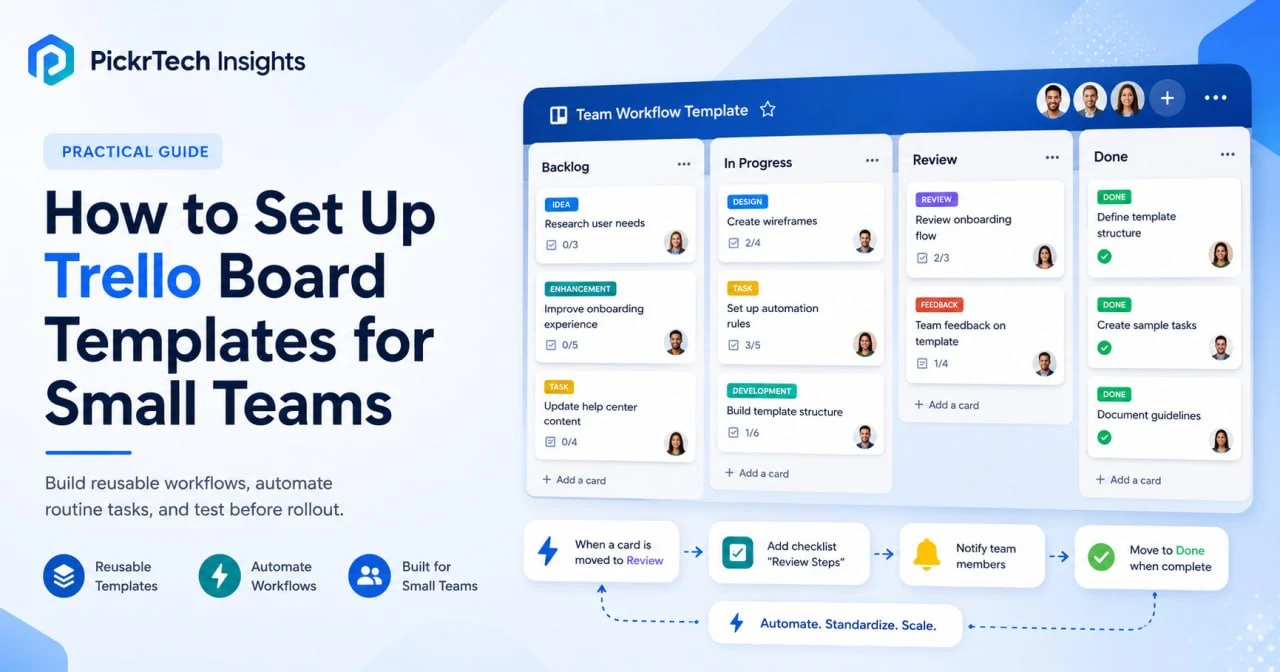
Trello board template example for small teams with workflow columns and automation steps.
Who this guide is for
This guide is for small teams (5-20 people), freelancers, and operators who already understand Trello’s basic Kanban structure and want practical board templates they can copy and deploy immediately. You know how to create cards and move them between lists—now you need board structures that work for specific team workflows like project management, content pipelines, or operations. This guide shows you how to select, customize, and roll out templates your team will actually use daily.
Skip this if you’re an absolute Trello beginner still learning how to navigate the interface or create your first board—start with our beginner’s Trello setup guide first. Skip it if your team has fewer than 5 people—a simple shared spreadsheet or basic Trello board may be faster to maintain than a structured template. Skip it if you need enterprise-grade permission controls, audit logs, or if your team already uses advanced project management tools like Jira or Asana with deeply embedded workflows.
Who should skip this
The workflow at a glance
- Identify your workflow type — Project management, content pipeline, operations, or CRM tracking
- Duplicate or create from a template — Copy an existing board structure or build from scratch using a template as a guide
- Customize lists, labels, and fields — Rename columns to match your process, create a color-coded label system
- Add automation — Set up Butler rules to reduce manual work (auto-assign, auto-move, auto-archive)
- Invite team and establish norms — Add members, document card creation rules, define workflow conventions
- Test with a dry-run project — Run one complete cycle through the board to identify bottlenecks before full adoption
Prerequisites
Tools needed
- Active Trello account (free or paid workspace)
- Trello board access with admin or edit permissions
- Slack, email, or in-team communication channel for documentation
Team setup
- At least one board owner/admin to set up and maintain the template
- 2-20 team members with Trello accounts
- Designated person to document workflow conventions and train new members
Estimated time: 30–60 minutes per board template (setup + testing)
Difficulty: Beginner to intermediate
Step-by-step workflow
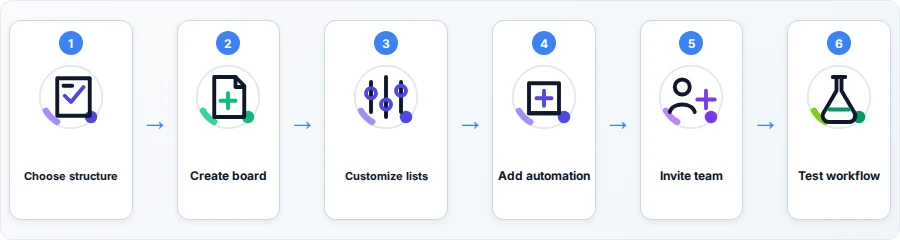
How to Set Up Trello Board Templates for Small Teams — step flow diagram
Step 1: Choose the right board structure for your use case
Before you duplicate anything, identify what your team actually does. Trello works differently for project management teams (iterative delivery) versus content teams (editorial calendar) versus operations teams (support tickets and recurring tasks).
For project management teams: You need lists that reflect your delivery cycle—Backlog, In Progress, In Review, Done. Add labels for priority, team member, or sprint.
For content teams: Use lists for idea, outline, draft, review, scheduled, published. Labels should track content type (blog, video, social, email) and owner.
For operations teams: Create lists for incoming request, assigned, in progress, blocked, completed. Add SLA labels (urgent, high, normal, low).
Don’t try to build a board that handles every workflow at once. If you’re also evaluating dedicated resource management tools, our comparison of 4 resource management tools covers how they stack up. Choose one core workflow first—you can always duplicate the board and customize it later for a second workflow.
Expected outcome: You have a clear description of your team’s workflow in 2-3 sentences. You can name the three lists that matter most to your process.
Step 2: Duplicate or create the board from a template
Open Trello and go to your workspace dashboard. Look for the “Create board” button. Trello offers built-in templates for project management, content calendars, and simple task tracking.
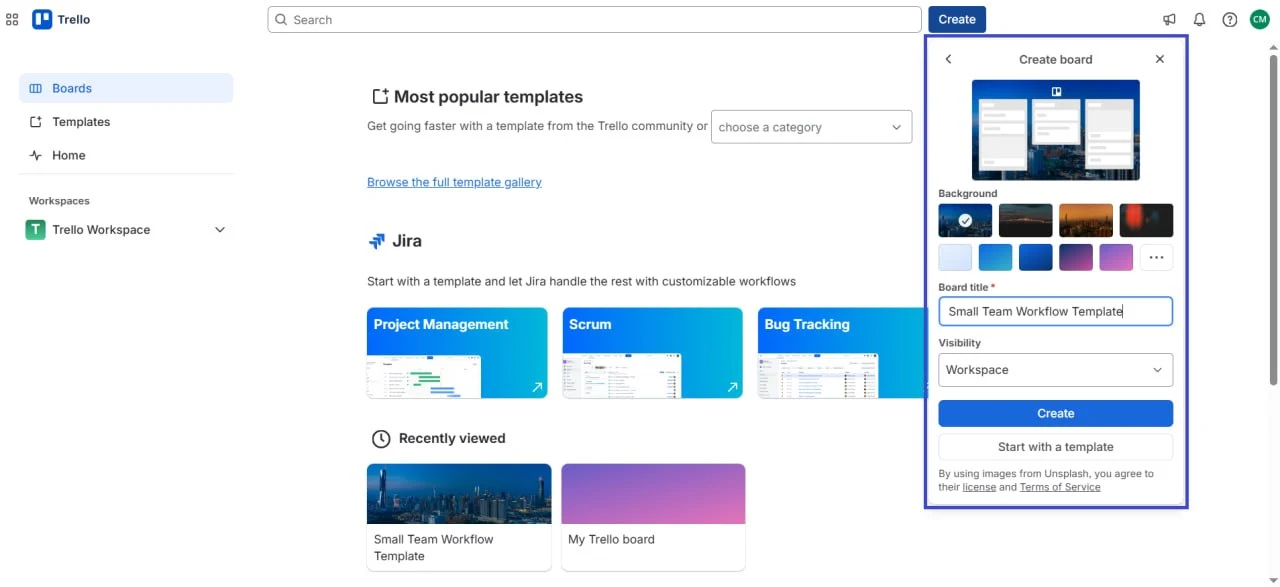
Trello Create board dialog with template selection and visibility options
If Trello’s default templates don’t fit your workflow, start with a blank board and manually create your core lists in the next step. Alternatively, if you have a colleague or another team using Trello, ask if you can copy their board structure (you’ll get a duplicate with all lists and card templates, but without the actual cards and team members).
To duplicate an existing board: Open the board, click the three-dot menu (More), select “Copy board”, name it, and choose your workspace destination. This creates a clean copy you can customize without affecting the original.
Expected outcome: You have a new Trello board in your workspace with a starting set of lists. The board is empty except for any card templates the original board included.
Step 3: Customize lists and labels for your team
Now rename the lists to match your actual workflow. For a project management board, you might rename the default lists from “To Do, Doing, Done” to “Backlog, Sprint, In Review, Merged, Closed.”
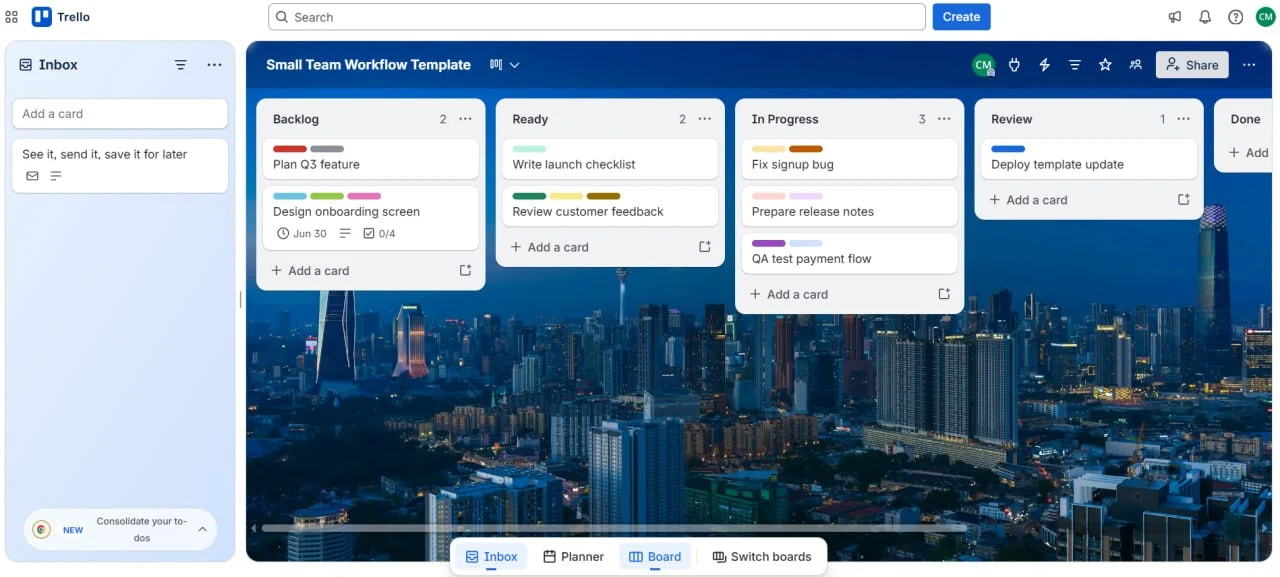
Trello board view showing workflow columns from Backlog to Done with cards and labels
Create a color-coded label system that your team will use consistently. Go to the board menu → Labels. Create labels for:
- Priority: Critical (red), High (orange), Normal (yellow), Low (blue)
- Team member: One label per person (helps with card filtering)
- Workflow stage: If your lists don’t fully capture your process (e.g., “Blocked” for cards waiting on external input)
- Type: For content teams, use Blog Post, Video, Social, Email; for project teams, use Backend, Frontend, Design
Delete any default labels you won’t use—a cluttered label list slows down card creation. Aim for 8-12 labels total.
Additionally, add custom fields if you use Trello’s Power-Ups. Fields like “Due Date”, “Story Points”, or “Client Name” can help teams filter and sort cards more easily. (Custom fields are available in Trello Standard and higher.)
Expected outcome: Lists are renamed to match your workflow. Labels are color-coded and documented (post a screenshot or list in your team Slack). Custom fields (if applicable) are added and visible on every card.
Step 4: Add automation for routine tasks
Trello’s built-in Butler feature automates repetitive work. Enable it from the board menu → Power-Ups → search “Butler” → enable.
Create these basic rules:
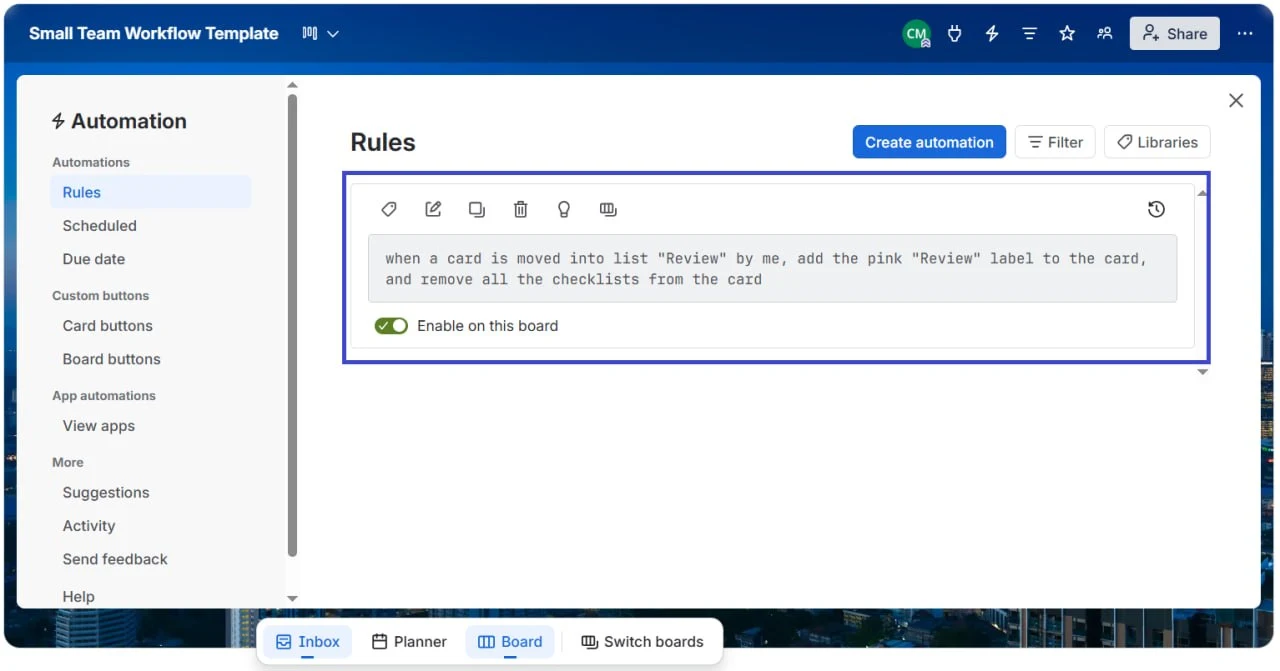
Trello Butler automation rules list showing trigger and action configuration
Auto-move completed cards: When a card moves to the “Done” list, automatically archive it after 7 days. Go to Butler → Cards → “Archive all cards in a list after X days” → set Done list, 7 days.
Auto-assign by label: If a card gets labeled “@Alice”, automatically assign it to Alice. Go to Butler → Cards → “Assign a member when a label is added” → set label “@Alice” → Alice’s account.
Auto-set due dates: For sprint-based teams, set a rule that assigns a due date to any card moved to the “Sprint” list (due date = 14 days from now). Go to Butler → Cards → “Set due date when card is moved to a list”.
Auto-archive old cards: Once a month, archive any card in “In Progress” that hasn’t been moved in 30 days. Go to Butler → Cards → “Archive cards that haven’t been updated in X days”.
Start with 1-2 rules. Test them on a few cards before adding more. Too much automation can make the board feel out of your control.
Expected outcome: At least two automation rules are active and tested. Your team knows which actions trigger which automations (document this in your workflow guide).
Step 5: Invite the team and establish conventions
Go to the board menu → Share → Add each team member by email. Assign permissions: most team members get “Editor” (can create and move cards); leads get “Admin” (can manage board settings).
Create a pinned card or board description that documents your team’s workflow norms:
- Card naming convention: Start with a verb (“Design homepage”, “Write Q3 roadmap”, “Review PR #234”)
- When to create a card: New task or deliverable? Create it. Questions or discussions? Use comments or Slack instead.
- Label rules: Every card must have a priority label. Cards in progress must be assigned to someone.
- Due date rule: Due dates for all cards? Or only for sprint/project cards? Decide and document.
- List movement: Who can move cards between lists? (Usually anyone can; blocked cards need a comment explaining why)
Pin this guide to the top of your board or link to it in your workspace documentation.
Expected outcome: All team members have board access. They’ve read the workflow guide. They understand what a properly filled-out card looks like.
Step 6: Test the workflow with a dry-run project
Before full rollout, run one real (or practice) project through the entire board. This catches setup mistakes before your team gets frustrated.
Create 5-10 test cards representing a small project (e.g., “Plan Q3 feature”, “Design UI mockups”, “Code feature”, “QA test”, “Deploy”). Move them through your lists from start to finish. Assign them to team members. Add labels and due dates. Test that automations work.

Trello card detail modal showing labels, due date, checklist, and comments
Note what’s awkward:
- Are there too many lists? Do some cards skip lists?
- Are labels missing? Do you need a new label?
- Did automation break anything? Disable rules that don’t work.
- Did team members get confused about card format or due dates?
Make adjustments, then clean up the test cards (delete or archive them). Announce to your team: “The board is ready—create your first real cards starting Monday.”
Expected outcome: You’ve identified and fixed at least one setup issue. Team members have seen the board in action. Cards move smoothly from list to list without confusion.
Common pitfalls and how to avoid them
- Creating too many lists and making the board overwhelming
⚠️ Why: Teams often try to capture every stage of their workflow in separate lists, leading to 10+ lists that are hard to scan and remember. Cards end up stuck in ambiguous lists.
🔧 Prevention: Start with 4-5 core lists. Test for two weeks. Add a new list only if cards are getting stuck or confused between two existing lists. Each list should represent a clear state of work (not yet started, in progress, under review, done).
- Assigning too many labels per card, making filtering useless
⚠️ Why: Team members add every possible label (priority + type + owner + status + blocker) to every card thinking it will help organization. The board becomes noisy, and filtering by label returns too many results.
🔧 Prevention: Enforce a label rule: maximum 2 labels per card (usually priority + type, or owner + status). Make list position the primary status indicator, not labels. Use labels only for filtering or cross-cutting concerns (e.g., “Client X”, “Urgent”).
- Setting up automation without documenting what it does, confusing the team
⚠️ Why: You add a Butler rule that auto-archives cards or auto-assigns them, but don’t tell your team. They create a card, and it disappears or gets assigned to the wrong person, destroying trust in the system.
🔧 Prevention: For each automation rule, add a comment to a pinned card describing what it does, when it triggers, and when it’s OK to override it. Include examples: “Any card moved to Done is archived after 7 days. If you need it later, move it back to In Progress before the 7 days are up.”
- Not maintaining the board, letting it become a mess of old cards and stale tasks
⚠️ Why: Over time, cards accumulate. Old tasks stay in “In Progress.” Labels get renamed inconsistently. New team members don’t know what’s current. The board becomes a graveyard instead of a working tool.
🔧 Prevention: Schedule a 15-minute “board cleanup” every two weeks: archive completed cards, close old projects, rename labels for consistency. Assign this to one person (rotate monthly). Set a Slack reminder to keep it consistent.
- Duplicating a template without adjusting it for your team’s actual pace and process
⚠️ Why: You grab a “Agile scrum” template designed for two-week sprints, but your team works on rolling, continuous delivery. The template’s sprint lists and burndown feel forced and slowing you down.
🔧 Prevention: After you duplicate a template, spend 10 minutes renaming lists and removing sections that don’t apply to your process. Run your dry-run project and iterate once before inviting the full team. The template is a starting point, not a final answer.
Scenario fit: When to adapt this workflow
Remote or hybrid teams: If your team is spread across time zones, add a “Blocked” list where cards go when they need input from someone in another time zone. Add due dates to every card so async work has a clear deadline. Use Butler to auto-assign cards to the relevant person based on label (so no one misses work assigned while they’re offline). Include a Slack integration so card updates notify the team without requiring them to check Trello constantly.
Agencies managing multiple clients: Create one master template board, then duplicate it for each client. Add a custom field “Client Name” to every card (if using Power-Ups) or use board-level labels (“@ClientA”, “@ClientB”) to track which cards belong to which client. Add a separate “Status” label for each client so you can filter by client and see their overall progress. Consider a separate workspace per client if confidentiality is critical.
Teams transitioning from spreadsheets or email: If you’re moving from a spreadsheet task tracker, duplicate your existing columns as Trello lists during the first setup. Run the dry-run with real work from your last two weeks to verify nothing important is lost. For email-based task assignment, set up an automation rule or use Zapier to capture incoming emails as Trello cards. The transition typically takes 2-3 weeks before the team stops checking the spreadsheet and trusts Trello fully. If Trello isn’t the right fit, moving from spreadsheets to Airtable is another option worth evaluating.
Templates and examples
Project Management Board
Lists:
- Backlog
- Ready (approved and scoped)
- In Progress
- In Review
- Done
Labels:
- 🔴 Critical, 🟠 High, 🟡 Normal, 🔵 Low (priority)
- Frontend, Backend, Design, DevOps (type)
- @TeamMember (one per person)
Sample card:
Title: Implement user authentication API
Assigned to: @Alice (Backend)
Labels: High, Backend
Due date: 2026-06-15
Description:
- Create JWT token generation
- Add refresh token endpoint
- Write unit tests
Comments: "Blocked on database schema review from @Bob"
Content Pipeline Board
Lists:
- Idea (raw pitches)
- Outline (structure approved)
- Draft (first version)
- Review (awaiting editorial sign-off)
- Scheduled (published to calendar)
- Published (live)
Labels:
- Blog Post, Video, Social, Email, Webinar (content type)
- 🔴 Urgent, 🟠 High, 🟡 Normal (priority)
- @ContentOwner (one per creator)
Sample card:
Title: "5 Trello Automation Tips for Startups"
Assigned to: @Charlie (Content)
Labels: Blog Post, Normal
Due date: 2026-06-20
Description:
- Target: 1500 words, SEO keyword "Trello automation"
- Include 3 case studies
- Graphics: 2 screenshots, 1 custom diagram
Comments: "First draft ready for review by @Diana"
Operations/Support Board
Lists:
- New Request (incoming)
- Assigned (triaged, waiting for action)
- In Progress (actively being worked)
- Blocked (waiting on external input)
- Done (resolved or closed)
Labels:
- 🔴 Critical, 🟠 High, 🟡 Normal, 🔵 Low (SLA tier)
- Support, Bug, Feature Request (request type)
- @TeamMember (one per agent)
Sample card:
Title: "Customer X: Feature request—bulk export"
Assigned to: @Elena (Support Lead)
Labels: Feature Request, High
Due date: 2026-06-18
Description:
Customer: Acme Corp
Contact: john@acmecorp.com
Request: Allow export of 10k+ records at once
Severity: High (blocks their monthly workflow)
Comments: "Assigned to engineering—waiting for timeline estimate"
Frequently asked questions
Q: Can I share a Trello template with multiple teams without duplicating work?
A: Yes. Create one master template board, keep it private or in a shared workspace, and duplicate it for each team that needs it. Any updates you make to the master template will not affect the copies (they’re independent). If you need to push updates to existing boards, you’ll have to manually apply them or re-duplicate from the updated master.
Q: What’s the maximum number of labels or lists before Trello performance suffers?
A: Trello performs smoothly with up to 20 lists and 50 labels. Beyond that, the board can slow down and become hard to navigate. If you need more than 20 lists, consider creating separate boards by project or phase instead of everything in one board.
Q: Can I scale a board template to a larger team (20+ people) without it becoming chaotic?
A: Yes, but make adjustments: (1) Rename labels to reflect team names (“@FrontendTeam”, “@DesignTeam”) instead of individuals. (2) Add a custom field for “Assignee” so one card can be assigned to multiple people or a team. (3) Create a separate board per team or feature, then use a dashboard board to track progress across all boards. (4) Use Zapier or Power-Ups to create views and filters that reduce clutter.
Q: How do I handle multiple projects on one board versus separate boards per project?
A: Use one board per project if projects have different workflows, team members, or timelines. Use one shared board for multiple small projects if they share the same workflow and team. A good rule: if you’d need to filter cards by project more than once a week, create separate boards. If projects are just different rows in the same workflow, keep them together.
Q: Do I need to pay for Power-Ups or automation, or is it all included in the free Trello plan?
A: Butler (basic automation) is free on all Trello plans. Advanced features like custom fields, timeline view, or integrations with external tools require Trello Standard ($5/user/month) or higher. The free plan is sufficient to get started with a simple template; upgrade if you need custom fields or more advanced automation.
Q: What should I do if my team stops using the board after a month?
A: This usually means the board doesn’t match the team’s actual workflow or requires too much manual work. Schedule a retro: ask the team what was confusing or slow. Common fixes: (1) Simplify lists—too many stages slow people down. (2) Reduce required fields—make labels and due dates optional, not mandatory. (3) Add more automation to reduce manual card creation. (4) Move the board to where your team already works (e.g., pin a Slack notification for new cards instead of requiring them to open Trello daily).
Recommended tools for this workflow
Trello — The core tool for this workflow. Use the free plan to start, upgrade to Standard ($5/user/month) if you need custom fields or timeline views. See our Trello review for feature comparisons and pricing details across plans.
Zapier — Connects Trello to 1000+ other apps. Use it to automatically create Trello cards from incoming emails, Slack messages, or form submissions, or to update Trello cards in response to external events. Free plan covers basic workflows; paid plans start at $20/month for advanced automations.
Slack integration for Trello — Free, built-in Slack app that sends Trello notifications to Slack channels. Keeps your team notified without requiring them to check Trello constantly. Essential for remote teams.
Monday.com or Asana — If your team outgrows Trello’s features, consider these more advanced project management tools. They offer timeline views, resource planning, and enterprise permission controls. Both have free plans but require a learning curve and higher cost at scale ($10+/user/month). For a broader comparison, see our best project management software for small teams.
Sources and notes
- Trello official documentation — used to verify board setup, labels, and Butler automation features
- Trello templates gallery — referenced for template categories and starting points
Disclaimer
This guide is for general informational purposes only and does not constitute professional advice. Workflow steps, tool interfaces, and feature availability were verified against each product’s official documentation as of June 2026 and may change without notice. Always test workflows in a non-production environment first. PickrTech may earn a commission when you sign up through our links at no extra cost to you. Our recommendations are based on independent evaluation and are not influenced by compensation.
Last reviewed: June 2026 by the PickrTech editorial team.