TL;DR: A simple 3-2-1 backup plan keeps 3 copies of your critical business data across 2 different types of storage media with 1 copy stored offsite—protecting you from ransomware, hardware failure, and localized disasters. Key steps: (1) audit your critical files, (2) set up local backups with an external drive, (3) add cloud backup with Backblaze Business ($99 per computer per year). Two copyable worksheets below turn this into a repeatable routine.
Where this guide fits: This guide helps you design a basic 3-2-1 backup plan for business files and devices. If you need to choose an offsite backup service first, compare offsite backup solutions. If your main asset is a WordPress site, use the WordPress backup plugin comparison and then run a WordPress backup test.
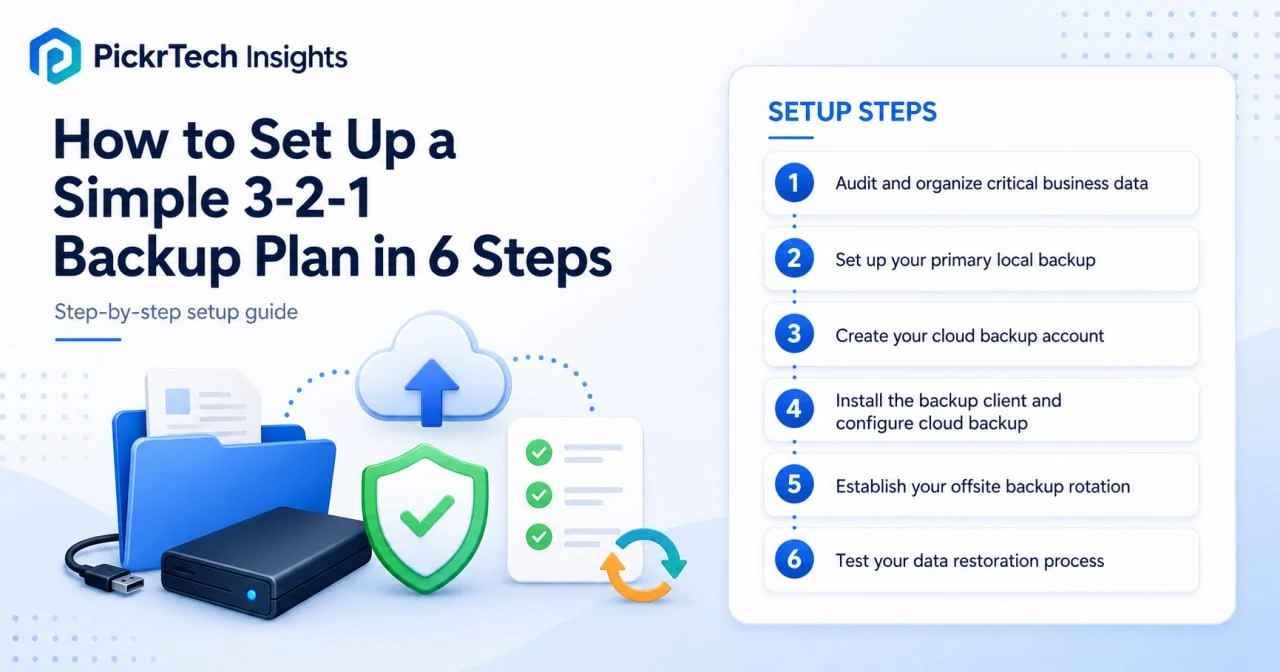
The six-step path to a working 3-2-1 backup: a local drive and a cloud copy, built and tested across six steps.
What you need before you start: accounts, hardware, and access
Account requirements
You’ll need a Backblaze Business Backup account to handle the cloud portion of your 3-2-1 setup. Backblaze charges a flat rate per computer—$9 per month, $99 per year, or $189 for two years—which makes budgeting simpler than usage-based storage billing. There’s a 15-day free trial with no credit card required, so you can test the client before paying. All pricing and plan details in this guide were checked in July 2026 against Backblaze’s official pages. If you want to compare broader offsite options before choosing a storage layer, see our Offsite Backup Solutions for Small Business: Files, NAS, and Servers.
Data needed
Before setup, identify which folders, drives, and files are essential for business continuity. This typically includes Documents, Desktop, accounting files, client databases, and any custom applications that store data in non-standard locations. Windows File History only backs up folders that belong to your libraries (Documents, Desktop, Pictures, Music, Videos by default), so anything stored elsewhere—like C:Accounting—has to be added manually. Time Machine takes the opposite approach: it backs up the entire Mac unless you exclude folders.
Physical hardware
Purchase one external USB hard drive (2TB to 4TB recommended for small businesses). If the drive is new or dedicated and needs formatting, NTFS is a practical Windows choice because FAT32 cannot hold files larger than 4GB. Do not reformat a drive that already contains data; Microsoft’s current File History instructions require a recognized external drive or network location, not a universal formatting step. For macOS, Time Machine will offer to erase and format the drive if needed and can encrypt it during setup.
Admin access
You’ll need administrator or root access on the computers you’re backing up in order to install the Backblaze client and configure Time Machine or File History.
Estimated time: About 30 minutes of hands-on configuration, plus initial backup upload time (varies by data size and can run for hours or days in the background).
Difficulty: Beginner
Cost implications: This setup requires a Backblaze Business Backup license for each computer ($99/year, or $9/month if you prefer monthly billing). The external hard drive is a one-time purchase ($50–$120 depending on capacity), and you’ll eventually want a second drive for offsite rotation. See the 12-month cost breakdown further down for exact totals—most small businesses find the amount negligible compared to data loss risk.
Build your 3-2-1 backup in six steps
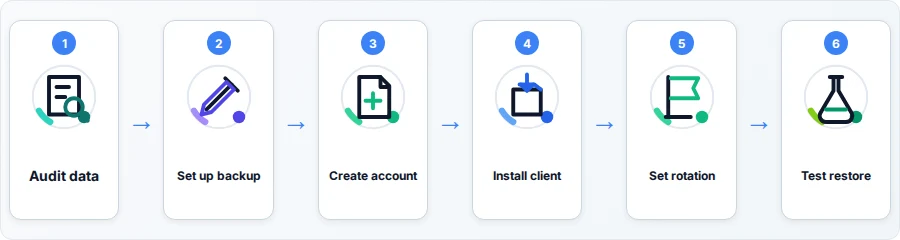
Step 1: Audit and organize your critical business data
Open File Explorer (Windows) or Finder (macOS) and make a list of every folder that contains data your business cannot operate without. This includes accounting records, client files, invoices, contracts, employee records, and any databases or applications that store customer data.
Next, identify folders that should be excluded from backups to save time and storage space. Good candidates are true throwaway data: temporary and cache folders (like C:UsersYourNameAppDataLocalTemp on Windows or ~/Library/Caches on macOS), installation media, and duplicate copies of documents. Cutting these can shrink your initial cloud upload dramatically.
⚠️ Careful with AppData and ~/Library. Don’t exclude these folders wholesale. Some Outlook PST archives and many accounting or CRM apps can store locally authoritative data outside standard libraries. Outlook OST files are server-synchronized caches and generally do not need backup. Exclude only the Temp and cache subfolders—if you block the whole tree, you may discover during a disaster that important application data was never backed up.
Use this worksheet to record what to include and what to exclude. Copy it into a spreadsheet or text file and keep it with your backup drive—it becomes the reference you check against in Steps 2 and 4, and again whenever you add a new app or device.
| What it is | Path or location (edit for your machine) | Include / Exclude | Why |
|---|---|---|---|
| Business documents | C:UsersYourNameDocuments / ~/Documents | Include | Core working files |
| Desktop | C:UsersYourNameDesktop / ~/Desktop | Include | Where loose files land |
| Accounting data | C:Accounting or the app’s data folder | Include | Often outside libraries — add manually |
| Email data files | Outlook PST archives / Mac Mail data in ~/Library | Include when locally authoritative | Locally stored mail may not exist elsewhere; OST caches usually rebuild from the server |
| Sync folder (Drive / OneDrive / Dropbox) | Local sync path on the device | Include (kept downloaded) | Sync ≠ backup; avoid online-only placeholders |
| Temp & cache | C:UsersYourNameAppDataLocalTemp, ~/Library/Caches | Exclude | Throwaway; bloats upload |
| Installers / downloads | C:UsersYourNameDownloads | Exclude (if re-downloadable) | Saves upload time |
Taking 5 minutes here prevents backing up the wrong data and saves hours on initial sync time.
Expected result: You have a written include/exclude list of critical business folders.
💡 Pro tip: If your working files live inside a sync folder (Google Drive, OneDrive, Dropbox), it’s fine—good, even—to include that folder in your backups: sync is not backup, and this gives those files a real safety net. The one trap to check for is “online-only” placeholder files. If you’ve used a space-saving option like OneDrive Files On-Demand or Dropbox online-only, those files hold no data locally, so there’s nothing for your backup software to copy. Mark business-critical sync folders to stay downloaded on the device before relying on the backup.
Step 2: Set up your primary local backup
Connect your external USB drive to your computer. If it already contains files, copy them elsewhere before changing its file system; a new dedicated Windows drive can be formatted as NTFS if needed.
For Windows:
- If the drive is new or dedicated and not already in a suitable format, right-click it in File Explorer and select “Format.”
- Choose NTFS as the file system, enter a name like “Business Backup,” and click Start. Formatting erases existing data, so skip this step if the drive is already recognized and contains files you need.
- Open File History. On Windows 11, search for “File History” in the Start menu or go to Control Panel > System and Security > File History (Microsoft moved it out of the Settings app). On Windows 10, you can also use Settings > Update & Security > Backup > “Add a drive.”
- Click “Select drive,” choose your external drive, and click “Turn on.”
- File History automatically covers your libraries: Desktop, Documents, Pictures, Music, and Videos. To include a folder from your audit list that lives elsewhere (like
C:Accounting), right-click it in File Explorer and choose “Show more options” > “Include in library,” then pick a library such as Documents. - In File History’s “Advanced settings,” set how often copies are saved (hourly is the default; daily is fine for most offices) and how long to keep them.
- Click “Run now” to start the first backup.
For macOS:
- Connect the external drive and open System Settings > General > Time Machine (on macOS Monterey and earlier: System Preferences > Time Machine).
- Click “Add Backup Disk” and choose your external drive. Time Machine will offer to erase and format it if needed.
- Turn on encryption when prompted. This protects the drive’s contents if it’s ever lost or stolen—which matters once you start carrying a rotation drive offsite in Step 5.
- Time Machine backs up your entire Mac by default. To exclude folders (caches, installers, media libraries you back up elsewhere), click “Options” and add them to the exclusion list.
- Your first backup will take several hours depending on data size; subsequent backups run hourly in the background.
Expected result: Your external drive is now receiving regular copies of your critical files. Verify by checking the last backup date in File History (Windows) or Time Machine settings (macOS).
💡 Pro tip: Label your external drive with the current date. When you rotate it offsite (Step 5), you’ll know at a glance how old the backup is.
Step 3: Create your Backblaze Business Backup account
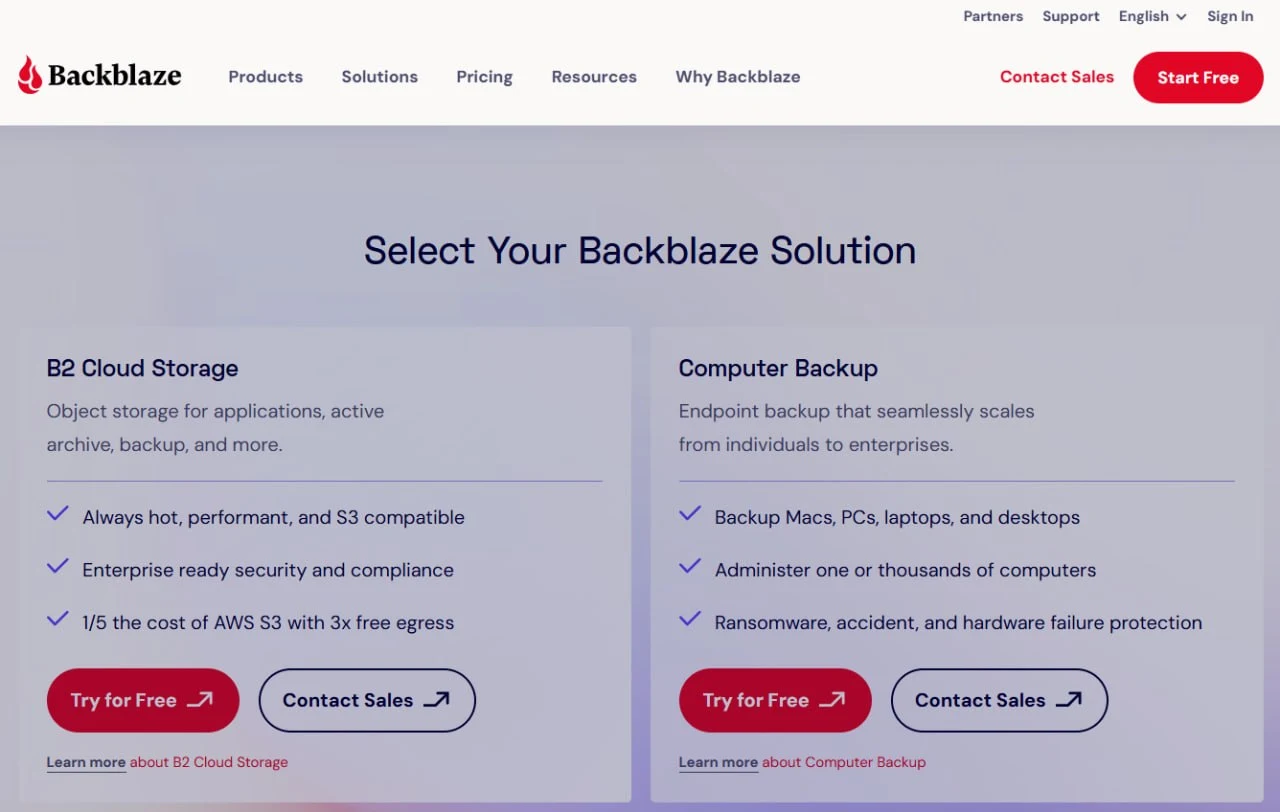
Choose Computer Backup before creating or starting a Backblaze trial.
Open your web browser and navigate to the Backblaze Business Backup page.
Click “Start free” to begin the 15-day trial—no credit card needed. Enter your email address, create a strong password (at least 12 characters, including uppercase, lowercase, numbers, and symbols), and verify your email if prompted.
Business Backup uses Backblaze’s Groups feature for centralized management: an administrator can oversee multiple computer licenses, monitor backup health, and restore files on behalf of employees from a single web dashboard. If you have multiple employees or computers, add them all to one account and manage backup policies from one place.
Once your account is created and verified, note your login credentials. You’ll use these to download and install the Backblaze client on each computer you want to back up.
Expected result: You have a working Backblaze Business account and can log in to the web dashboard.
💡 Pro tip: Enable two-factor authentication (2FA) on your Backblaze account immediately. This protects your backups from unauthorized access if your password is compromised.
Step 4: Install the Backblaze client and configure the cloud backup
Log in to your Backblaze Business account, navigate to the “Downloads” or “Manage Devices” section, and download the Backblaze client for your operating system (Windows or macOS).
Run the installer and follow the prompts. Installation typically takes 2–3 minutes, after which the app will ask you to log in with your account credentials.
By default, the Backblaze client continuously backs up all user-created data and attached external hard drives in the background. After the initial scan, it uploads only changed data, so day-to-day network impact is small.
Backblaze works by exclusion rather than folder selection: everything user-created is included unless you exclude it. Open the Backblaze settings, go to the “Exclusions” tab, and add the throwaway folders from your worksheet (Temp, caches, installer downloads). Then double-check that the drives holding your critical folders appear in the “Hard Drives” selection.
Start the initial backup by clicking “Back up now” or allowing the scheduled backup to begin. The initial upload may take hours or days depending on your internet speed and data size. Backblaze runs in the background, so you can continue working.
Expected result: The Backblaze client is installed, logged in, and showing “Backup in progress” or “Backup up to date” in the status display. Verify progress in the main Backblaze Control Panel; a Group administrator can also open Users & Computers in the web console and view a computer’s Details page.
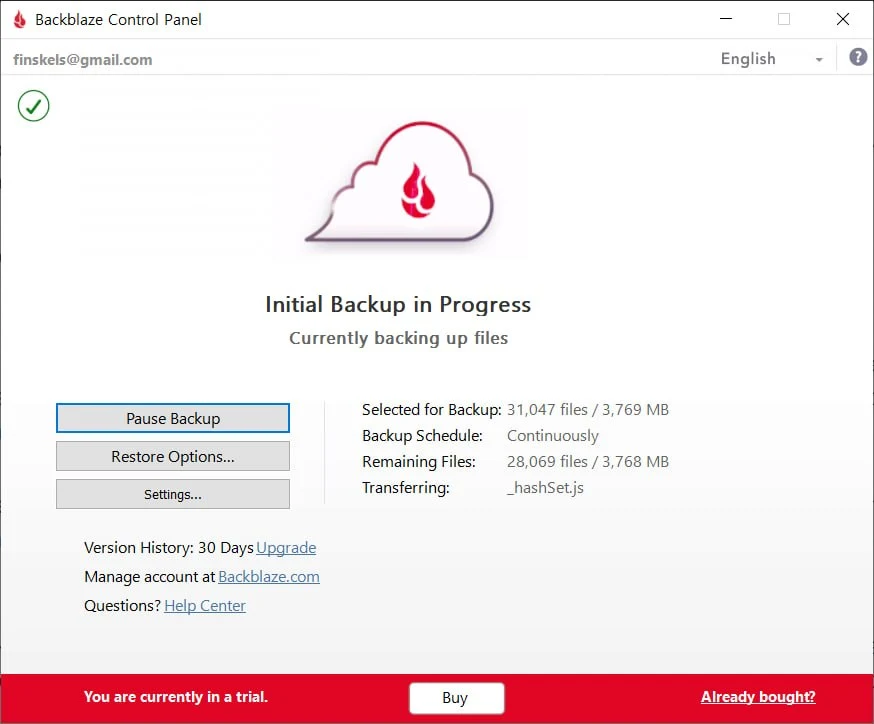
Backblaze shows “Initial Backup in Progress” after the client starts uploading files.
💡 Pro tip: Check your internet upload speed before starting—Backblaze uploads only as fast as your connection allows. If you have slow internet, let the initial backup run overnight.
Step 5: Establish your offsite backup rotation
With your local backup (external drive) and cloud backup (Backblaze) both running, the 3-2-1 rule is already technically satisfied: three copies of your data (the original, the drive, and the cloud), on two different types of media, with one copy—the cloud—stored offsite. So why add a rotating offsite drive? Because it covers the failure modes the cloud copy doesn’t: a compromised Backblaze account, ransomware that encrypts your connected backup drive along with everything else, or an emergency where your internet is down and pulling hundreds of gigabytes from the cloud would take days. A drive stored away from the office is a fourth copy that restores at USB speed no matter what’s happening online—cheap resilience on top of an already sound plan.
Purchase a second external drive identical to the first. Once per month (or every two weeks for critical data), swap the drives: disconnect the current backup drive, connect the fresh one, let a full backup complete, then transport the disconnected drive to an offsite location—a safe deposit box at your bank, a family member’s home office, or a secure storage facility.
On a Mac this rotation is painless: Time Machine lets you add both drives as backup destinations and automatically alternates between whichever one is connected, keeping independent histories on each. On Windows, File History only tracks one target at a time, so when you swap drives, open File History, click “Select drive,” and point it at the newly connected drive (choose to start fresh rather than move existing backups).
Create a simple calendar reminder for the rotation schedule. For example: “Disconnect backup drive on the 15th of each month, swap in fresh drive, and store offsite drive at safe deposit box.” This discipline ensures you always have a recent copy in a different physical location.
Expected result: You have a documented rotation schedule and the first offsite drive is stored away from your main office.
Step 6: Test your data restoration process
Having backups means nothing if you can’t actually recover your data. Test restoration from both your local backup and Backblaze cloud backup. If you run a WordPress site, our How to Test a WordPress Backup — Step-by-Step Guide shows a more specific restore drill.
Before running the full restore drill, use our backup restore time calculator to estimate whether your measured transfer rate can meet the recovery-time objective.
Test 1: Restore from local backup (external drive)
- Windows: Open File History in Control Panel, click “Restore personal files,” and select a few random documents to restore to a test folder.
- macOS: Open the folder in Finder, click the Time Machine icon in the menu bar, choose “Browse Time Machine Backups,” select a past backup, and restore a few files.
- Verify that restored files open correctly and contain the expected data.
Test 2: Restore from Backblaze
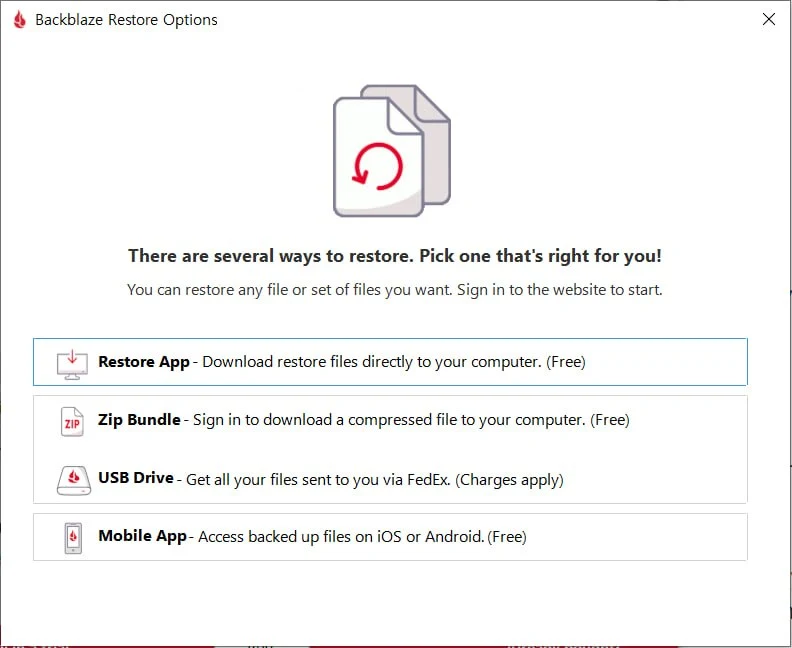
Backblaze offers several restore methods, including Restore App, Zip Bundle, USB Drive, and Mobile App.
- Sign in to your Backblaze account, open the computer’s Restore page (or use the Restore App built into the desktop client).
- Download a small file (a few MB) as a free ZIP restore to verify the process works. ZIP restores are free with a limit of 500GB per request.
- Know your big-restore options for a real emergency: Backblaze can ship you a USB hard drive (up to 8TB, optionally encrypted) via FedEx for $279 and refunds that fee when you return the drive within 30 days—you only cover return shipping. There’s also a mobile app for grabbing individual files on the go.
- Open the restored file and confirm it matches the original.
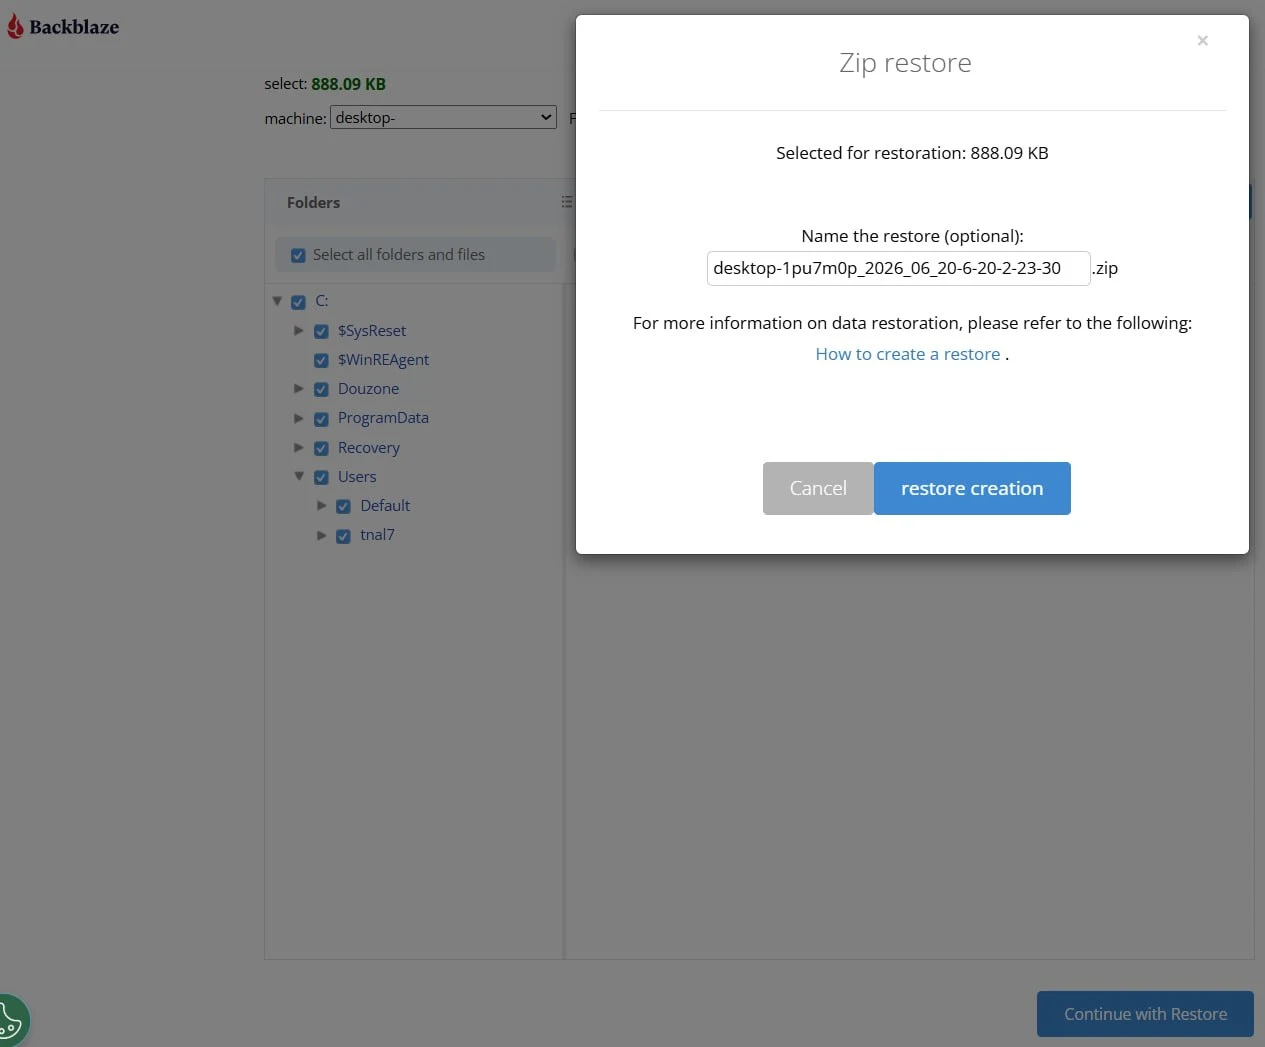
A small ZIP restore is useful for testing whether cloud recovery works before an emergency.
A successful data restoration test must verify file integrity (the file opens correctly) and, where your workflow depends on it, metadata such as timestamps and folder structure. Do not assume that a ZIP restore will preserve original ownership or permissions across operating systems; verify and reapply those settings separately when needed. If any file fails to restore or appears corrupted, contact Backblaze support before relying on that backup.
Restores aren’t a one-time check. Log each test so you can prove—to yourself, an auditor, or an insurer—that recovery actually works. Copy this log into a spreadsheet and run a fresh test every quarter. The first two rows below are example entries, not PickrTech test results; replace them with your own results:
| Test date | Backup source | Files restored | Opened OK? | Required metadata OK? | Next test due |
|---|---|---|---|---|---|
| 2026-07-15 | Local (File History) | 3 client PDFs | Yes | Yes | 2026-10-15 |
| 2026-07-15 | Backblaze (ZIP restore) | 1 accounting file | Yes | Yes | 2026-10-15 |
Expected result: You’ve successfully restored at least one file from each backup source, confirmed the files are intact and usable, and recorded the result in your restore-test log.
Common backup problems and how to fix them
Review these common issues and their solutions to troubleshoot your backup setup.
Initial Backblaze upload taking days or weeks
⚠️ Cause: Large amounts of data on a slow internet connection. If you’re backing up 500GB+ on a 5 Mbps upload speed, the math is brutal—it can take weeks. Backblaze’s default throttle settings may also be limiting upload speed to keep your connection responsive.
🔧 Fix: Check your upload speed using speedtest.net. In the Backblaze client’s Performance settings, disable automatic throttling and increase the number of backup threads—on a decent connection this can multiply upload speed. Trim the backup scope by excluding large re-downloadable data (installers, media libraries you have elsewhere). Then simply let it run 24/7; the client is safe to leave working overnight. One thing to plan around: unlike its B2 product, Backblaze offers no offline “seed drive” ingest for Computer Backup, so there’s no way to mail your data in—the initial upload has to go over your connection. More threads speed uploads but use more CPU and memory, so dial them back down once the initial backup finishes (see the resource-use fix below).
External drive not recognized by Windows File History or macOS Time Machine
⚠️ Cause: The drive may not be mounted correctly, may not have a stable drive letter, or may not be available as a File History destination.
🔧 Fix: Confirm the drive appears in File Explorer and in File History’s drive-selection screen. Reconnect the drive and try another USB port if needed. Reformatting erases data, so do not format the drive as a first troubleshooting step without backing it up and confirming the destination requirements for your setup.
Files missing from Backblaze cloud restoration
⚠️ Cause: The files sit inside an excluded folder path (an overly broad exclusion like all of AppData is a classic culprit), the Backblaze client wasn’t running when the files were created, or the files are still queued for upload and haven’t reached the cloud yet.
🔧 Fix: In the Backblaze client, check the “Exclusions” tab and remove any exclusion that covers the missing folder. Confirm the drive containing the files is selected under “Hard Drives.” Then click “Back up now” and give the client time to scan and upload the newly included files—for large folders this can take hours. The web dashboard’s backup status page shows what has actually reached the cloud.
Backblaze client consuming too much disk space or RAM
⚠️ Cause: The Backblaze client runs continuously in the background and maintains a local index of all files being backed up. On computers with large amounts of data (1TB+) or limited RAM (under 4GB), this can slow down system performance, especially during the initial full-drive scan.
🔧 Fix: Reduce the number of backup threads first; Backblaze notes that each additional thread increases resource use. Keep the default Continuous schedule when possible so new files and external drives are not missed. Use Once Per Day only if the computer will be awake during the full window and you accept less frequent protection. If the machine remains constrained, shrink the backup scope by excluding unnecessary data; upgrading RAM may help an otherwise underpowered system, but it is not a Backblaze-specific requirement.
Confirm your backup is complete: a verification checklist
Confirm your setup is complete and secure by verifying each item below.
- You have a written include/exclude list of critical business folders
- Your external hard drive is recognized by File History or Time Machine and reserved for backups
- Local backup software (File History or Time Machine) is running and shows a recent backup date
- Backblaze Business account is created and the client software is installed on all business computers
- Backblaze shows “Backup up to date” or “Backup in progress” (initial backup may take days)
- You’ve successfully restored at least one test file from both local and cloud backups and logged it
- A second external drive is purchased and ready for monthly rotation
- You have a calendar reminder set for monthly offsite drive rotation
What this setup costs over 12 months
Here’s the real first-year budget for a typical 3-person business backing up 3 computers, using Backblaze’s published rates (annual billing at $99 per computer; monthly billing runs $9 per computer, or $324/year for three).
| Item | Quantity | Cost |
|---|---|---|
| Backblaze Business Backup, annual license | 3 computers × $99 | $297/year |
| Primary external drive (2TB–4TB, USB 3.0) | 1 | $50–$120 one-time |
| Rotation drive for offsite copies | 1 | $50–$120 one-time |
| First 12 months, total | — | $397–$537 |
| Ongoing annual cost | — | $297 |
For scale: a ransomware incident or dead drive can create far more downtime and reconstruction cost than this first-year budget. Roughly $500 in year one is a modest resilience expense for a three-computer business.
Setup mistakes to avoid
Steer clear of these common pitfalls to ensure reliable data protection.
Mistake 1: Keeping both backup drives in the same physical location. If your office catches fire, floods, or is broken into, the original data and both drive copies can be destroyed together—leaving the cloud copy as your only survivor, and a days-long full re-download as your only recovery path. A recent physical copy in a second location is what keeps recovery fast when the worst happens. Establish a monthly rotation ritual where you disconnect the offsite backup drive and actually transport it to a safe deposit box, family member’s home, or storage unit. This takes 30 minutes per month and is non-negotiable.
Mistake 2: Getting the exclusions wrong—in either direction. Failing to exclude temp and cache folders bloats your cloud backup and can add days to the initial sync. But the opposite mistake is worse: excluding all of AppData or ~/Library to save space can silently drop your Outlook mail files and accounting databases from the backup. Exclude Temp and cache subfolders specifically, and after the first backup completes, spot-check in the Backblaze restore browser that your accounting data and email archives are actually there.
Mistake 3: Never testing a data restoration. Until you’ve successfully restored a file from your backup, you don’t know if your backups actually work. Corrupted backups are common, especially with external drives that fail silently. Schedule a quarterly restoration test where you intentionally restore a few random files and verify they open correctly. Document the results in your restore-test log. If any file fails to restore, investigate immediately rather than discovering the problem during an actual emergency.
Mistake 4: Using a weak password and no two-factor authentication on Backblaze. Your Backblaze account has access to all your business data. If a hacker gains access, they can delete your cloud backups and hold them for ransom. Use a password manager to generate a 16-character password and enable 2FA immediately after account creation. Review your Backblaze account’s security settings quarterly.
When a 3-2-1 plan isn’t enough
A simple 3-2-1 backup plan works well for small businesses with under 2TB of critical data and standard compliance needs. Three scenarios, however, call for something more:
Scenario 1: You need instant failover or disaster recovery. If your business can’t tolerate even 1 hour of downtime, a 3-2-1 plan isn’t sufficient. You need real-time replication to a secondary server or data center. This requires a Disaster Recovery (DR) solution, which is more expensive and complex than backups. Backblaze is designed for recovery after failure, not prevention of downtime.
Scenario 2: You have massive datasets (multiple terabytes) or SQL databases that need point-in-time recovery. Simple file-based backups like Backblaze struggle with constantly changing database files and virtual machine images. You need specialized backup software that understands database semantics. And at multi-terabyte scale, even a shipped 8TB restore drive per batch becomes a slow way to recover.
Scenario 3: You have regulated or contract-driven data requirements. HIPAA, PCI DSS, privacy laws such as GDPR, cyber-insurance terms, and customer contracts can impose different controls. Depending on your scope, you may need encryption, access controls, audit evidence, retention rules, regional storage choices, and documented restore tests; no single checklist applies to every organization.
Backblaze publishes SOC 2 Type 2 compliance support and offers Business Associate Agreements for eligible HIPAA-covered business customers, but the provider does not make your overall environment compliant. Confirm that the specific Backblaze product, region, account controls, retention settings, and restore process meet your obligations before deployment.
If any of these apply to your business, compare offsite backup solutions if you need a more specialized cloud layer or vendor feature set. WordPress site owners can also compare plugin-first options in Which WordPress Backup Plugin Is Right for Your Site?.
Frequently asked questions
What type of external drive should I buy?
Look for a USB 3.0 (or faster) external hard drive with 2TB–4TB capacity. Seagate, WD (Western Digital), and LaCie are reliable brands. Avoid cheap USB flash drives (they’re too small and unreliable for backups). Avoid ancient external drives from 2010 or earlier (they wear out). New drives should have at least a 2-year warranty. For offsite storage, choose a drive that’s compact enough to fit in a safe deposit box but capable enough to survive being transported in a bag.
How long does Backblaze keep deleted files?
By default, Backblaze keeps deleted files and older versions of modified files for 30 days. You can extend that to one year at no extra charge by enabling One-Year Extended Version History in your backup settings—for a business, there’s little reason not to flip this on. A “Forever” option is also available for $0.006/GB per month, billed only on versions older than a year. Note that extending retention only applies going forward; it can’t resurrect files that already aged out under the 30-day setting.
Do I really need both a local backup and a cloud backup?
Yes. Local backups (external drive) restore files much faster than cloud backups—you can restore 100GB in minutes instead of hours. Cloud backups (Backblaze) protect against localized disasters like fire or theft. Together, they cover your bases. If you only have a local backup and your office catches fire, you lose everything. If you only have cloud backup and your internet goes down during an emergency, you can’t recover files as fast.
Can I use Google Drive, OneDrive, or Dropbox as my backup?
Not as your only backup. Sync services propagate changes—including deletions and ransomware-encrypted files—to every synced copy, which is the opposite of what a backup should do. They aren’t entirely without safety nets: Google Drive, OneDrive, and Dropbox all keep deleted files and prior file versions for a limited window (typically around 30 days on standard plans, longer on some business tiers), and Microsoft 365 includes a ransomware-recovery rollback for OneDrive.
Those features soften the risk, but they weren’t designed as archival protection: retention windows are short, recovering thousands of files version-by-version is painful, and anything that ages out of the window is gone for good. Dedicated backup software like Backblaze quietly retains what you delete for 30 days by default (or a full year with the free extended-history setting) and restores everything in one pass. Use cloud storage for active file access and sharing; use dedicated backup software for protection.
Where to go next
- Understand the trade-offs between local and cloud backup for WordPress before finalizing your 3-2-1 strategy.
- Compare offsite backup solutions before choosing a cloud layer.
- If you run WordPress, choose a plugin with the WordPress backup plugin comparison.
- After setup, test recovery with the WordPress backup testing guide.
Sources and notes
- Backblaze Business Backup official page — plan features, $99/year per-computer pricing, centralized management, and Enterprise Control add-on
- Backblaze Computer Backup pricing page — monthly/annual/two-year billing and restore options by plan
- Backblaze Docs — Create a Restore — ZIP restore limits, USB hard drive restores, and Restore App
- Backblaze Docs — Version History — 30-day default retention, free one-year extension, and Forever pricing
- Backblaze Blog — The 3-2-1 Backup Strategy — 3-2-1 rule definition and offsite backup rationale
- Microsoft Support — Backup and restore with File History — library-based backup scope and Control Panel setup path
- Apple Support — Back up your Mac with Time Machine — Time Machine setup, encryption, and multiple backup disks
Disclaimer
This guide is for general informational purposes only and does not constitute professional accounting, tax, legal, or financial advice. Pricing, features, and plan details were verified against each product’s official website as of July 2026 and may change without notice. Always consult a qualified professional for advice specific to your business situation.
Last reviewed: July 2026 by the PickrTech editorial team.