This article may contain affiliate links. We may earn a commission when you sign up through our links — at no extra cost to you. Our recommendations are based on independent evaluation and are not influenced by commissions.
TL;DR: A simple 3-2-1 backup plan keeps 3 copies of your critical business data across 2 different types of storage media with 1 copy stored offsite—protecting you from ransomware, hardware failure, and localized disasters. Key steps: (1) audit your critical files, (2) set up local backups with an external drive, (3) add cloud backup with Backblaze Business.
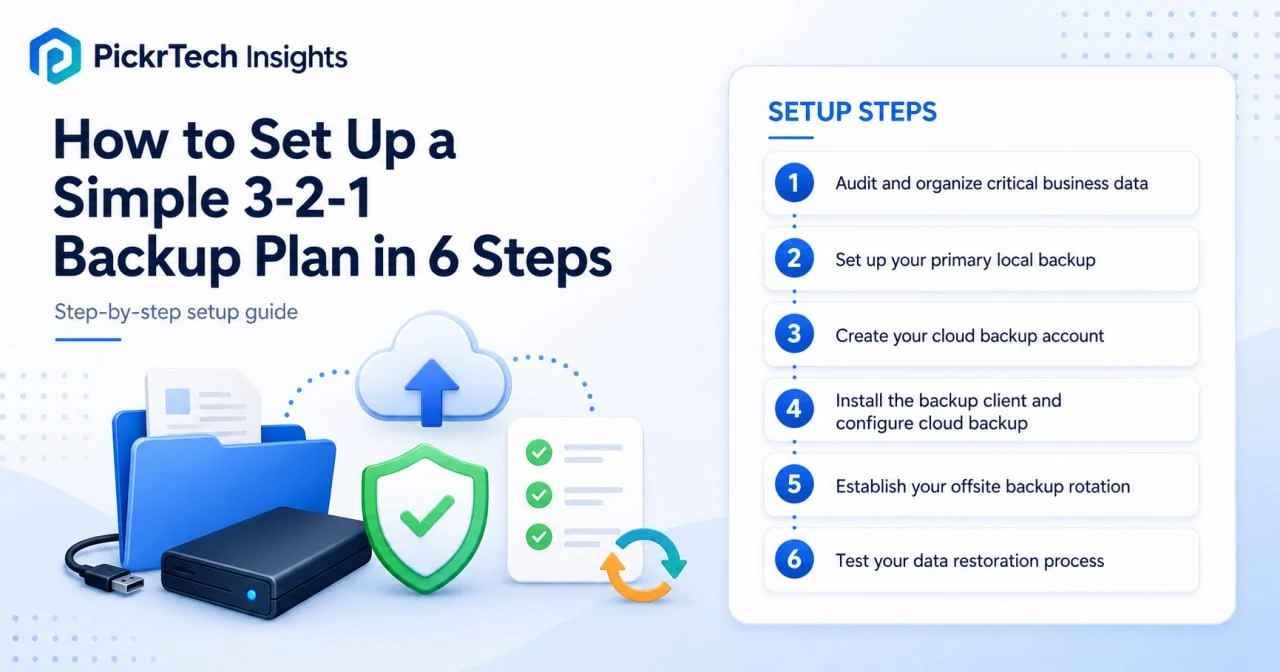
How to Set Up a Simple 3-2-1 Backup Plan in 6 Steps hero showing six setup steps for local, cloud, and offsite backup planning.
Before you begin: What you’ll need
Account requirements
You’ll need a Backblaze Business Backup account to handle the cloud portion of your 3-2-1 setup. Backblaze Business offers flat-rate, per-computer pricing at $7.00 per month or $70.00 per year, which simplifies budget forecasting compared to usage-based storage billing. A free account with limited restoration options is available if you want to test the service before committing. If you want to compare broader offsite options before choosing a storage layer, see our Top Offsite Backup Solutions for Small Business in 2026.
Data needed
Before setup, identify which folders, drives, and files are essential for business continuity. This typically includes Documents, Desktop, accounting files, client databases, and any custom applications that store data in non-standard locations. Windows File History and macOS Time Machine primarily back up user directories (Documents, Desktop, Downloads) by default, meaning system files or data stored on non-standard paths must be manually added to the backup scope.
Physical hardware
Purchase one external USB hard drive (2TB to 4TB recommended for small businesses). Windows File History requires the external drive to be formatted as NTFS to support large file transfers and maintain persistent file history versions without partition errors. For macOS users, any USB drive formatted as Mac OS Extended or APFS will work; you can encrypt the drive during Time Machine setup for added security.
Admin access
You’ll need administrator or root access on the computers you’re backing up in order to install the Backblaze client and configure Time Machine or File History.
Estimated time: 30 minutes for initial setup, plus initial backup upload time (varies by data size)
Difficulty: Beginner
Cost implications: This setup requires the Backblaze Business paid plan ($7/month or $70/year per computer). The external hard drive is a one-time purchase ($50–$120 depending on capacity). Most small businesses find this cost negligible compared to data loss risk.
Step-by-step walkthrough

Step 1: Audit and organize your critical business data
Open File Explorer (Windows) or Finder (macOS) and make a list of every folder that contains data your business cannot operate without. This includes accounting records, client files, invoices, contracts, employee records, and any databases or applications that store customer data.
Next, identify folders that should be excluded from backups to save time and storage space. Excluding temporary cache folders, such as the AppData folder on Windows or the Library/Caches folder on macOS, from backups significantly reduces cloud storage bloat and decreases initial sync times. You may also want to skip download folders containing only temporary files, installation media, or duplicate versions of documents.
Create a simple text file listing your critical folders. For example:
- C:UsersYourNameDocuments
- C:UsersYourNameDesktop
- C:Accounting (or wherever your accounting app stores data)
- Exclude: C:UsersYourNameAppDataLocalTemp
- Exclude: C:UsersYourNameDownloads
This list will guide your backup configuration in Steps 2 and 4. Taking 5 minutes here prevents backing up the wrong data and saves hours on initial sync time.
Expected result: You have a written list of critical business folders and exclusions.
💡 Pro tip: If you use cloud storage (Google Drive, OneDrive, Dropbox), don’t back up the sync folder itself—back up the original source files instead. Backing up sync folders can create infinite loops and redundant copies.
Step 2: Set up your primary local backup
Connect your external USB drive to your computer. If this is the first time using the drive, format it:
For Windows:
- Right-click the drive in File Explorer and select “Format.”
- Choose NTFS as the file system.
- Enter a name like “Business Backup” and click Start.
- Once formatting is complete, open Settings > System > Storage > Advanced storage options > Backup options.
- Click “Back up now” and select your external drive as the destination.
- Click “More options” and add the specific folders from your audit list (Step 1).
- Set the backup frequency to daily or weekly depending on how often your files change.
- Click “Start backup.”
For macOS:
- Connect the external drive and open System Preferences > Time Machine.
- Click “Select Backup Disk” and choose your external drive.
- Optionally, check “Encrypt Time Machine backup” for security—Time Machine will automatically encrypt local backups when this option is selected, providing physical security for the external drive if it’s lost or stolen.
- Time Machine will automatically back up your entire Mac, but you can exclude specific folders by clicking “Options” and adding them to the exclusion list.
- Your first backup will take several hours depending on data size; subsequent backups run hourly in the background.
Expected result: Your external drive is now receiving daily or weekly copies of your critical files. Verify by checking the backup status in Settings (Windows) or Time Machine preferences (macOS).
💡 Pro tip: Label your external drive with the current date. When you rotate it offsite (Step 5), you’ll know at a glance how old the backup is.
Step 3: Create your Backblaze Business Backup account
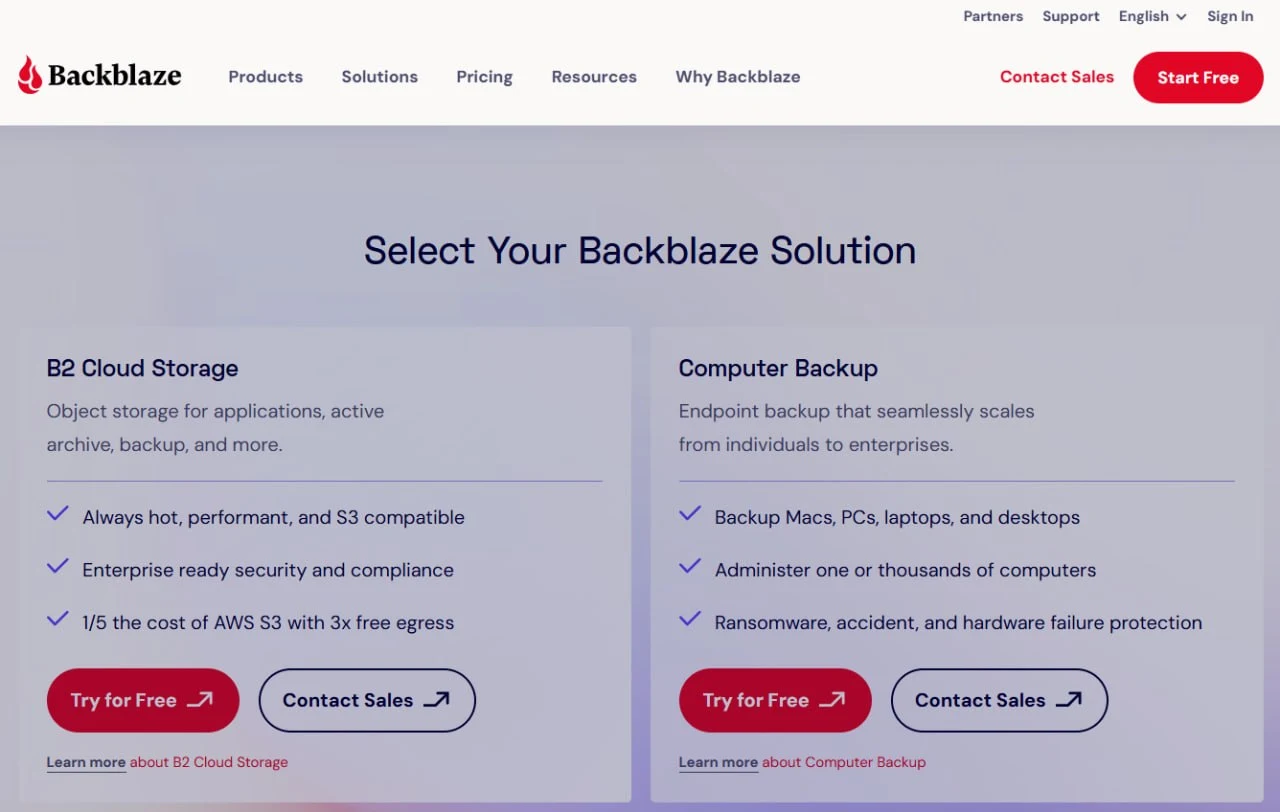
Choose Computer Backup before creating or starting a Backblaze trial.
Open your web browser and navigate to https://www.backblaze.com/cloud-backup/business.
Click “Start free trial” or “Get started” to begin the signup process. Enter your email address, create a strong password (at least 12 characters, including uppercase, lowercase, numbers, and symbols), and verify your identity if prompted.
Backblaze Business Backup offers centralized management, allowing administrators to oversee multiple user licenses, monitor backup health states, and manage group policies from a single web dashboard.
If you have multiple employees or computers, you can add them to a single account and manage backup policies for all devices from one place.
Once your account is created and verified, note your login credentials. You’ll use these to download and install the Backblaze client on each computer you want to back up.
Expected result: You have a working Backblaze Business account and can log in to the web dashboard.
💡 Pro tip: Enable two-factor authentication (2FA) on your Backblaze account immediately. This protects your backups from unauthorized access if your password is compromised.
Step 4: Install the Backblaze client and configure the cloud sync
Log in to your Backblaze Business account at https://www.backblaze.com/cloud-backup/business.
Navigate to the “Downloads” or “Manage Devices” section and download the Backblaze client for your operating system (Windows or macOS).
Run the installer and follow the prompts to install Backblaze on your computer. The installation typically takes 2–3 minutes.
Once installation is complete, the Backblaze application will prompt you to log in with your account credentials. By default, the Backblaze client continuously backs up all user-created data and attached external hard drives in the background, utilizing incremental backups to only upload changed blocks after the initial scan.
Open the Backblaze settings and navigate to the “Backup” or “Files” section. Select the specific folders from your audit list (Step 1) that need cloud protection. If you want to exclude certain folders (like Temp or Cache), add them to the exclusion list here. This ensures Backblaze only backs up essential business data.
Start the initial backup by clicking “Back up now” or allowing the scheduled backup to begin. The initial upload may take hours or days depending on your internet speed and data size. Backblaze runs in the background, so you can continue working.
Expected result: The Backblaze client is installed, logged in, and showing “Backup in progress” or “Backup up to date” in the status display. You can verify backup progress by checking the “Account” or “History” tab in the Backblaze app.
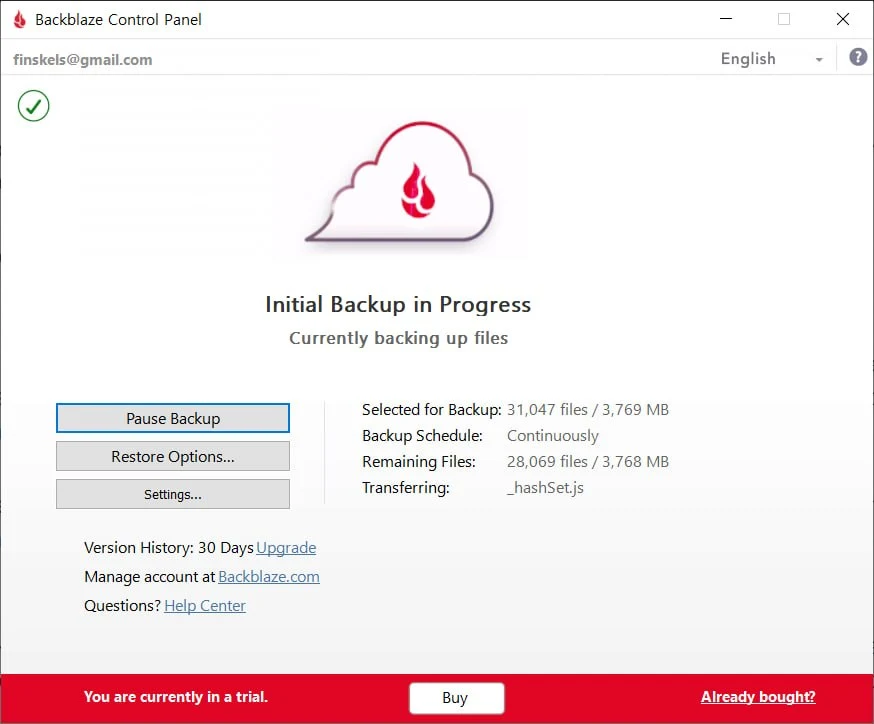
Backblaze shows “Initial Backup in Progress” after the client starts uploading files.
💡 Pro tip: Check your internet upload speed before starting—Backblaze uploads only as fast as your connection allows. If you have slow internet, let the initial backup run overnight.
Step 5: Establish your offsite backup rotation
Now that your local backup (external drive) and cloud backup (Backblaze) are running, you need to create a third copy by storing one external drive offsite. This completes the 3-2-1 rule: 3 copies, 2 different media types (local drive + cloud), 1 offsite.
Purchase a second external drive identical to the first. Once per month (or every two weeks for critical data), disconnect your current backup drive and replace it with a fresh drive. Connect the disconnected drive to your computer and let your local backup software copy all new changes to it. Once the sync is complete, disconnect this drive and transport it to an offsite location—a safe deposit box at your bank, a family member’s home office, or a secure storage facility.
In macOS, disconnecting a Time Machine drive gracefully pauses the backup sequence and automatically resumes upon reconnection without corrupting the local snapshot database. So you don’t risk losing backup history by swapping drives.
Create a simple calendar reminder for the rotation schedule. For example: “Disconnect backup drive on the 15th of each month, swap in fresh drive, and store offsite drive at safe deposit box.” This discipline ensures you always have a recent copy in a different physical location.
The 3-2-1 backup rule dictates keeping at least 3 copies of data, on 2 different media, with 1 copy stored offsite, which physically separating a local backup drive mitigates risks of localized disasters (fire, theft, flood).
If your office experiences a fire or break-in, your offsite copy is safe.
Expected result: You have a documented rotation schedule and the first offsite drive is stored away from your main office.
Step 6: Test your data restoration process
Having backups means nothing if you can’t actually recover your data. Test restoration from both your local backup and Backblaze cloud backup. If you run a WordPress site, our How to Test a WordPress Backup — Step-by-Step Guide shows a more specific restore drill.
Test 1: Restore from local backup (external drive)
- Windows: Open File History settings, click “Restore your files,” and select a few random documents to restore to a test folder.
- macOS: Open the Finder, click the Time Machine icon in the menu bar, select a past backup, and restore a few files.
- Verify that restored files open correctly and contain the expected data.
Test 2: Restore from Backblaze
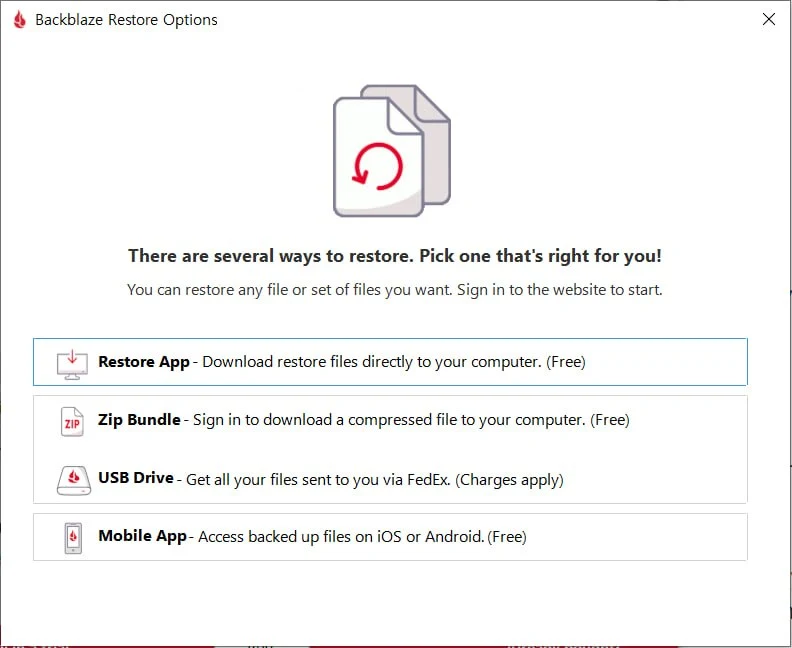
Backblaze offers several restore methods, including Restore App, Zip Bundle, USB Drive, and Mobile App.
- Log in to your Backblaze account at https://www.backblaze.com/cloud-backup/business.
- Navigate to the “Restore” section and download a small file (a few MB) to verify the restoration process works.
- If you need to restore large amounts of data quickly, Backblaze provides multiple restoration methods: a downloadable ZIP file, a USB Flash Drive (64GB) shipped overnight, or a USB Hard Drive (up to 8TB) shipped via FedEx for faster physical recovery of massive datasets.
- Open the restored file and confirm it matches the original.
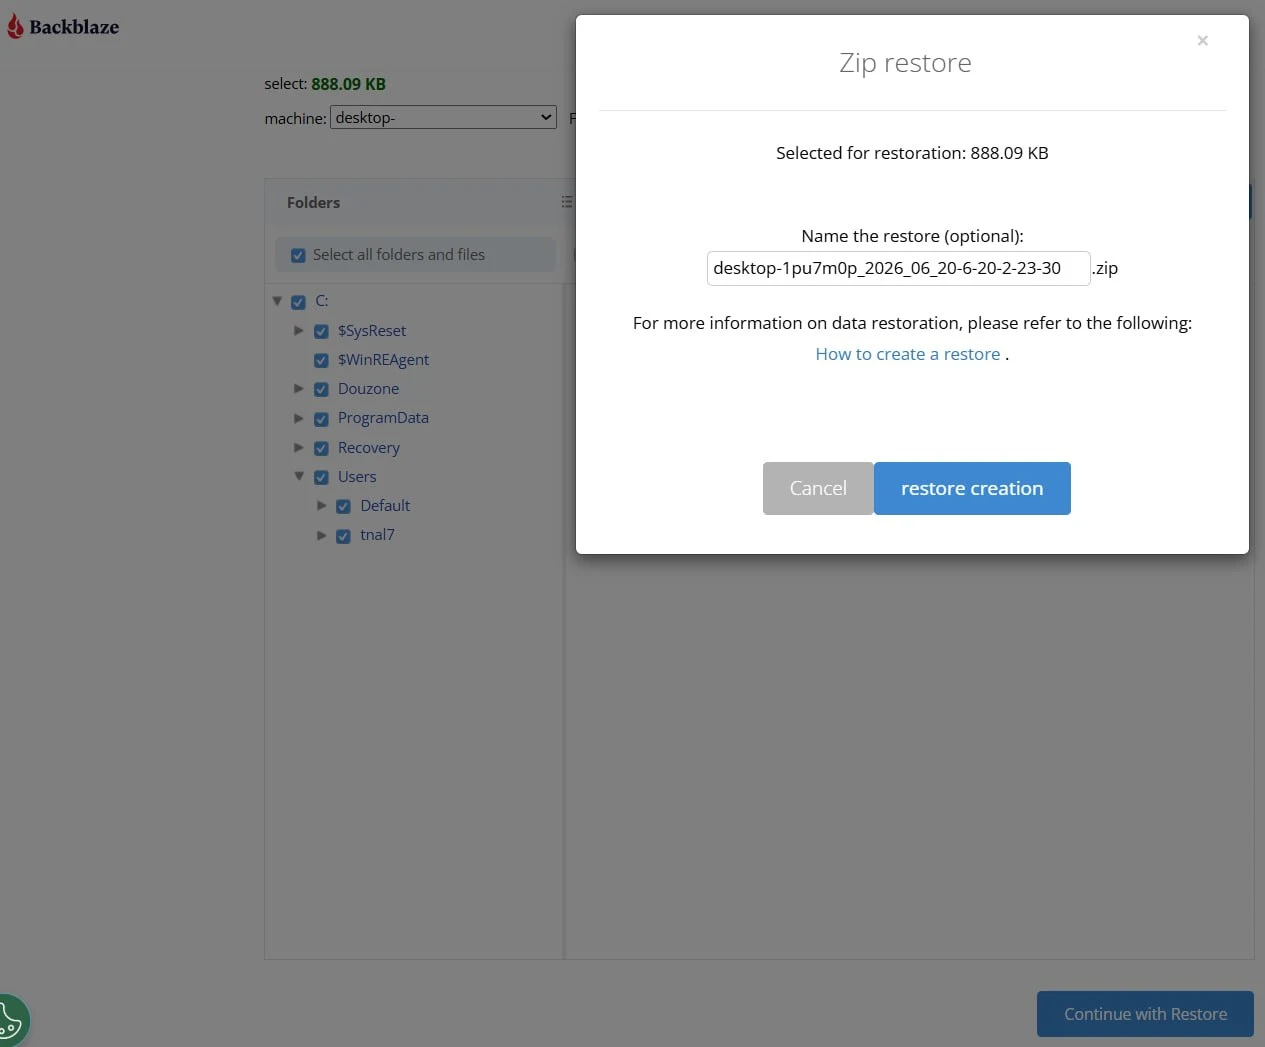
A small ZIP restore is useful for testing whether cloud recovery works before an emergency.
A successful data restoration test must verify both file integrity (the file opens correctly) and metadata integrity (timestamps and file ownership are preserved). If any file fails to restore or appears corrupted, contact Backblaze support before relying on that backup.
Expected result: You’ve successfully restored at least one file from each backup source and confirmed the files are intact and usable.
💡 Pro tip: Document your restoration test results. Write down the date, which files you restored, and any issues you encountered. This creates an audit trail and helps you debug problems later.
Common problems and fixes
Review these common issues and their solutions to troubleshoot your backup setup.
- Initial Backblaze upload taking days or weeks
⚠️ Cause: Large amounts of data on a slow internet connection. If you’re backing up 500GB+ on a 5 Mbps upload speed, the math is brutal—it can take weeks. Additionally, your computer may be throttling the upload speed to avoid network congestion or overheating.
🔧 Fix: Check your upload speed using speedtest.net. If it’s under 10 Mbps, let Backblaze run 24/7 (consider running it overnight and during non-business hours). Alternatively, use Backblaze’s physical seeding option: request a USB drive, load your data onto it offline, mail it to Backblaze, and they’ll upload it to your account for you. This bypasses slow internet entirely. Contact Backblaze support for pricing on the seeding service.
- External drive not recognized by Windows File History or macOS Time Machine
⚠️ Cause: The drive is formatted as FAT32 or exFAT (default for most new drives), not NTFS (Windows) or Mac OS Extended (macOS). File History specifically requires NTFS and won’t work with other file systems. Additionally, the drive may not have a valid driver or may have failed to mount properly.
🔧 Fix: Right-click the external drive in File Explorer and select “Format.” Choose NTFS as the file system and complete the format. For macOS, open Disk Utility, select the external drive, and reformat it to Mac OS Extended (Journaled) or APFS. Once reformatted, the backup application should recognize the drive immediately. Warning: formatting erases all data on the drive, so back it up first if needed.
- Files missing from Backblaze cloud restoration
⚠️ Cause: The files were excluded from backup (either intentionally in settings or accidentally because they’re in an excluded folder path), or the Backblaze client wasn’t running when the files were created. Some users exclude entire folders like Downloads or AppData without realizing important data lives there. Additionally, files may still be queued for upload and not yet synced to the cloud.
🔧 Fix: Log in to Backblaze and check the “Backup Status” or “Activity” log to confirm the missing files are included in the backup scope. If they’re not, go to Settings > Backup and add the missing folder to the backup list. If the folder is already in the list, check the “Exclusions” tab and remove any overly broad exclusions. Wait 24 hours for Backblaze to scan and upload any newly included files. You can also force an immediate backup by clicking “Back up now” in the Backblaze app.
- Backblaze client consuming too much disk space or RAM
⚠️ Cause: The Backblaze client runs continuously in the background and maintains a local index of all files being backed up. On computers with large amounts of data (1TB+) or limited RAM (under 4GB), this can slow down system performance, especially during initial backup when Backblaze is scanning the entire drive.
🔧 Fix: Open Backblaze settings and set a backup schedule instead of continuous backup—for example, “Back up daily from 9 PM to 6 AM” to avoid peak work hours. You can also reduce the backup priority to “Low” so Backblaze only uses idle CPU cycles. If you have very limited RAM, consider upgrading to at least 8GB or reducing the number of files being backed up by excluding unnecessary folders.
Verification checklist
Confirm your setup is complete and secure by verifying each item below.
- You have a written list of critical business folders that need backup
- Your external hard drive is formatted (NTFS for Windows, Mac OS Extended for macOS) and connected
- Local backup software (File History or Time Machine) is running and shows a recent backup date
- Backblaze Business account is created and the client software is installed on all business computers
- Backblaze shows “Backup up to date” or “Backup in progress” (initial backup may take days)
- You’ve successfully restored at least one test file from both local and cloud backups
- A second external drive is purchased and ready for monthly rotation
- You have a calendar reminder set for monthly offsite drive rotation
Recommended first 30-minute setup order
Follow this sequence to complete your initial backup setup within 30 minutes.
1. Purchase external drive (0–5 minutes). Visit your local electronics retailer or order online. Choose 2TB–4TB USB 3.0 drive ($50–$120). While you’re waiting for it to arrive or if you already have one, move to step 2.
2. Connect and format external drive (5–10 minutes). Plug the drive into your computer. Right-click and format as NTFS (Windows) or Mac OS Extended (macOS). This takes 2–3 minutes depending on drive size.
3. Sign up for Backblaze Business (10–15 minutes). Open https://www.backblaze.com/cloud-backup/business and create a free trial account. No credit card required for the trial. This step is quick but unlocks cloud backup.
4. Install local backup software (15–20 minutes). On Windows, open Settings > System > Backup > Back up now and select your formatted external drive. On macOS, open System Preferences > Time Machine and select the drive. Configuration takes about 5 minutes; the first backup starts immediately but runs in the background.
5. Install Backblaze client (20–25 minutes). Download the Backblaze installer from your account dashboard and run it. Installation is automatic; you just need to log in with your account credentials.
6. Verify both backups are running (25–30 minutes). Check File History or Time Machine to confirm your local backup is active. Check the Backblaze app icon in the system tray (Windows) or menu bar (macOS) to confirm the client is running. Both should show “Backup in progress” or similar status. You’re done with initial setup—both backups now run automatically.
Setup mistakes to avoid
Steer clear of these common pitfalls to ensure reliable data protection.
Mistake 1: Keeping all backup drives in the same physical location. If your office catches fire, floods, or is broken into, all three copies (original + local backup + offsite backup) could be destroyed. The entire point of the 3-2-1 rule is that one copy lives somewhere else. Establish a monthly rotation ritual where you disconnect the offsite backup drive and actually transport it to a safe deposit box, family member’s home, or storage unit. This takes 30 minutes per month and is non-negotiable.
Mistake 2: Forgetting to exclude temporary and cache folders from cloud backup. Folders like AppData (Windows) or Library/Caches (macOS) contain temporary files that change constantly and bloat your cloud backup with junk data. Excluding these folders can reduce initial sync time by 50% or more and save you hundreds of dollars in cloud storage if you exceed your plan limits. Review your Backblaze exclusion list before starting the initial backup.
Mistake 3: Never testing a data restoration. Until you’ve successfully restored a file from your backup, you don’t know if your backups actually work. Corrupted backups are common, especially with external drives that fail silently. Schedule a quarterly restoration test where you intentionally restore a few random files and verify they open correctly. Document the results. If any file fails to restore, investigate immediately rather than discovering the problem during an actual emergency.
Mistake 4: Using a weak password and no two-factor authentication on Backblaze. Your Backblaze account has access to all your business data. If a hacker gains access, they can delete your cloud backups and hold them for ransom. Use a password manager to generate a 16-character password and enable 2FA immediately after account creation. Review your Backblaze account’s security settings quarterly.
When to consider a different approach
A simple 3-2-1 backup plan works well for small businesses with under 2TB of critical data and standard compliance needs.
However, three scenarios may require a more complex solution:
Scenario 1: You need instant failover or disaster recovery. If your business can’t tolerate even 1 hour of downtime, a 3-2-1 plan isn’t sufficient. You need real-time replication to a secondary server or data center. This requires a Disaster Recovery (DR) solution, which is more expensive and complex than backups. Backblaze is designed for recovery after failure, not prevention of downtime.
Scenario 2: You have massive datasets (multiple terabytes) or SQL databases that need point-in-time recovery. Simple file-based backups like Backblaze struggle with constantly changing database files and virtual machine images. You need specialized backup software that understands database semantics. Additionally, Backblaze’s cloud restore for petabyte-scale data can take weeks.
Scenario 3: You have strict compliance requirements (HIPAA, PCI-DSS, GDPR). These regulations often require encryption in transit and at rest, audit logs, specific data residency (data must stay in certain countries), and proof of successful restores. While Backblaze supports encryption, it may not meet all compliance documentation requirements for healthcare or financial services. You may need to work with a compliance-aware backup provider or implement additional controls.
If any of these apply to your business, compare alternatives in our software reviews to find a more specialized solution. WordPress site owners can also compare plugin-first options in Which WordPress Backup Plugin Is Right for Your Site?.
Frequently asked questions
Q: How much does this 3-2-1 backup setup cost?
A: The external hard drive (one-time purchase) costs $50–$120. Backblaze Business Backup costs $7/month or $70/year per computer. For a 3-person small business with 3 computers, annual costs are roughly $210–$360 for Backblaze plus $150 for a second external drive, totaling under $600 per year. This is a fraction of the cost of recovering from ransomware or data loss, which can run into the tens of thousands of dollars. Consider it insurance.
Q: What type of external drive should I buy?
A: Look for a USB 3.0 (or faster) external hard drive with 2TB–4TB capacity. Seagate, WD (Western Digital), and LaCie are reliable brands. Avoid cheap USB flash drives (they’re too small and unreliable for backups). Avoid ancient external drives from 2010 or earlier (they wear out). New drives should have at least a 2-year warranty. For offsite storage, choose a drive that’s compact enough to fit in a safe deposit box but capable enough to survive being transported in a bag.
Q: How long does Backblaze keep files after I delete them?
A: Backblaze retains deleted files for 30 days by default, after which they’re permanently removed from the cloud backup. If you accidentally delete a critical file, you have a 30-day window to restore it. If you need longer retention (for legal or compliance reasons), contact Backblaze support about retention policies. Note that this is different from version history—Backblaze keeps multiple versions of modified files, not just the latest version.
Q: Do I really need both a local backup and a cloud backup?
A: Yes. Local backups (external drive) restore files much faster than cloud backups—you can restore 100GB in minutes instead of hours. Cloud backups (Backblaze) protect against localized disasters like fire or theft. Together, they cover your bases. If you only have a local backup and your office catches fire, you lose everything. If you only have cloud backup and your internet goes down during an emergency, you can’t recover files as fast.
Q: Can I use my cloud storage (Google Drive, OneDrive, Dropbox) as my backup?
A: No, because cloud storage apps sync deletions. If you accidentally delete a file in Google Drive, it deletes from the cloud version too—no safety net.
Backup software like Backblaze keeps historical versions even after deletion (for 30 days). Additionally, cloud storage apps are designed for active file access, not archival protection, so they’re not encrypted or versioned the same way. Use cloud storage for file sharing; use dedicated backup software for protection.
Sources and notes
- Backblaze Business Backup official page — used to verify features, pricing, and centralized management capabilities
- Official OS Documentation – Backup Scope — File History default backup scope
- Apple Support – Time Machine Setup — Time Machine encryption and disconnection behavior
- Microsoft Learn – File History Requirements — NTFS formatting requirement
- Backblaze Blog – 3-2-1 Strategy — 3-2-1 rule definition and offsite backup rationale
- Backblaze Official – How Backup Works — incremental backup and continuous sync behavior
- Backblaze Help – Restore Methods — restoration options and shipping timeline
- Backblaze Blog – Backup Best Practices — exclusion recommendations for cache and temporary folders
Disclaimer
This guide is for general informational purposes only and does not constitute professional accounting, tax, legal, or financial advice. Pricing, features, and plan details were verified against each product’s official website as of June 2026 and may change without notice. Always consult a qualified professional for advice specific to your business situation. PickrTech may earn a commission when you sign up through our links at no extra cost to you. Our recommendations are based on independent evaluation and are not influenced by compensation.
Last reviewed: June 2026 by the PickrTech editorial team.