TL;DR: Before you update plugins or themes, test your backup on a staging site or local environment to make sure your data actually restores. You’ll need an existing UpdraftPlus backup, a staging domain (or the free Local app on your computer), and about 45–60 minutes. The payoff: proof — not hope — that you can recover your site if something goes wrong.
Where this guide fits: This guide verifies whether your WordPress backup can actually restore a working site. If you have not created a backup yet, start with the UpdraftPlus setup guide. If your test fails, use the UpdraftPlus errors guide to diagnose the problem.
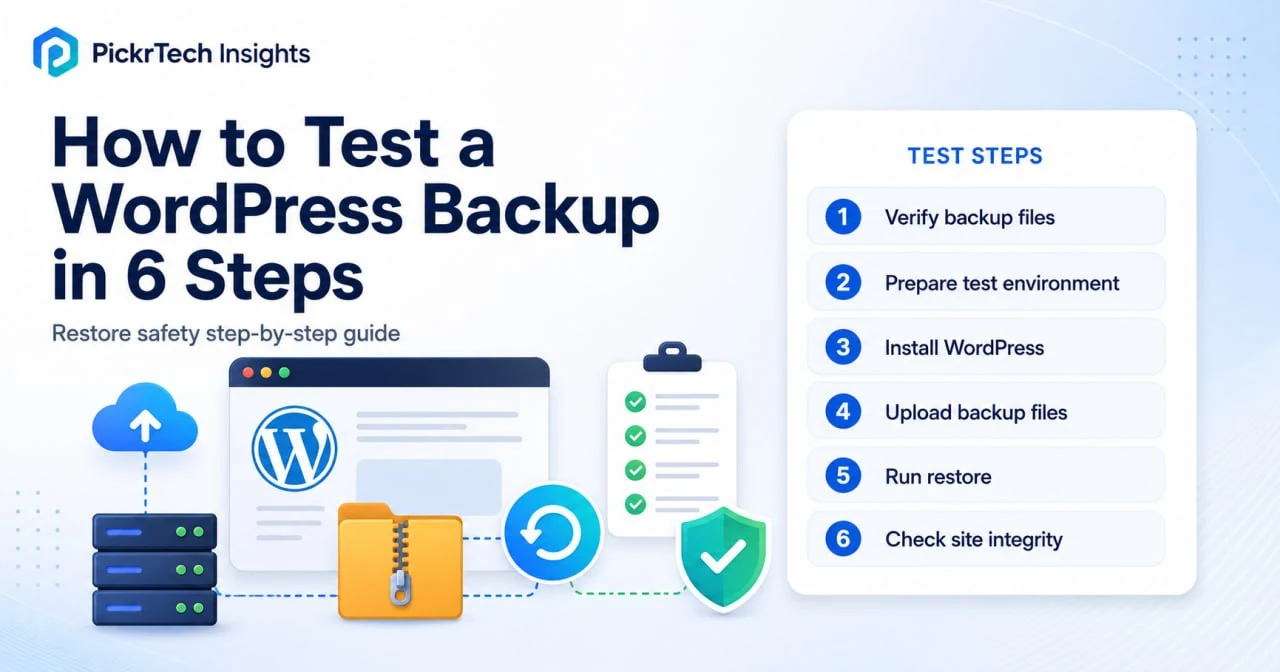
The six-step restore test at a glance: verify the backup, isolate the environment, restore, then check that everything still works.
Before you test a WordPress backup
Account requirements
You need a WordPress hosting account for your live site, plus the ability to create a staging environment. Most hosts offer a staging feature through their control panel. If you prefer working on your own computer, download Local (formerly Local by Flywheel) — it’s free for Mac, Windows, and Linux at localwp.com.
Data needed
You must have at least one complete backup created by UpdraftPlus that includes your database, plugins, themes, and uploads folder. Ideally, this backup is no more than 1–2 weeks old so it reflects your current site. Don’t have a recent backup? Create one now before proceeding.
Software and tools
If testing locally, grab Local from localwp.com. Otherwise, you’ll use your hosting provider’s staging tool (check your hosting dashboard for a Staging or Clone Site button). You’ll also need UpdraftPlus installed on both your live site and your test environment.
⚠️ Before you start: update UpdraftPlus on both sites to version 1.26.5 or later for the free plugin, or 2.26.5 or later for Premium. Those June 2026 releases patched an unauthenticated authentication-bypass vulnerability (CVE-2026-10795) that could allow site takeover on affected installations. Check your version under Plugins, or see the official plugin page for the current free release.
Estimated time: 45–60 minutes (mostly waiting for backup downloads and restore processing)
The tutorial duration is not the same as your full-site recovery window. Use our backup restore time calculator to compare your site size, measured throughput, preparation time, and verification time with your target RTO.
Difficulty: Beginner–Intermediate
Cost implications: Free. The free version of UpdraftPlus covers this entire workflow — backup, upload, restore, and the built-in search-and-replace for the test domain — and Local costs nothing either. UpdraftPlus Premium (from $70/year) adds incremental backups and automatic pre-update backups, but you don’t need it for this test. Pricing and version details checked July 2026.
How to test a WordPress backup in six steps
Step 1: Locate and verify your existing backup files
Log into your WordPress dashboard and head to Settings > UpdraftPlus Backups > Existing Backups. You’ll see a chronological list of all your backups. Each row shows the backup date and a button for every component the backup set contains.
Look for a backup showing four core buttons: Database (posts, pages, settings), Plugins, Themes, and Uploads (media files). Many sets also include an “Others” component for anything else in wp-content.
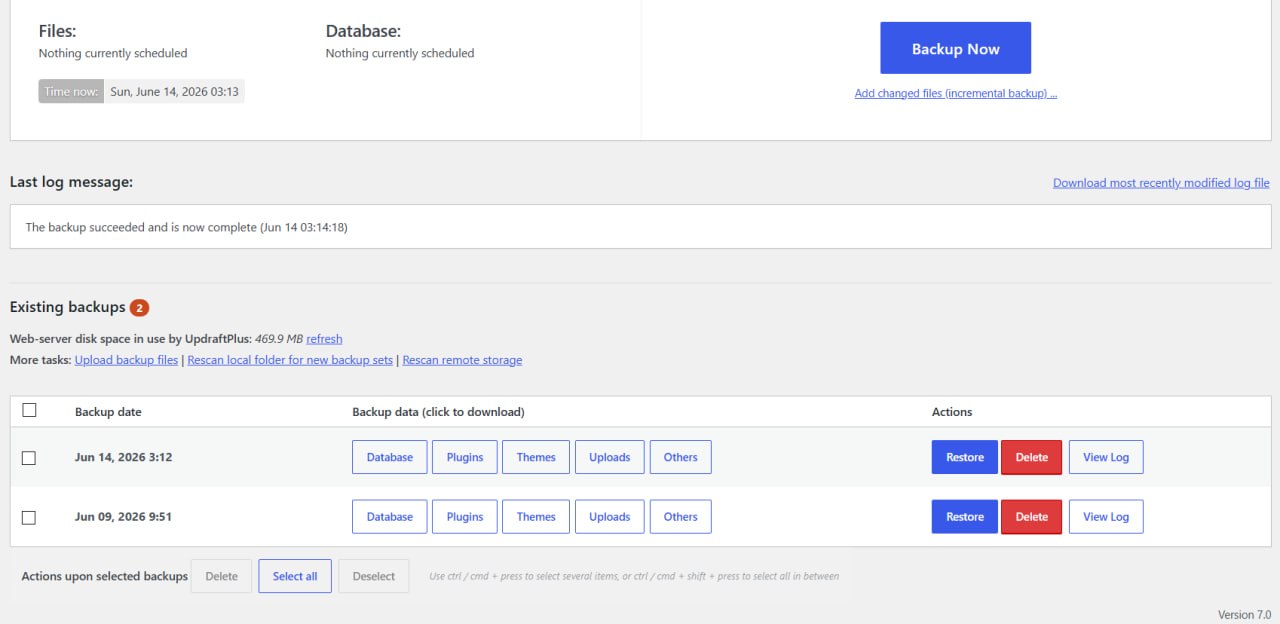
Two complete backup sets in the Existing Backups tab — each component appears as its own button.
For a standard WordPress site, a backup missing Database, Plugins, Themes, or Uploads cannot restore the complete site. If your site uses must-use plugins, custom folders inside wp-content, or other non-standard files, confirm that the backup also includes the Others component. If the required components are missing, click Backup Now to create a complete set before testing.
Expected result: You’ve confirmed that one recent backup set contains every component your site needs. If it’s older than two weeks, create a fresh one now.
💡 Pro tip: Large sites (over 500 MB) may take 5–10 minutes to back up. Let it finish before moving on.
If you haven’t set up automated backups yet, take a few minutes to configure UpdraftPlus on your live site before proceeding.
Step 2: Set up an isolated testing environment
Use a disposable destination with its own database: either a temporary hosting subdomain or a local site on your computer. The destination must be isolated from production and clean enough that files left over from a live-site clone cannot hide gaps in the backup. If you have not formalized your broader backup structure yet, start with our simple 3-2-1 backup plan guide before you run restore drills.
Option A: Temporary hosting site — Create a new staging subdomain or disposable site with a separate database. Some hosting dashboards label their tool Staging or Clone Site but copy the entire live site by default. Do not restore over that clone as-is: existing files could remain in place and make an incomplete backup look successful. Reset the destination to a fresh WordPress installation, or create a separate temporary subdomain instead.
Option B: Local environment — Download Local from localwp.com and install it. Open Local and click Create a New Site. Name it something like “site-backup-test”, keep the default environment settings, and click Create. Local creates a separate WordPress installation on your computer.
⚠️ Contain the test: password-protect a public staging URL, discourage search indexing, and prevent the restored copy from sending production email or triggering live payment, CRM, webhook, or scheduled-job integrations. Use sandbox credentials or disable those connections before testing forms and other workflows.
Expected result: You have an isolated destination with a separate database and no production workflows. Do not use your live site for testing.
💡 Pro tip: Match the test environment’s PHP version to your live site. Check your live PHP version under Tools > Site Health > Info, then set the same version in Local or in your hosting environment. A mismatch can stop plugins from activating and create a misleading test result.
Step 3: Install a fresh copy of WordPress
On a hosting subdomain, use the host’s one-click installer or reset tool to create a fresh WordPress installation. If the staging tool produced a copy of the live site, wipe or reset that copy before continuing; restoring onto a pre-populated clone does not prove that the backup contains every required file.
If you chose Local, WordPress is already installed. Open Local, select your test site, and click WP Admin to access the dashboard.
Expected result: You can access a fresh WordPress dashboard at the temporary URL or on localhost. Only the default installation content is present.
Step 4: Install UpdraftPlus on the test site
In your test site’s WordPress dashboard, go to Plugins > Add New. Search for “UpdraftPlus” and click Install Now on the official plugin by TeamUpdraft (listed under lead developer David Anderson). After installation, click Activate.
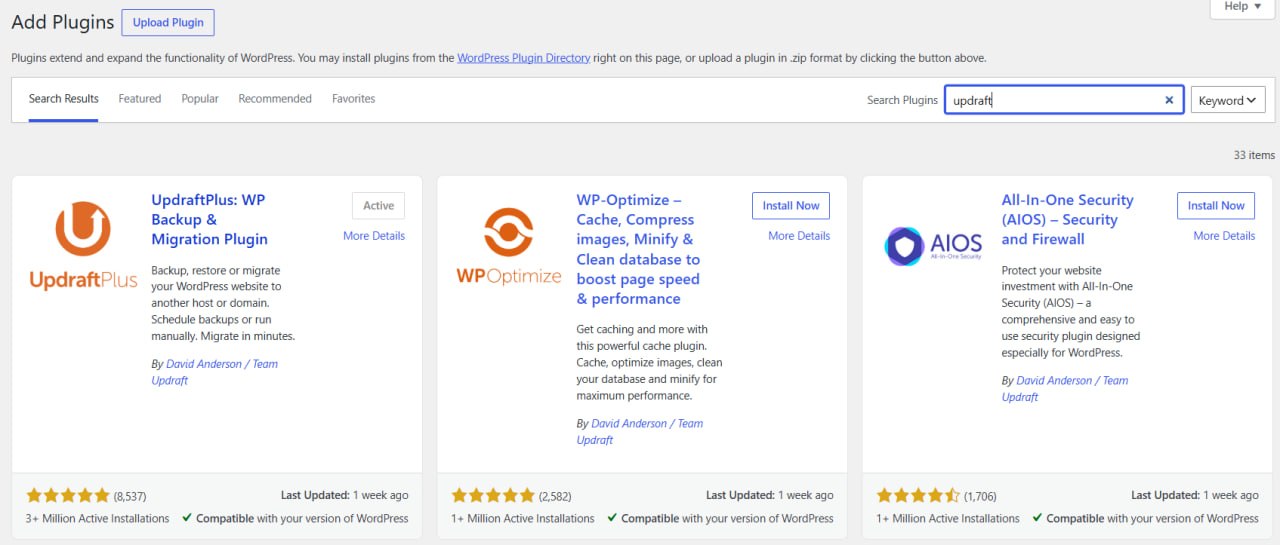
UpdraftPlus shown as active in the Add Plugins search results on the test site.
You’ll find the plugin under Settings > UpdraftPlus Backups. Click it to open the UpdraftPlus dashboard — this is where you’ll upload and restore your backup files.
Expected result: UpdraftPlus is active on your test site. The plugin dashboard is accessible, and you see tabs for “Backup / Restore”, “Existing Backups”, and “Settings”.
💡 Pro tip: You don’t need to configure remote storage on the test site. Just install the plugin and move to the restore.
Step 5: Download your backup and restore it to the test site
Go back to your live site’s WordPress admin and navigate to Settings > UpdraftPlus Backups > Existing Backups. Find the backup you verified in Step 1. UpdraftPlus stores the set as separate component archives, so click each required component — Database, Plugins, Themes, Uploads, and Others when applicable — and download every file to your computer before continuing.
Once downloaded, switch to your test site’s WordPress admin. Go to Settings > UpdraftPlus Backups > Existing Backups and find the Upload backup files link. Click it, select the files you just downloaded, and let the upload finish (5–10 minutes depending on file size).
Now click the Restore button next to your uploaded backup. A dialog will ask which components to restore. Select Database, Plugins, Themes, Uploads, and any other component required by the backup set, then click Next. UpdraftPlus unpacks the backup and shows a second screen. Because the backup comes from a different address, you’ll see a note that this backup set is from a different site, and under “Database restoration options” a “Search and replace site location in the database (migrate)” checkbox, ticked by default. Leave it ticked — it rewrites your live URLs to the test domain during the restore, and it’s included in the free version. (If you don’t see it, make sure Database is selected and that you’re on the second screen, not the first component dialog. And if your test site happens to use the same URL as the backup — an in-place restore — the checkbox won’t appear at all, because no address needs replacing; just double-check you’re not accidentally restoring onto your live site.) Then click Restore and let the process complete.
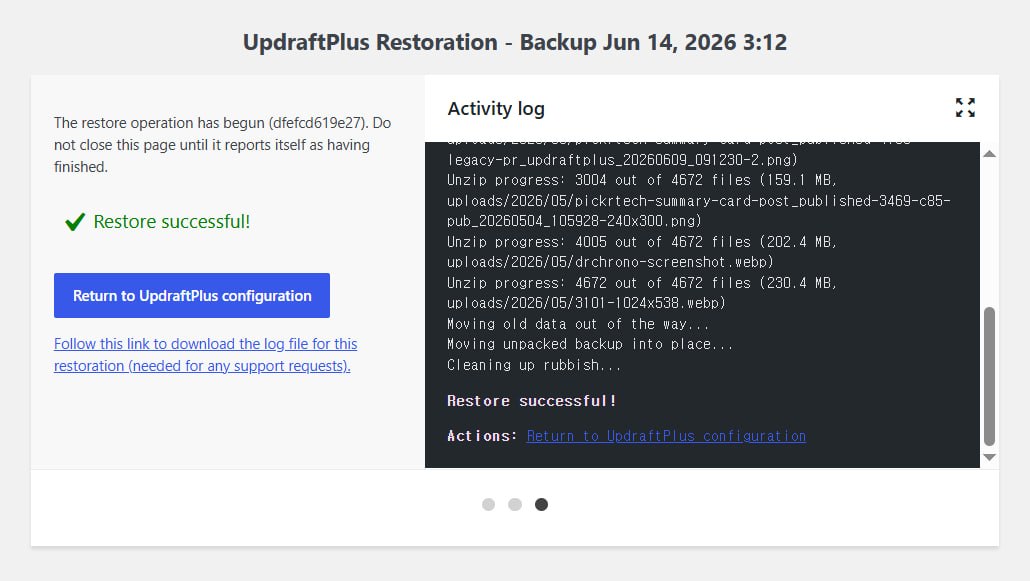
The “Restore successful” confirmation, with the activity log showing each component unpacked and restored.
You may see a “restore in progress” spinner — this is normal and can take 10–20 minutes for larger sites.
Expected result: The restore finishes without errors. You see a “Restore successful” message. Your test site now contains all the content, plugins, themes, and media from your live site.
⚠️ Important: If the restore fails midway with a white screen or timeout error, see the “Common restore-test problems and fixes” section below.
Step 6: Test functionality and visual integrity
Once the restore completes, log out and visit your test site’s homepage as a regular visitor. The site should look identical to your live site. Click through several pages and test navigation. For forms or interactive features, use a test recipient, local mail catcher, or sandbox account so the staging copy does not send real messages or trigger production workflows.
Check the Media Library by going to Media > Library in the dashboard. All images and files should be present. Visit a page with embedded images and confirm they load.
Test user login with an account from your live site. Note that after restoring the database, the test site’s credentials become the same as your live site’s — your fresh-install admin password no longer works. If login fails entirely, check that the database restore completed fully.
Finally, go to Settings > Permalinks and click Save Changes without modifying anything. This refreshes WordPress rewrite rules and may update the server’s permalink configuration. If internal pages still return 404 errors, the destination web server may need a separate rewrite-rule change.
Expected result: The test site works like your live site. Pages load, test form submissions complete without contacting production systems, images display, and menus function. If something is broken, document it and refer to the “Common restore-test problems and fixes” section.
💡 Pro tip: Create a simple document listing which pages you tested and any issues found. This helps you decide whether your backup is safe to restore, or whether you need to investigate plugin conflicts before your next update.
Common restore-test problems and fixes
Use the exact error message and UpdraftPlus activity log to identify the cause before changing server settings.
Internal pages return “404 Not Found” after restoring
⚠️ Cause: The destination web server’s permalink rewrite configuration was not created or refreshed. This is a server-routing issue, not a database restore resetting .htaccess.
🔧 Fix: Go to Settings > Permalinks and click Save Changes. On Apache or IIS, WordPress may update the relevant configuration file when permissions allow. If the site uses Nginx or the 404 errors remain, check the host’s WordPress rewrite rules or ask the hosting provider to apply them.
The restore stops with a fatal error or white screen
⚠️ Cause: Low PHP memory is one possible cause, but a damaged archive, insufficient disk space, an execution timeout, or file-permission error can produce a similar symptom.
🔧 Fix: Read the final error in the activity log first. If it reports an exhausted memory limit, raise the WordPress and PHP memory limits within the amount your host allows, then retry. In Local, edit memory_limit in the site’s conf/php/php.ini.hbs file and stop and restart the site. If the log identifies disk space, a corrupt ZIP, timeout, or permissions instead, correct that specific issue rather than increasing memory blindly.
Media Library images are missing or broken after restoring
⚠️ Cause: The uploads archive was missing from the backup set or did not extract successfully.
🔧 Fix: Verify that the backup includes Uploads, download that component again, and retry the restore. If the database attachment records are present but the files are still missing, copy the corresponding wp-content/uploads files to the test site via SFTP and then recheck the affected media items.
The restored site redirects to the live domain
⚠️ Cause: The “Search and replace site location in the database (migrate)” option was not applied, so stored URLs still point to the live domain.
🔧 Fix: Run the restore again with the search-and-replace option enabled. Changing “WordPress Address (URL)” and “Site Address (URL)” under Settings > General only corrects those two values; it does not replace URLs stored throughout the database. TeamUpdraft’s migration guide covers the full process.
Plugins are inactive or fail to activate after restore
⚠️ Cause: The test environment may use a different PHP version, lack a required server extension, or reject a production license or API configuration. A hardcoded path can also break after a server or domain change.
🔧 Fix: Match the production PHP version and required extensions, then activate critical plugins one at a time. Read the exact activation error and reconfigure test-safe API or license settings where necessary. Document any plugin that cannot run in the matched environment before treating the backup as verified.
Restore-test verification checklist
Use this checklist to confirm your restore is fully functional.
- Backup set contains all four core components (database, plugins, themes, uploads) — and the Others component when your site needs it
- Test site was created on an isolated domain or local environment (not on live)
- UpdraftPlus free 1.26.5+ or Premium 2.26.5+ is installed and active on the test site
- “Search and replace site location in the database (migrate)” stayed ticked on the second restore screen
- Backup restore completed without fatal errors or white screens
- Homepage and key pages load and display content correctly
- Images in the Media Library are present and display on the front-end
- Forms and integrations work with test recipients or sandbox connections and do not trigger production workflows
- Permalinks are regenerated (no 404 errors on internal links)
- User login works with an account from your live site
- Site URL in Settings > General matches the test domain
When this restore-test method isn’t the right approach
This backup testing workflow using UpdraftPlus and a staging site works well for most WordPress sites. However, a few scenarios may warrant different tools.
If your site uses custom post types, complex database relationships, or proprietary plugins tied to your live server’s file structure, restoring to staging may expose configuration conflicts that don’t show up in a standard restore test. In these cases, tools like Duplicator or All-in-One WP Migration handle custom architectures more gracefully.
If your hosting provider offers a native backup and staging feature (WP Engine and Kinsta both build staging into their dashboards), using those tools may be simpler than managing UpdraftPlus backups separately. These host-provided tools are tightly integrated with your server environment.
For very large sites (over 2 GB) or complex setups with multiple database-driven subsystems, testing locally may expose server resource constraints that don’t affect your live hosting. For these scenarios, test your backup directly on a staging subdomain through your host so the test environment matches production specs.
Frequently asked questions about restore testing
How often should I test a WordPress backup?
At least once per month, or whenever you plan a major update (like a new WordPress core version or plugin update). This ensures your backup strategy is working and you catch any issues before they become emergencies.
What should I do if a WordPress backup is too large or the restore times out?
Increase the PHP memory limit and max_execution_time on your test server (see “Common restore-test problems and fixes” above). For backups over 1 GB, ask your hosting provider about uploading the backup via SFTP directly to the test site’s wp-content/updraft folder instead of pushing it through the WordPress dashboard, then use “Rescan local folder for new backup sets” in the Existing Backups tab. This is faster and avoids timeout issues altogether.
Can UpdraftPlus restore a backup made by a different WordPress backup plugin?
Not with the free version. Each backup plugin uses its own format, so the safest route is to restore with the same plugin that created the backup. UpdraftPlus Premium can import and restore backups from BackWPup, BackupWordPress, Simple Backup, and a few other plugins, but if you’re on the free tier, install your original backup plugin on the test site and restore through it instead.
What should I do after a WordPress backup test succeeds but before restoring to live?
Run the test again in a few weeks — confidence comes from repetition, not from a single pass. Before applying major updates, do one more test run. If you’re concerned about plugin conflicts, test your updates on staging first (before applying them to live), then run a fresh backup. This workflow ensures you’re always backing up a stable site.
Next steps
- Decide where to store your backups with our local vs cloud backup comparison.
- A successful restore test matters even more when your backup strategy also includes an offsite backup copy for hardware failure or site-wide incidents.
- If your restore test fails, use the UpdraftPlus errors guide.
- If you have not chosen a plugin yet, compare options in the WordPress backup plugin comparison.
- If you need to protect more than just your WordPress site, follow the 3-2-1 backup plan.
Sources and notes
- UpdraftPlus on WordPress.org — current free version, restore components, and free-version migration capabilities
- TeamUpdraft — Important security update — fixed free and Premium version numbers for the June 2026 vulnerability
- NVD — CVE-2026-10795 — authentication-bypass description and affected free-plugin versions
- TeamUpdraft — How to restore a WordPress site with UpdraftPlus — official restore workflow, including uploading backup files via SFTP
- TeamUpdraft — How to migrate a WordPress site — the search-and-replace step when restoring to a different domain
- Local — free local WordPress development environment (WP Engine)
- WordPress Documentation — WordPress Backups — official guidance on backup and restore safety
- WordPress Documentation — Customize permalinks — WordPress permalink settings
- TeamUpdraft — 404 errors after migration — web-server rewrite configuration after moving a site
- Local — Troubleshooting performance issues — editing PHP settings in
php.ini.hbsand restarting the site
Disclaimer
This guide is for general informational purposes only. Plugin features, version numbers, and interface details were verified against the official UpdraftPlus and Local documentation as of July 2026 and may change without notice. Always keep a separate copy of your backup before running any restore, and test on an isolated environment rather than your live site.
Last reviewed: July 2026 by the PickrTech editorial team.