This article may contain affiliate links. We may earn a commission when you sign up through our links — at no extra cost to you. Our recommendations are based on independent evaluation and are not influenced by commissions.
TL;DR: This guide covers UpdraftPlus common errors and fixes through a structured troubleshooting workflow that identifies root causes and resolves backup, restore, and cloud sync failures. Key steps: (1) Review error logs to pinpoint failure points, (2) Verify WordPress cron and backup schedules are active, (3) Increase PHP memory and execution limits to prevent timeouts.
UpdraftPlus common errors and fixes
Before you begin: What you’ll need
Account requirements
You need an active WordPress installation with UpdraftPlus installed (free version or Premium). Admin access to the WordPress dashboard is required to access plugin settings, error logs, and restore functions.
Data needed
Have your hosting control panel credentials (cPanel, Plesk, or similar) available in case you need to edit wp-config.php or adjust server PHP settings. If using cloud storage backups, ensure you have the API keys or OAuth credentials for your storage provider (Dropbox, Google Drive, AWS S3, etc.) ready for re-authentication if needed.
FTP/SFTP access
For advanced troubleshooting (Step 5), you may need to manually upload backup files to your server. An FTP or SFTP client like FileZilla is helpful for this task.
Estimated time: 15–30 minutes
Difficulty: Beginner to Intermediate
Cost implications: The core troubleshooting steps apply to both the free UpdraftPlus version and Premium. Cloud storage integration and advanced restoration may require UpdraftPlus Premium ($70/year) for certain features, but diagnosis and most fixes work on the free tier.
These steps assume you already have UpdraftPlus installed — if not, our UpdraftPlus review covers what it does and whether it’s worth it.
Step-by-step walkthrough: Diagnose and fix UpdraftPlus errors
Step 1: Review the UpdraftPlus error log
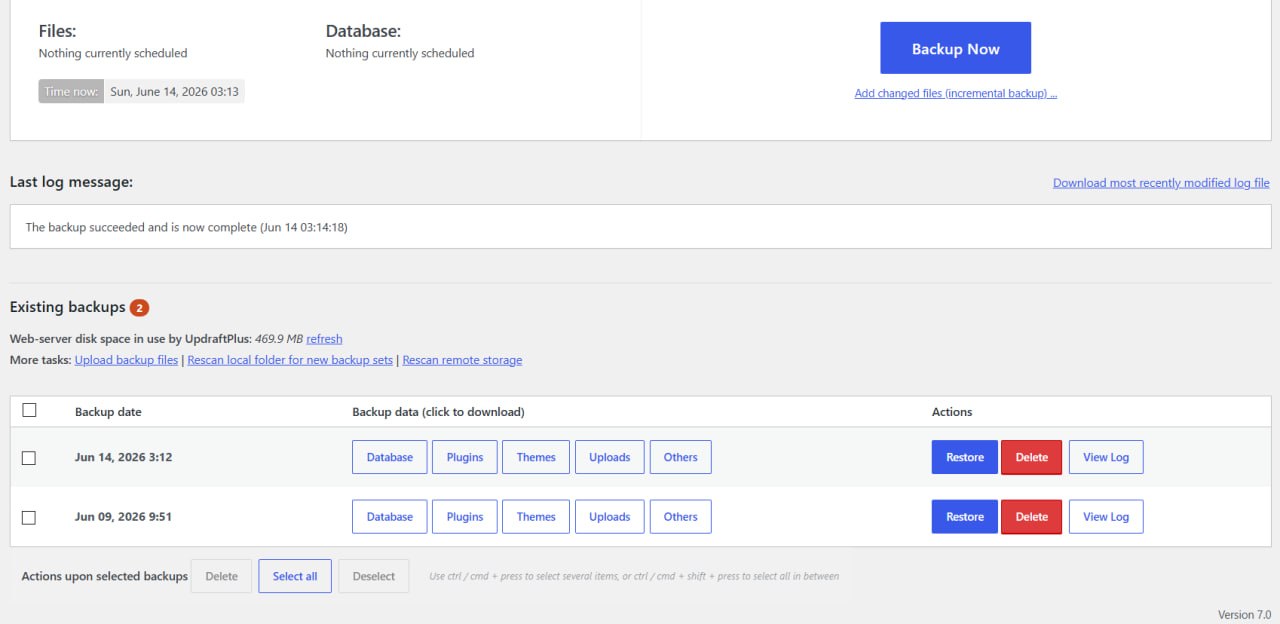
UpdraftPlus Existing Backups with Restore and View Log options
Navigate to Settings > UpdraftPlus Backups in your WordPress admin dashboard. Scroll down to the “Existing Backups” section and look for the “Review existing log” link or “Download log for support” button. Click one of these options to examine the detailed log output.
The log file identifies the exact point where the backup process failed—such as database extraction errors, file compression timeouts, or cloud storage upload failures.
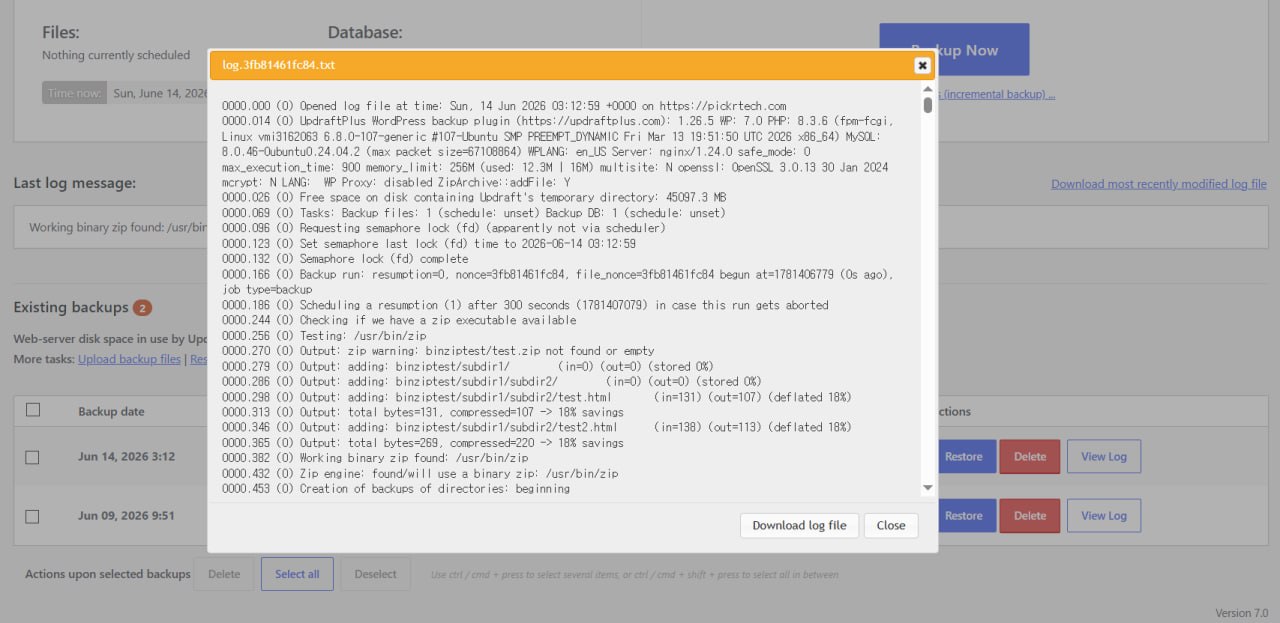
UpdraftPlus backup log viewer with diagnostic details
Look for error messages containing keywords like “Fatal error”, “Allowed memory size”, “Connection timeout”, or “Authentication failed”. Write down the specific error code or message.
Expected result: You now have a clear error message pinpointing which stage of the backup failed (database dump, file zipping, or cloud sync). This narrows down which step to tackle next.
💡 Pro tip: If the log is very long, use your browser’s search function (Ctrl+F or Cmd+F) to find the line with the actual error, then read upward to understand the context.
Step 2: Verify WordPress cron and backup scheduling
UpdraftPlus relies on the WordPress cron system (WP-Cron) to trigger scheduled backups automatically. If WP-Cron is disabled, backups will never run on schedule—only when you manually click “Backup Now”.
Check if WP-Cron is disabled:
- Use an FTP client or your hosting file manager to open
/wp-config.phpin the root of your WordPress installation - Search for the line:
define('DISABLE_WP_CRON', true); - If this line exists, your WP-Cron is disabled. Either remove this line entirely or change
truetofalseto re-enable it - Save and upload the file
Verify your backup schedules are set:
- Return to Settings > UpdraftPlus Backups in your WordPress admin
- Look for the “Files backup schedule” and “Database backup schedule” dropdowns
- Ensure both are set to something other than “Off” (e.g., “Every 12 hours” or “Daily”)
- Click Save changes
If you prefer not to rely on WP-Cron, consider installing the free WP-Cron Manager plugin to test whether your site’s cron jobs are triggering correctly.
Expected result: Scheduled backups now trigger automatically at your configured intervals. You should see new backup entries in the “Existing Backups” section at the scheduled times.
Step 3: Increase PHP memory and execution limits
One of the most common UpdraftPlus errors is “Fatal error: Allowed memory size of XXX bytes exhausted”. This happens when your site’s files or database are too large to compress within the default PHP memory limit.
Edit wp-config.php to boost memory:
- Open
/wp-config.phpvia FTP or your hosting file manager - Find the line that says
/* That's all, stop editing! */(usually near the bottom) - Just above that line, add these two new lines:
   define('WP_MEMORY_LIMIT', '512M');
   define('WP_MAX_EXECUTION_TIME', 300);
- Save and upload the file
If your site is very large (over 5GB), consider increasing to 1024M (1GB).
Alternative: Use php.ini
If your hosting provider restricts wp-config.php edits, ask your host to increase the following in php.ini:
memory_limit = 512M(minimum)max_execution_time = 300(seconds)max_input_time = 300(seconds)
Expected result: UpdraftPlus can now allocate enough memory to compress and archive large databases and file directories without crashing.
💡 Pro tip: After increasing limits, wait 5–10 minutes for the changes to take effect, then run a manual backup by clicking Backup Now to test.
Step 4: Reconnect or reauthenticate cloud storage
Cloud storage connection errors (“Authentication failed”, “Token expired”) occur when OAuth tokens expire or API keys are revoked. Fortunately, re-authentication is straightforward.
For cloud storage services (Dropbox, Google Drive, OneDrive, AWS S3):
- Go to Settings > UpdraftPlus Backups and scroll to the remote storage section (e.g., “Dropbox”, “Google Drive”)
- Click the “Authenticate” or “Re-authenticate” button next to your storage provider
- A popup window will appear asking you to log in to your cloud provider and grant UpdraftPlus access
- Authorize the permission request, then close the popup
- Return to the UpdraftPlus settings and confirm the authentication status shows “Connected”
- Click Save changes
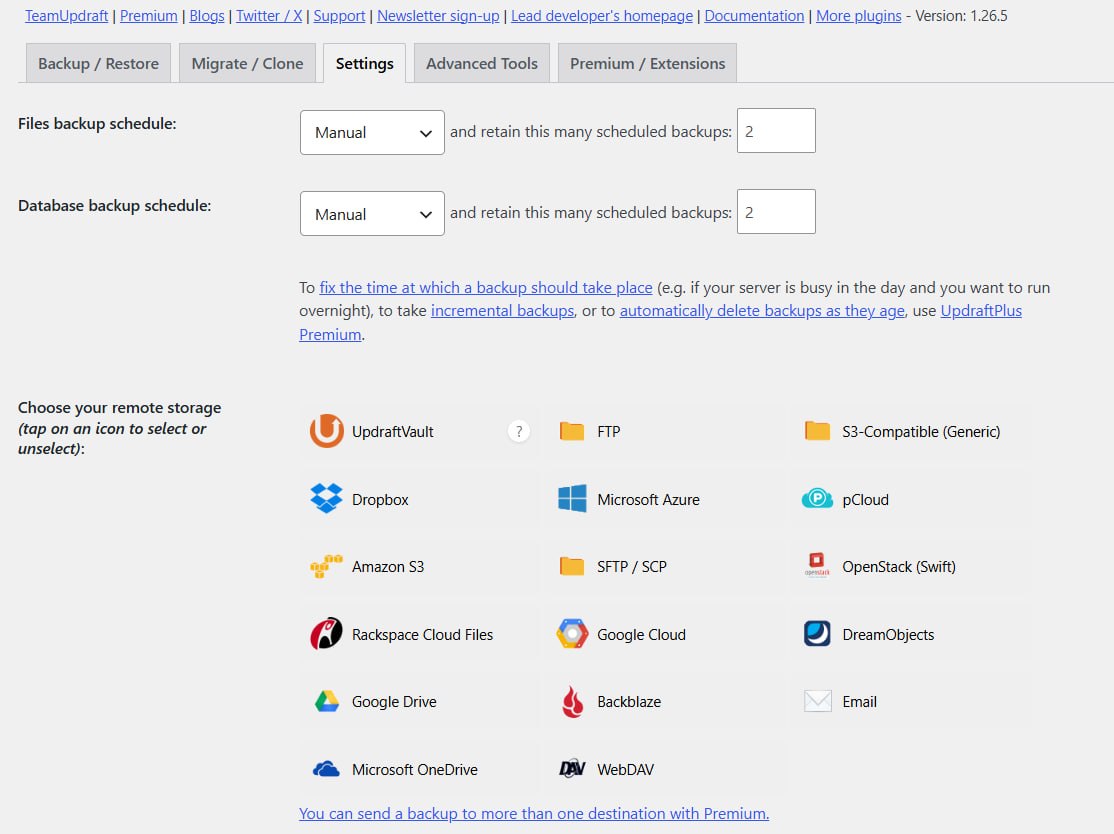
UpdraftPlus Settings — backup schedules and remote storage
Important: Ensure popup blockers in your browser are disabled, or the OAuth window will not appear.
Check server firewall settings:
If re-authentication still fails, your server firewall may be blocking outbound requests to the cloud API. Contact your hosting provider and ask them to whitelist outbound connections to:
*.dropboxapi.com(Dropbox)*.googleapis.com(Google)*.live.com(OneDrive)
Expected result: The remote storage shows a “Connected” status, and your next backup will successfully upload to the cloud.
Step 5: Perform a manual restore and check file permissions
If a standard restore fails, you can manually upload backup archives via FTP so UpdraftPlus can detect them.
Manual restore via FTP:
- Download your backup files (database dump and file archives) from your cloud storage provider or from a previous successful local backup
- Open an FTP client (FileZilla, WinSCP, etc.) and connect to your server
- Navigate to
/wp-content/updraft/directory - Upload the backup files (
.sql.gzfor database,.zipfiles for site files) into this directory - Return to WordPress admin and go to Settings > UpdraftPlus Backups
- Refresh the page—the uploaded backup should now appear in “Existing Backups”
- Click the Restore button next to the backup entry and follow the prompts
Check file and directory permissions:
If the restore fails with permission errors, your server’s file permissions may be too restrictive. Permissions should be:
- Directories:
755 - Files:
644
You can change these via FTP by right-clicking files/folders and selecting “File Permissions” or using the chmod command if your FTP client supports it. Alternatively, contact your hosting provider’s support team to adjust these permissions.
Expected result: The restore completes successfully, and your site is restored to the backup point without errors.
Step 6: Resolve database migration and charset errors
When restoring to a new server or different hosting provider, database collation and charset mismatches can cause failures. MySQL on the old server may have used a different character encoding than the new server.
Check database collation:
- In your new server’s hosting panel (cPanel, Plesk, etc.), open phpMyAdmin
- Select your WordPress database on the left sidebar
- Click the “Operations” tab at the top
- Look for “Collation” and note the current setting (usually
utf8mb4_unicode_ciorutf8_general_ci) - Ensure the target database user has full CREATE, ALTER, and DROP privileges in phpMyAdmin under “User accounts” > (select user) > “Edit Privileges”
During restore:
When you click the Restore button in UpdraftPlus, the plugin will display a dialog asking which components to restore (database, themes, plugins, uploads). Make sure the database component is checked, then proceed. If the restore fails, check your UpdraftPlus error log (Step 1) for specific MySQL errors and cross-reference them with your database collation.
Expected result: The database restores without collation or permission errors, and your site content is intact on the new server.
Step 7: Run a final test backup to confirm the fix
Once you’ve completed the troubleshooting steps above, verify the fix by running a manual backup.
Manual backup test:
- Go to Settings > UpdraftPlus Backups
- Click the “Backup Now” button in the top-right area
- A progress modal will appear showing real-time status: “Backing up database…”, “Backing up files…”, “Uploading to [Cloud Provider]…”
- Wait for the modal to close (this may take several minutes depending on site size)
- Refresh the page and check the “Existing Backups” section—a new backup should appear with today’s date
- Confirm the backup status shows a green checkmark or “Completed” label
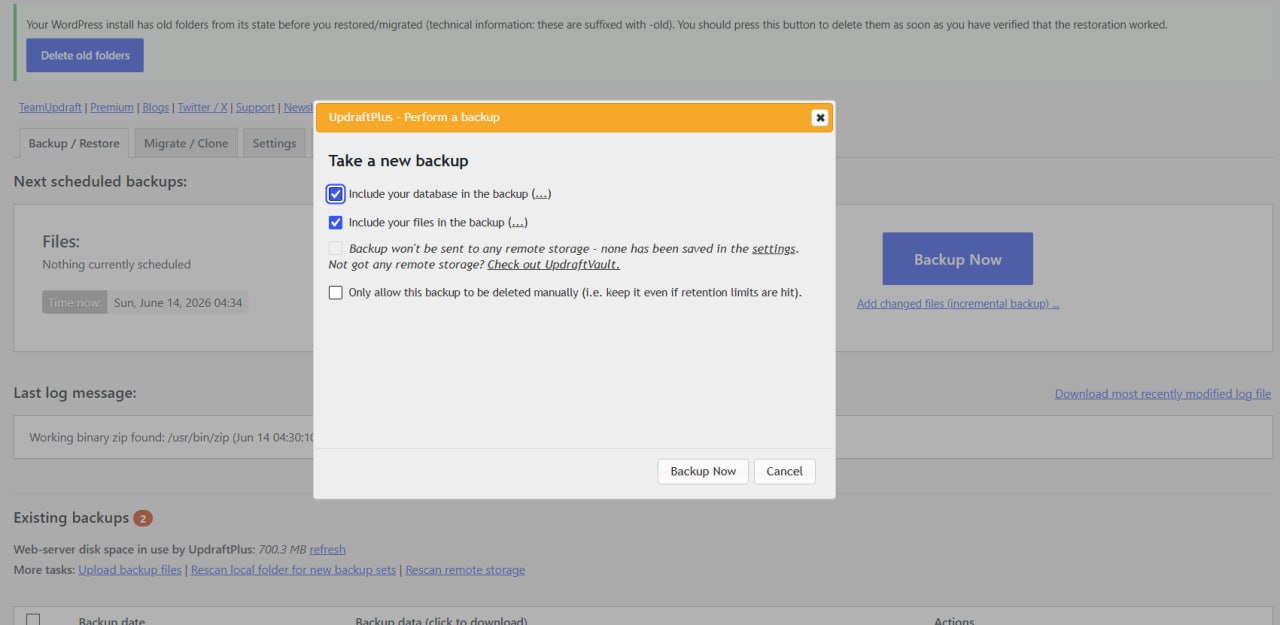
UpdraftPlus Backup Now confirmation dialog
Verify cloud sync:
If you configured cloud storage, log into your cloud provider (Dropbox, Google Drive, etc.) and confirm a new backup folder appeared with the current date.
Expected result: The backup completes without errors, and files appear in your cloud storage. No error messages in the UpdraftPlus log.
Common problems and fixes
- Scheduled backups are not running automatically
⚠️ Cause: WordPress cron (WP-Cron) is disabled in wp-config.php, so UpdraftPlus has no trigger to run scheduled backups.
🔧 Fix: Open wp-config.php and remove or set
define('DISABLE_WP_CRON', false);. Alternatively, set up a manual server-side cron job via your hosting control panel to triggerwp-cron.phpat regular intervals (e.g., every 6 hours). - Backup fails with “Memory limit exhausted” error
⚠️ Cause: The default PHP memory limit (usually 128MB or 256MB) is insufficient to compress large databases or file directories.
🔧 Fix: Edit wp-config.php and add
define('WP_MEMORY_LIMIT', '512M');to allocate more memory. If the error persists after refreshing the page, contact your hosting provider to increase the memory limit in php.ini, as they may cap wp-config overrides. - Cloud storage authentication fails with “Token expired” or “Invalid credentials”
⚠️ Cause: OAuth tokens from Dropbox, Google Drive, or OneDrive have expired, or the API app credentials are no longer valid.
🔧 Fix: Go to Settings > UpdraftPlus Backups, find the remote storage section (e.g., “Google Drive”), and click “Re-authenticate”. Log in to your cloud provider account again in the popup window, grant UpdraftPlus access, and save changes. Ensure popup blockers are disabled.
- Restore fails with permission or charset errors when moving to a new server
⚠️ Cause: The target database user lacks CREATE, ALTER, or DROP privileges, or the database collation differs between servers.
🔧 Fix: In your new server’s phpMyAdmin, verify the database user has full privileges via User Accounts. Also confirm the target database collation (Operations tab) matches the original, or ask your hosting provider to align them before restoring.
- Backup is smaller than expected or site files are missing
⚠️ Cause: Custom directories outside the standard WordPress structure are not included, or file exclusion rules are filtering out essential folders.
🔧 Fix: In UpdraftPlus Premium, navigate to Settings > UpdraftPlus Backups > “Files” > “More Files” and add any custom directories you want to include. Review the “Exclude” settings to ensure critical WordPress core folders (wp-content, wp-admin, wp-includes) are not accidentally excluded.
If you’re weighing UpdraftPlus against other options, our WordPress backup plugin comparison breaks down the alternatives.
Verification checklist
- Error log reviewed and specific failure point identified (database, files, or cloud sync)
- WordPress cron is enabled (DISABLE_WP_CRON not set to true, or manual cron job configured)
- File and database backup schedules are set to active intervals (not “Off”)
- PHP memory_limit set to at least 512M and max_execution_time set to at least 300 seconds
- Cloud storage is re-authenticated and shows “Connected” status
- Manual test backup completes successfully and appears in “Existing Backups”
- Remote cloud storage contains new backup files from the test backup
- Restore test passes without errors (optional but recommended for critical sites)
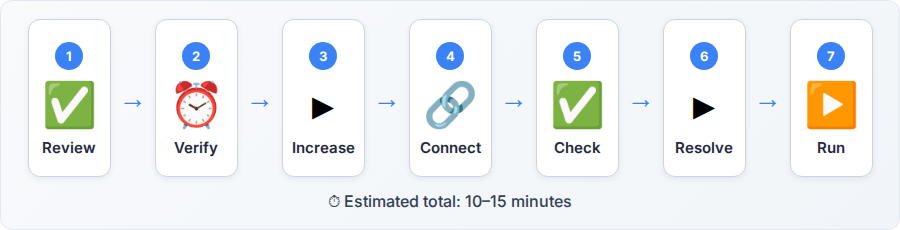
Recommended first 30-minute troubleshooting order
1. Review error log (2 minutes). Go to Settings > UpdraftPlus Backups and click “Review existing log” to identify the exact failure point. Write down any error codes or messages containing “Fatal”, “Memory”, “Timeout”, or “Authentication”.
2. Check disk space on hosting (2 minutes). Log into your hosting control panel (cPanel, Plesk) and verify that your account has free disk space available. If disk space is full, UpdraftPlus cannot create backup files. Delete old backups or contact your host if you need more storage.
3. Increase PHP memory and execution limits (5 minutes). Open wp-config.php via FTP and add `define(‘WP_MEMORY_LIMIT’, ‘512M’);` and `define(‘WP_MAX_EXECUTION_TIME’, 300);` just before “That’s all, stop editing!”. Save and wait 5–10 minutes for changes to take effect.
4. Verify WordPress cron status (5 minutes). Check wp-config.php for `define(‘DISABLE_WP_CRON’, true);`. If present, change `true` to `false` or remove the line. Then go to Settings > UpdraftPlus Backups and confirm both file and database schedules are set to active intervals.
5. Re-authenticate cloud storage (10 minutes). If using Dropbox, Google Drive, or AWS S3, click the “Re-authenticate” button in remote storage settings, grant access in the popup, and confirm the status shows “Connected”.
6. Test backup (5 minutes). Click “Backup Now” and monitor the progress modal until completion. Refresh the page and confirm a new backup appears in “Existing Backups” without errors.
Setup mistakes to avoid
Relying solely on local server backups. UpdraftPlus stores backups on your server by default, which defeats the purpose of a backup if your entire server fails or is compromised. Always configure at least one remote cloud storage destination (Dropbox, Google Drive, AWS S3) and verify files are uploading successfully.
Ignoring the “More Files” option. If you store custom data, themes, or plugins outside the default WordPress directories, they won’t be backed up unless you explicitly add them via Settings > UpdraftPlus Backups > “More Files” in Premium. This results in incomplete backups and failed restores.
Setting overly aggressive backup schedules on shared hosting. Scheduling hourly backups on a low-resource shared hosting account can overwhelm your server and cause performance issues for other site visitors. Start with daily or every-12-hours scheduling, and only increase frequency if your hosting provider confirms you have sufficient resources.
Storing API keys and OAuth tokens improperly. Never paste your cloud storage API keys into support forums, chat logs, or unencrypted emails. If you suspect an API key is compromised, revoke it immediately in your cloud provider’s settings and generate a new one, then re-authenticate UpdraftPlus.
When to consider a different approach
UpdraftPlus is an excellent backup solution for most WordPress sites, but it may not be the best fit for every scenario:
Scenario 1: Your site exceeds 10GB and backup times consistently exceed 2 hours.
Large sites sometimes struggle with UpdraftPlus’s file compression and cloud upload speeds, leading to frequent timeouts. In this case, consider server-level snapshots offered by your hosting provider (e.g., DigitalOcean Spaces, Kinsta snapshots) or managed backup solutions like BlogVault or BackWPup, which run on external servers and don’t consume your site’s resources.
Scenario 2: You manage complex multisite WordPress networks with dozens of subsites.
UpdraftPlus’s free version requires separate backup configurations for each subsite, which becomes cumbersome at scale. Enterprise-grade backup plugins like Snapshot or managed hosting backup tools may offer centralized multisite backup management. Review our software reviews for additional WordPress backup tool comparisons.
Scenario 3: Your hosting provider already includes automated backups in your plan (e.g., WP Engine, Kinsta, Flywheel).
If your managed host performs daily or hourly backups automatically, UpdraftPlus provides redundancy but may be unnecessary. However, if you need off-server backups for compliance or disaster recovery, UpdraftPlus to an external cloud storage still adds value.
Frequently asked questions
Q: Why are my backups not running on schedule, even though I’ve configured the schedule?
A: The most common cause is that WordPress cron (WP-Cron) is disabled in your wp-config.php file. Check for define('DISABLE_WP_CRON', true); and change it to false, or remove it entirely. If you prefer not to use WP-Cron, contact your hosting provider to set up a manual server cron job that visits your WordPress site every 6–12 hours to trigger wp-cron.php.
Q: Can I restore a backup if I can’t access my WordPress admin dashboard?
A: Yes. If your site is completely down or inaccessible, you can manually upload your backup files via FTP to the /wp-content/updraft/ directory, then restore them. First, use FTP to upload your .sql.gz database file and .zip files into the updraft folder. Once uploaded, access your site via a backup login method or staging environment to trigger the restore. Alternatively, if you’re locked out, contact your hosting provider’s support team for emergency restore assistance.
Q: What’s the difference between a “partial backup” and a “full backup”?
A: A full backup includes your entire database, all WordPress core files, themes, plugins, and uploads. A partial backup may exclude certain components—for example, if you manually exclude large cache folders or old post revisions. UpdraftPlus by default performs full backups unless you specifically enable exclusions in the settings. Partial backups are smaller and faster but may miss critical data if not configured carefully.
Q: How often should I schedule backups?
A: For blogs or informational sites updated infrequently, daily backups are sufficient. For ecommerce sites, membership sites, or high-traffic publications updated multiple times per day, schedule backups every 6–12 hours. The more frequently your site changes, the more often you should backup to minimize data loss risk.
Q: Can I migrate my site to a new server using UpdraftPlus backups?
A: Yes. Restore the backup on your new server using the same steps as a standard restore. However, check that the new server’s database user has full CREATE, ALTER, and DROP privileges, and ensure the database collation (character set) matches the original or is compatible. If the restore fails, review your error log for charset or permission mismatches (Step 6 above).
Q: Where is the UpdraftPlus log file stored?
A: The log is stored in your site’s /wp-content/updraft/ directory and can be accessed directly from the WordPress admin via Settings > UpdraftPlus Backups > “Review existing log” link. You can also download it for sharing with support using the “Download log for support” button.
Sources and notes
- TeamUpdraft — Fixing memory limit errors — PHP memory allocation and WP_MEMORY_LIMIT guidance
- TeamUpdraft — Backup troubleshooting guide — scheduled backup failures, partial uploads, SSL errors
- TeamUpdraft — Why isn’t my restoration completing? — restore failures, timeout, and server limits
- WordPress.org — UpdraftPlus support forum — community troubleshooting for common errors
- WordPress Codex — Editing wp-config.php — WP_MEMORY_LIMIT, DISABLE_WP_CRON, and server configuration
- WordPress Documentation — Best Practices for Restores — official backup and restore safety guidance
Disclaimer
This guide is for general informational purposes only and does not constitute professional accounting, tax, legal, or financial advice. Pricing, features, and plan details were verified against each product’s official website as of June 2026 and may change without notice. Always consult a qualified professional for advice specific to your business situation. PickrTech may earn a commission when you sign up through our links at no extra cost to you. Our recommendations are based on independent evaluation and are not influenced by compensation.
Last reviewed: June 2026 by the PickrTech editorial team.