This article contains affiliate links to UpdraftPlus. If you purchase through those links, PickrTech may earn a commission at no additional cost to you. This does not affect our editorial evaluation.
TL;DR: Most UpdraftPlus failures trace back to one of a few causes — a disabled WordPress cron, PHP memory or time limits, an expired cloud token, restrictive file permissions, or a database charset mismatch during migration. Read the backup log first to see which stage failed, jump straight to the matching symptom below, apply the fix, and confirm with a manual test backup. You do not need to work through every section.
Use this guide when an UpdraftPlus backup, restore, scheduled job, or cloud upload fails. It is organised by the symptom you are actually seeing rather than as a fixed sequence: read the log, match your failure to a section, apply the fix, and verify. If you have not configured UpdraftPlus yet, start with the setup guide. Once backups run cleanly, confirm they can actually be restored with the backup testing guide.
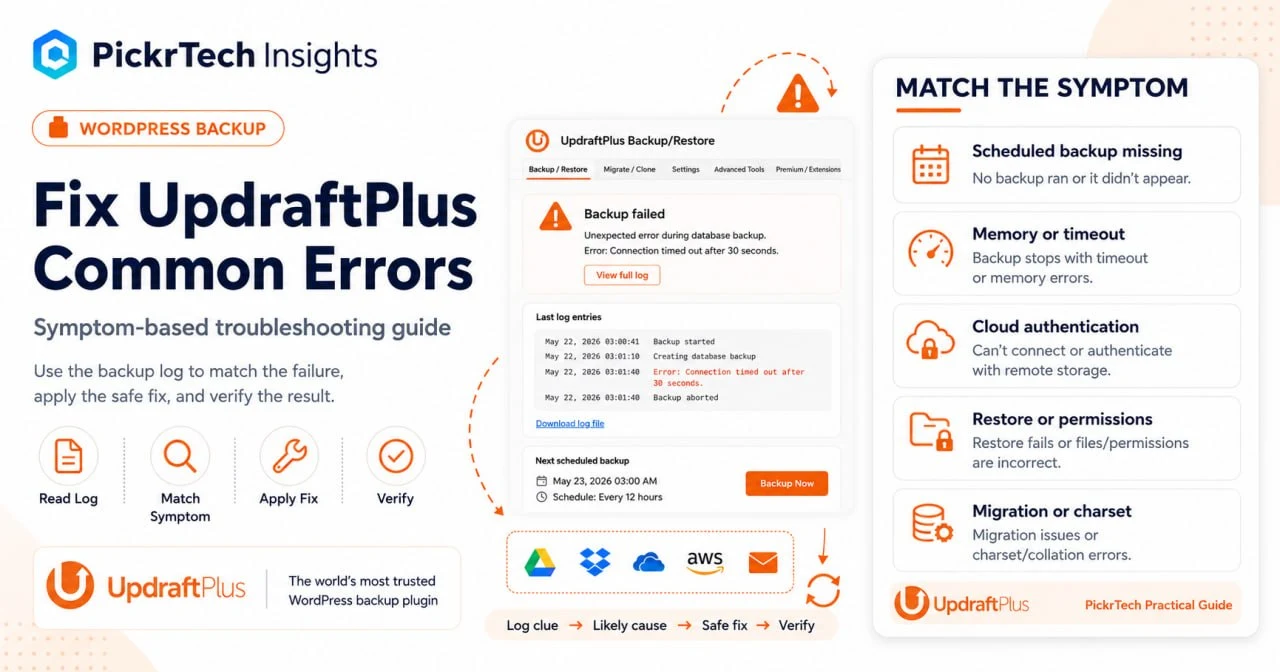
What you will need: admin access to the WordPress dashboard for every fix, and — for the server-level fixes — your hosting control panel or an FTP/SFTP client such as FileZilla. If you use cloud storage, have your provider login (or API/OAuth credentials) ready for re-authentication. Most fixes take 15–30 minutes and sit at a beginner-to-intermediate level.
Free vs Premium: diagnosis and nearly all fixes here work on the free version. A few features referenced below — the “More Files” backup option, multisite support, and incremental backups — require UpdraftPlus Premium, which starts at $70/year for Personal (2 sites); Business is $95/year (10 sites) and Agency is $145/year (35 sites), checked July 2026. If you are still deciding whether the plugin fits, our UpdraftPlus review covers what it does and whether it is worth it.
Start with the log: it tells you which fix you need
Before changing anything, read the UpdraftPlus log. It names the exact stage that failed — database dump, file compression, cloud upload, or restore — which is what points you to the right section below. This is the one step every reader should do first.
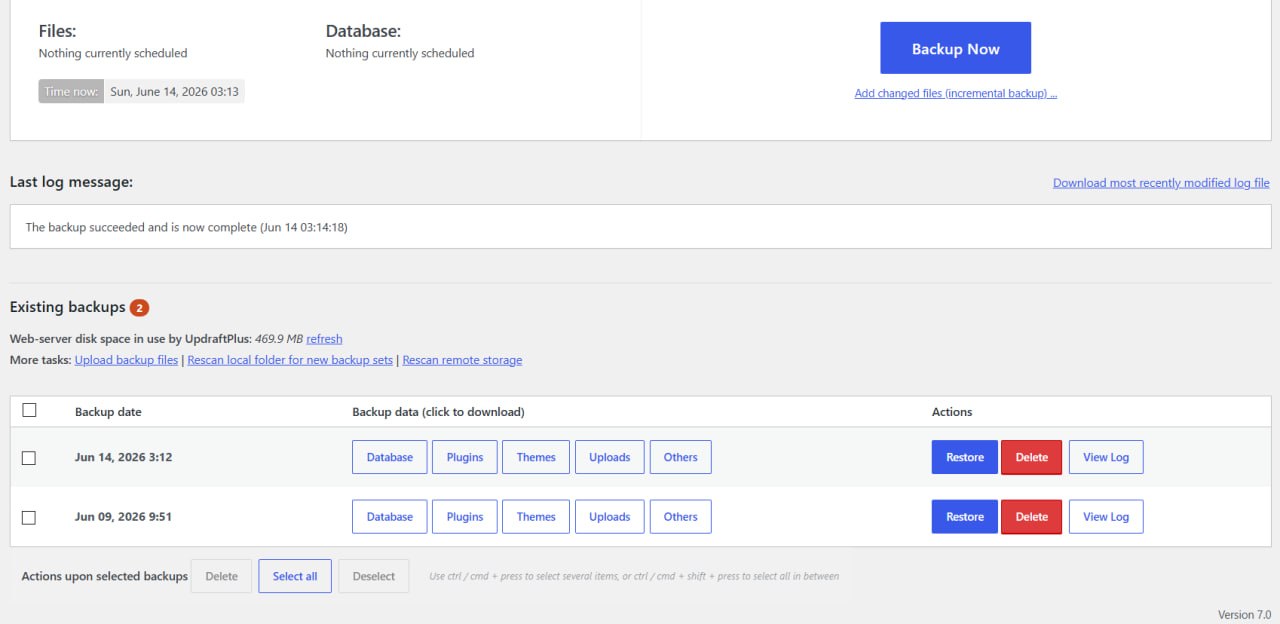
Go to Settings > UpdraftPlus Backups, scroll to Existing Backups, and open “Review existing log” (or use “Download log for support”). The log is stored in /wp-content/updraft/ if you need to reach it by FTP when the dashboard is unavailable.
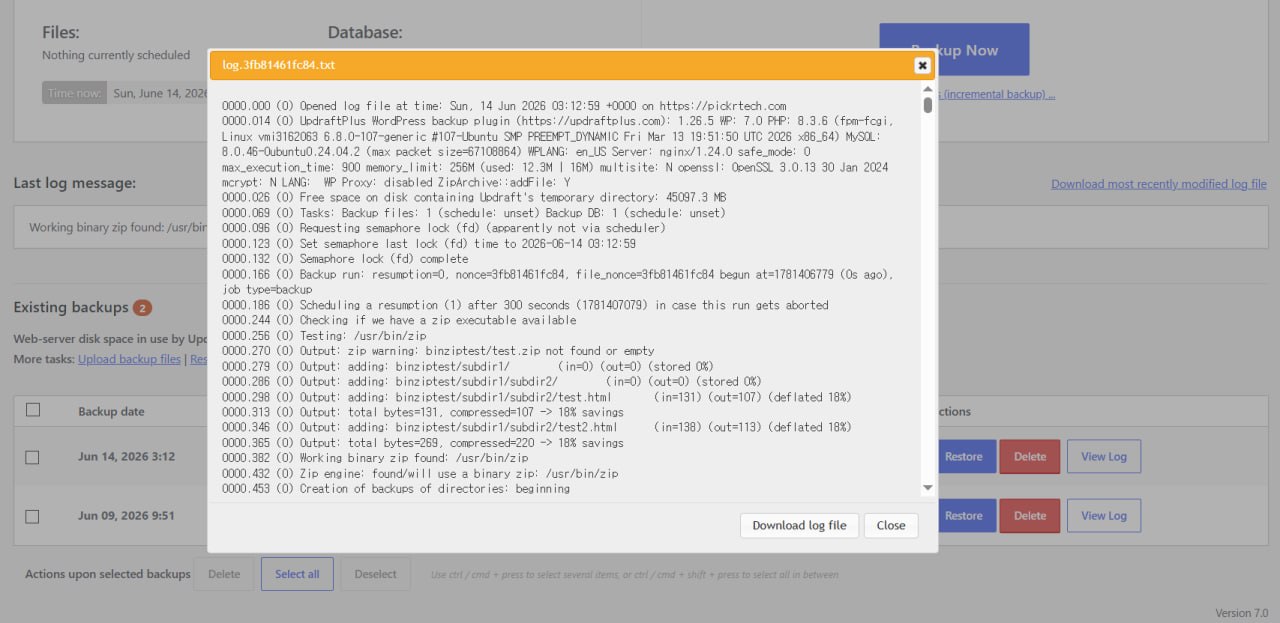
Search the log (Ctrl+F / Cmd+F) for wording such as “Fatal error”, “Allowed memory size”, “Connection timeout”, or “Authentication failed”, and note where the log stops. Then match that clue to one of the symptoms below.
Match your symptom to the fix
Pick the description that matches what you are seeing. Each fix ends with a way to confirm it worked.
- Manual backups work, but scheduled backups never appear
- The backup dies with “Allowed memory size exhausted” or stalls partway through
- Cloud storage reports “Authentication failed” or “Token expired”
- A backup set is missing, or a restore reports a permission error
- Restoring to a new host fails with a charset, collation, or permission error
- The backup finishes but is smaller than expected or missing files
Scheduled backups never run on their own
If “Backup Now” works but scheduled backups never show up, the cause is almost always WordPress cron (WP-Cron) being disabled or a schedule left on “Off” — not UpdraftPlus itself.
Log clue: scheduled runs simply do not appear in Existing Backups, and the log only records the manual runs you triggered. Likely cause: DISABLE_WP_CRON is set to true, the schedule is “Off”, or WP-Cron is not firing on a low-traffic site.
- Open
/wp-config.phpand look fordefine('DISABLE_WP_CRON', true);. Remove it or changetruetofalse— but only if no server-side cron job replaces it. Some hosts disable WP-Cron on purpose and run a real cron instead, so check with your host first. - In Settings > UpdraftPlus Backups, set both the “Files backup schedule” and “Database backup schedule” to a real interval (for example, “Every 12 hours”), then click Save changes.
- Install the free WP Crontrol plugin to confirm the UpdraftPlus
updraft_backuphooks are scheduled and due. It lets you run one manually to test.
Verify: new backup entries appear in Existing Backups at the scheduled times. One caution while you are here: on low-resource shared hosting, avoid hourly schedules — start with daily or every-12-hours so backups do not overload the server for other visitors.
The backup dies with “Allowed memory size exhausted” or times out
An “Allowed memory size exhausted” error means PHP reached its configured memory limit. A backup that only stalls or stops can also be caused by low disk space, an execution limit, or the host terminating a long-running request, so use the log to distinguish the failure before changing server settings.
Log clue: look for “Fatal error”, “Allowed memory size”, “Maximum execution time”, or a low-disk-space warning. Likely cause: PHP does not have enough memory for the current operation, the request is being stopped by a server limit, or the server cannot write the temporary archive.
- Check available disk space in your hosting control panel. If the account is full, delete unneeded local backup sets or ask the host to increase the quota before retrying.
- If the log specifically reports exhausted memory, open
/wp-config.phpand add the following lines before WordPress loadswp-settings.php. These are starting values rather than universal minimums.
define('WP_MEMORY_LIMIT', '256M');
define('WP_MAX_MEMORY_LIMIT', '384M');
WP_MAX_MEMORY_LIMIT matters for restore and migration work performed in the WordPress admin area. If the log still reports memory exhaustion and your host permits a higher limit, raise the affected value one step, such as to 512M. Do not choose 1024M solely because the total site is larger than 5GB; restore memory use can depend more on the largest archive entry and the memory already consumed by WordPress and its plugins.
If the log reports an execution timeout, use the PHP configuration tool provided by your host or ask support to raise max_execution_time. A five-minute value is a reasonable test setting:
max_execution_time = 300Only use an .htaccess override when your host confirms that its Apache or LiteSpeed PHP configuration accepts php_value directives:
php_value max_execution_time 300If adding that line causes a 500 error, remove it and use the control panel or hosting support instead. Changing max_input_time is not normally required for a backup that is already running; that directive controls how long PHP spends parsing incoming request data.
Verify: open Tools > Site Health > Info > Server and confirm that the host accepted the relevant PHP changes. Then run Backup Now and check that the new log reaches its completion lines without another memory or execution-time error.
Cloud storage reports “Authentication failed” or “Token expired”
An “Authentication failed” or “Token expired” message means the OAuth link to your cloud provider lapsed. Re-authenticate from the remote storage section and the upload resumes.
Log clue: the log reaches the upload stage and then stops with token, credential, or authentication wording. Likely cause: an expired OAuth token or revoked API key — or, less often, a server firewall blocking outbound API calls.
Two different causes, one symptom. A token that lapsed after months of working is the common case. The other is an authorisation that never completed in the first place — selecting a remote destination and saving settings is not the same as granting access. UpdraftPlus will show the destination as configured either way, so the settings screen cannot tell you which one you are looking at. The log can.
On a Google Drive destination that had been saved but never authorised, our own log repeated this line eight times across a single job:
Google Drive: ERROR: Have not yet obtained an access token from Google
(has the user authorised?) (Forbidden for
https://auth.updraftplus.com/auth/googledrive) (403)
The phrase has the user authorised? is the tell. If you see it, skip the token-refresh troubleshooting and complete the OAuth grant from scratch. A popup blocker silently stopping the authorisation window is the usual reason it never happened.
- Go to Settings > UpdraftPlus Backups and scroll to your remote storage section (for example, “Dropbox” or “Google Drive”).
- Click Authenticate or Re-authenticate, log in to your provider in the popup, and grant UpdraftPlus access. Disable popup blockers first, or the OAuth window will not appear.
- Confirm the status shows “Connected”, then click Save changes.
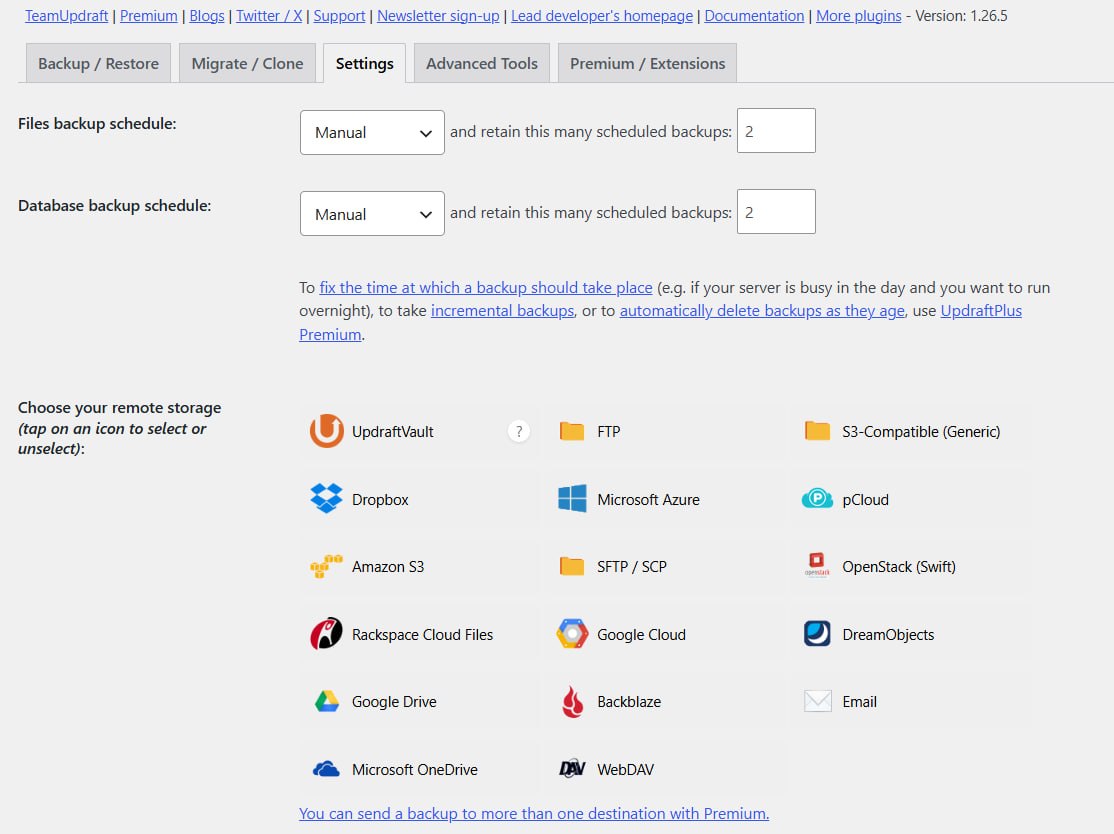
After re-authenticating, wait before you retry. A failed upload does not discard the backup. The archives were already built and stored on your server; only the transfer stopped. UpdraftPlus keeps the job alive and schedules a resumption, so once authorisation succeeds the pending files upload on their own.
In our case the job retried twice — roughly five and then seven minutes after the first failure — and completed on the third attempt, about twelve minutes after the initial 403, with no further action from us. Clicking Backup Now in the meantime would have discarded that progress and rebuilt every archive from scratch. Give the scheduled resumption ten to fifteen minutes before intervening.
One caution while uploads are failing: retention pruning does not pause. Our log shows local backup files being deleted on schedule during the same run in which every remote operation returned 403. If “Delete local backup” is enabled in expert settings and some sets upload while others do not, you can end up with sets scattered across locations rather than complete copies in either — fewer usable backups than your retention count implies. Confirm the remote destination is genuinely connected before trusting the retention setting to manage your copies.
If re-authentication still fails, the server firewall may be blocking outbound requests to the cloud API. Ask your host to allow outbound connections to:
*.dropboxapi.com(Dropbox)*.googleapis.com(Google Drive)login.microsoftonline.comandgraph.microsoft.com(OneDrive — UpdraftPlus connects through the Microsoft Graph API)
While you are handling credentials: never paste your cloud API keys or tokens into support forums, chat logs, or unencrypted email. If you suspect one is compromised, revoke it in your provider’s settings, generate a new one, and re-authenticate.
Verify: the remote storage connection succeeds or shows as connected, and the next backup creates new backup files in the configured provider. Storage providers do not all create a separate folder named with the current date.
UpdraftPlus cannot see the backup set, or restore reports permission errors
If a known-good backup set does not appear in Existing Backups, upload its archives to the UpdraftPlus directory and rescan the folder. This procedure addresses missing backup detection and some write-permission problems; it does not fix every restore failure, so follow the exact log message when it reports memory, timeout, archive-format, or security-module errors.
Log clue: the backup set is absent after upload, UpdraftPlus cannot read or write the backup directory, or the restore log explicitly reports a permission error. Likely cause: the archives are in the wrong directory, the local folder has not been rescanned, or the web-server user does not have the required ownership or permissions.
- Download your backup files — the
.sql.gzdatabase dump and the.zipfile archives — from cloud storage or a known-good local backup. - Open an FTP client (FileZilla, WinSCP), connect to your server, and navigate to
/wp-content/updraft/. - Upload the backup files into that directory.
- In Settings > UpdraftPlus Backups > Existing Backups, click Rescan local folder for new backup sets. The uploaded set should now appear.
- Click Restore next to it and follow the prompts.
Directories set to 755 and files set to 644 are common WordPress baselines, but correct ownership and hosting policy matter as much as the numeric mode. Do not recursively change permissions across the entire site without a current backup and confirmation from your host. Ask support to correct the ownership or permissions when you are unsure.
Verify: UpdraftPlus detects the uploaded archives, the restore completes without errors, and the site returns to the backup point.
Restoring to a new host fails with a charset, collation, or permission error
A restore that fails only when you move to a new host is almost always a database problem: the target database user lacks privileges, or the collation differs from the original server.
Log clue: MySQL errors during the database step — collation or charset mismatches, or CREATE/ALTER/DROP being denied.
- In the new host’s phpMyAdmin, select your WordPress database, open the Operations tab, and note the “Collation” (usually
utf8mb4_unicode_ciorutf8_general_ci). - Confirm the database user has full CREATE, ALTER, and DROP privileges under User accounts > Edit privileges.
- When you click Restore, make sure the database component is checked. If it fails, re-read the log (see the top of this guide) for the exact MySQL error and align the target collation with the original.
Verify: the database restores without collation or permission errors and your content is intact on the new server. (Whether the free version can migrate at all is covered in the FAQ below.)
The backup finishes but is smaller than expected or missing files
If a backup completes but is smaller than you expect — or a restore is missing files — custom directories outside the standard WordPress structure are being skipped, or an exclusion rule is filtering them out.
Likely cause: a standard backup covers the database and the site content in wp-content (plugins, themes, uploads). WordPress core files and wp-config.php are not included in the free version, and anything stored outside those paths must be added explicitly.
Fix: in UpdraftPlus Premium, go to Settings > UpdraftPlus Backups > Files > More Files and add any custom directories you need. Review the Exclude settings so critical folders are not accidentally filtered out. Verify: re-run the backup and confirm the archive size and contents match what you expect before relying on it for recovery.
Confirm the fix with a manual test backup
Whatever you changed, prove it with a manual backup before trusting the schedule again.
- Go to Settings > UpdraftPlus Backups and click Backup Now.
- Watch the progress modal (“Backing up database…”, “Backing up files…”, “Uploading to [Cloud Provider]…”) until it closes. This can take several minutes on larger sites.
- Refresh the page and confirm that a new backup row with the current timestamp and the expected database and file components appears in Existing Backups. Open its log and confirm that the job completed without a new error.
- If you use remote storage, open the provider and confirm that new UpdraftPlus backup files were uploaded.
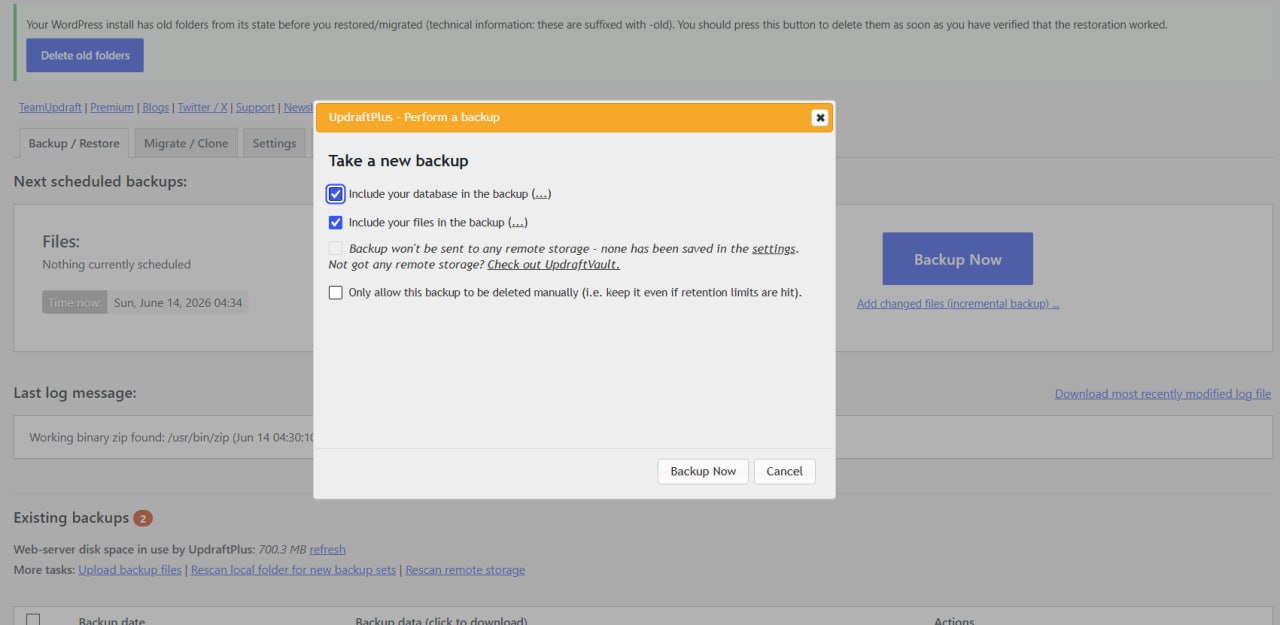
One habit worth keeping: UpdraftPlus stores backups on your own server by default, which defeats the purpose if that server fails or is compromised. Always keep at least one remote destination (Dropbox, Google Drive, AWS S3) and confirm files actually land there.
Use this short checklist to confirm the environment is healthy:
- Log reviewed and the specific failure point identified (database, files, or cloud sync)
- WordPress cron enabled, or a manual server-side cron job configured
- File and database schedules set to active intervals (not “Off”)
- PHP limits checked against the actual log; any memory or execution changes are accepted by the host and confirmed in Site Health
- Cloud storage re-authenticated and showing “Connected”
- Manual test backup completes and appears in Existing Backups, with a copy in remote storage
- Backup report email actually arrives — a silently failing mail function is how a site runs broken backups for months without anyone noticing
- Restore test passes without errors (recommended for business-critical sites)
For the last item, run a full isolated restore using the WordPress backup testing guide rather than assuming a completed backup is a recoverable one.
When UpdraftPlus is not the right backup approach
UpdraftPlus fits most WordPress sites, but if it keeps failing in your environment, the problem may be the approach rather than the settings.
Your site exceeds 10GB and backups routinely run past two hours. Large sites can hit repeated timeouts on compression and upload. Consider server-level snapshots from your host (DigitalOcean snapshots, Kinsta backups) or off-server services such as BlogVault or Jetpack VaultPress Backup, which run incremental backups on their own infrastructure so your site’s resources are not consumed. UpdraftPlus Premium also supports incremental backups if you would rather stay with the plugin.
You manage complex multisite networks with dozens of subsites. Multisite support requires Premium, and per-subsite management becomes cumbersome at scale. Tools such as WPMU DEV Snapshot or managed-hosting backup systems may offer more centralised control. The WordPress backup plugin comparison weighs the alternatives.
Your host already includes automated backups (WP Engine, Kinsta, Flywheel). If the host backs up daily or hourly, UpdraftPlus adds redundancy but may be optional — though sending an independent copy to external cloud storage is still worthwhile for compliance or disaster recovery.
Frequently asked questions about UpdraftPlus errors
Can I restore an UpdraftPlus backup without access to WordPress admin?
Not through the normal UpdraftPlus restore interface if you have no WordPress admin access anywhere. You can upload the backup archives by FTP into /wp-content/updraft/, but an accessible WordPress installation with UpdraftPlus is still needed to rescan the folder and launch the restore. If the original dashboard is unavailable, use a fresh or staging WordPress installation as the restore destination, ask your host to restore the site, or perform a true manual recovery of the files and database outside the plugin.
What is the difference between a partial and a complete UpdraftPlus backup?
A complete standard backup includes your database and the site-specific content in wp-content — plugins, themes, uploads, and any included directories. WordPress core files and wp-config.php are not included in the free version; backing those up requires Premium’s “More Files” feature. A partial backup omits one or more standard components or applies extra exclusion rules, so always confirm exactly what a backup set contains before relying on it for recovery.
How often should I schedule UpdraftPlus backups?
For blogs or informational sites that change infrequently, daily backups are enough. For ecommerce, membership, or high-traffic sites updated several times a day, schedule every 6–12 hours. The more often your content changes, the more frequently you should back up to limit potential data loss.
Can I migrate a WordPress site to a new server with the free version?
Yes. The free version can migrate a site by downloading the backup from the source, uploading it to the destination, and restoring there; its migration workflow also runs a search-and-replace for the old site location. Premium adds a more direct site-to-site migration flow and other conveniences. On the new server, confirm the database user has the required privileges and check the log if the restore reports charset or permission errors.
Next steps
- If your settings are incomplete, review the UpdraftPlus setup guide.
- If backups complete successfully, run a restore test with the WordPress backup testing guide.
- If UpdraftPlus keeps failing in your hosting environment, compare alternatives in the WordPress backup plugin comparison.
Sources and notes
- TeamUpdraft — Fixing memory limit errors — PHP memory allocation and WP_MEMORY_LIMIT guidance
- TeamUpdraft — Backup troubleshooting guide — scheduled backup failures, partial uploads, SSL errors
- TeamUpdraft — Why isn’t my restoration completing? — restore failures, timeout, and server limits
- TeamUpdraft — UpdraftPlus Premium pricing — plan tiers and pricing, checked July 2026
- WordPress.org — UpdraftPlus support forum — community troubleshooting for common errors
- WordPress Developer Resources — Editing wp-config.php — WP_MEMORY_LIMIT, DISABLE_WP_CRON, and server configuration
- WordPress Documentation — WordPress Backups — official backup and restore safety guidance
- Authentication failure behaviour, resumption timing, and retention interaction were observed in UpdraftPlus backup logs on pickrtech.com dated 18 July 2026 (UpdraftPlus 1.26.5, WordPress 7.0.2, PHP 8.3.6).
Disclaimer
This guide is for general informational purposes only and does not constitute professional advice. Pricing, features, and plan details were verified against each product’s official website as of July 2026 and may change without notice.
Last reviewed: July 2026 by the PickrTech editorial team.