This article may contain affiliate links. We may earn a commission when you sign up through our links — at no extra cost to you. Our recommendations are based on independent evaluation and are not influenced by commissions.
Mailchimp setup guide — step-by-step for small business 2026
TL;DR: Set up Mailchimp in under 30 minutes by creating an account, importing your contact list, designing a welcome email, and adding a signup form to your website. The three essential first steps are account creation → audience setup → welcome automation.
Before you begin: What you’ll need
- A business email address (Gmail, Outlook, or your domain email)
- Your business name and physical address
- An existing contact list in CSV or spreadsheet format (optional but recommended)
- Access to your website’s DNS settings if you plan to verify a custom sending domain
- Your business logo file (JPG or PNG, ideally under 2 MB)
- Estimated setup time: 30 minutes for core setup
- Difficulty: Beginner
- Cost: Free tier available (up to 500 contacts and 1,000 emails per month)
Mailchimp’s free plan covers most small business needs during the initial setup phase. You’ll only upgrade when your contact list grows beyond 500 subscribers or you need advanced features like paid ads integration.
Step-by-step walkthrough
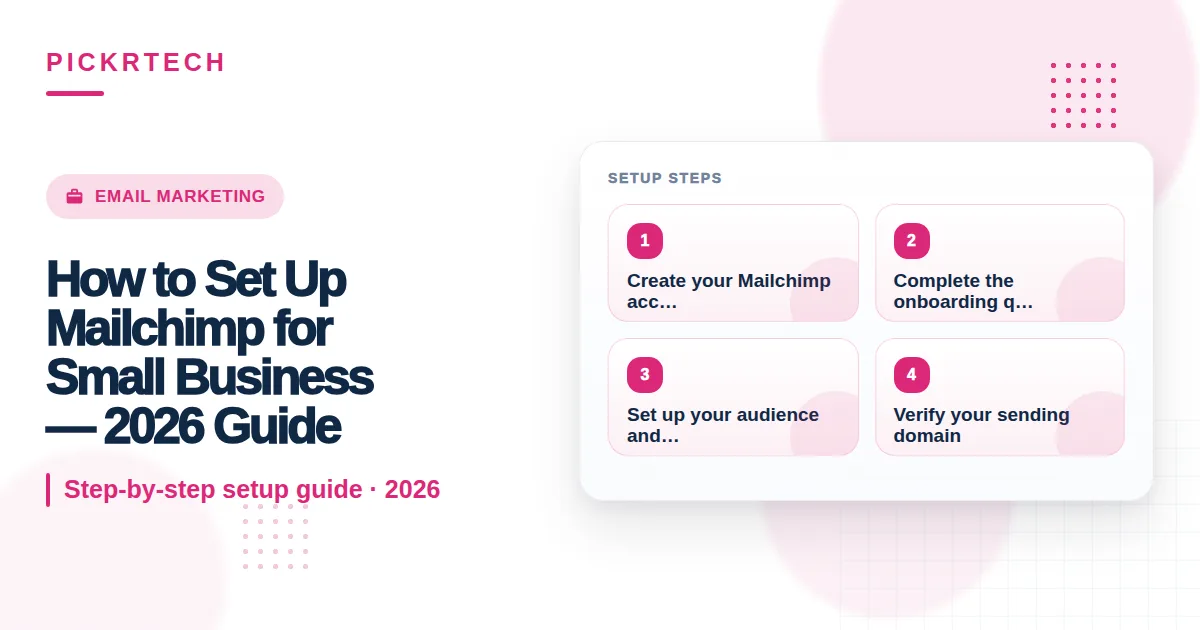
Step 1: Create your Mailchimp account
Go to mailchimp.com and click the “Sign Up Free” button at the top right of the homepage. Enter your email address, create a username, and set a strong password. Mailchimp will send a verification email to the address you provided—check your inbox and spam folder, then click the verification link.
Once you click the verification link, you’ll be taken back to Mailchimp and prompted to set up your account. You should now see the Mailchimp dashboard with a welcome message.
Expected result: You’re logged into your Mailchimp dashboard and see the main navigation menu on the left side. 💡 Pro tip: Use your business email address rather than a personal one so multiple team members can recover the account if needed.
Step 2: Complete the onboarding questionnaire
Mailchimp will ask a few quick questions: your business name, physical street address, industry category, and what you plan to do with email marketing (e.g., send newsletters, promote sales, share updates). Select the option that best matches your primary use case.
This questionnaire helps Mailchimp personalize your dashboard and recommend relevant features. Your physical address is required by CAN-SPAM and GDPR regulations—this is non-negotiable, so enter your actual business location.
Expected result: Your account now displays a customized dashboard with setup recommendations and quick-start links relevant to your industry. The left-hand menu should show “Audience,” “Campaigns,” “Automations,” and other core sections.
Step 3: Set up your audience and import contacts
Click “Audience” in the left navigation menu, then select “Audience dashboard.” You’ll see an “Add Contacts” button. Click it and choose “Import Contacts” if you have an existing subscriber list, or “Add a Contact” if you’re starting fresh.
If importing, download or prepare a CSV file with columns for email, first name, and last name. Mailchimp will map these fields automatically. Avoid importing email addresses without permission—only import contacts who have opted in to receive emails from you. After upload, Mailchimp will confirm how many contacts were added and flag any duplicates or invalid emails.
Set your default merge tags (FNAME for first name, LNAME for last name) so you can personalize emails later. Go to “Audience” > “Audience settings” > “Merge tags” to confirm these are configured.
Expected result: Your audience dashboard shows a contact count (e.g., “250 subscribed”). You can see individual subscriber records and have the ability to segment or tag contacts.
Step 4: Verify your sending domain
Click “Content” in the left menu, then “Domains.” Enter your custom domain (e.g., mail.yourcompany.com or info.yourcompany.com). Mailchimp will display DNS records (CNAME and TXT records) that you need to add to your domain provider’s DNS settings.
Log into your domain host (GoDaddy, Namecheap, your web hosting provider, etc.) and find the DNS or CNAME management section. Add the records Mailchimp provides. DNS changes can take 24–48 hours to propagate, so don’t panic if verification fails immediately.
Return to Mailchimp’s Domain page and click “Verify” once the DNS changes have been applied. Mailchimp will check your DNS records and confirm when verification is complete.
Expected result: Your domain shows a green checkmark or “Verified” status. Emails sent from this domain will pass authentication checks and land in inboxes rather than spam folders. If you skip this step, Mailchimp will use a default domain, and deliverability may suffer.
Step 5: Design your first email template
Go to “Content” > “Email Templates” and click “Create Template.” Choose a layout that matches your brand (single column, two-column, or blank). Select one of Mailchimp’s pre-built templates or start with a blank canvas.
Add your business logo by uploading an image, then adjust the header color, text, and footer. Include your business name, physical address, and a way for subscribers to unsubscribe—these are legally required. Add placeholders for |FNAME| (first name) so emails feel personal.
Save the template with a descriptive name like “Newsletter Standard” or “Promotional Email.” You’ll reuse this template for most campaigns, saving time later.
Expected result: Your template appears in the template library with a preview thumbnail. When you create a new campaign, you can select this template from your saved options. 💡 Pro tip: Keep your template simple—plain text with clear calls-to-action converts better than overly designed layouts.
Step 6: Create and send a welcome email
Go to “Automations” and select “Welcome new subscribers.” This automation triggers when someone joins your list. Click “Create” and select your template from Step 5. Write a short welcome message (2-3 sentences) that thanks subscribers and sets expectations for future emails.
Choose when to send the email (immediately or after a delay like 1 hour). Set a “From” name (your business name, not a generic address) and preview the email to check for typos. Click “Start Automation” to activate it.
Expected result: A welcome email will be sent to every new subscriber automatically. Test by subscribing to your own list with a secondary email address and confirm the welcome message arrives in your inbox within the timeframe you set.
Step 7: Build a signup form
Go to “Audience” > “Signup Forms” and click “Create a Form.” Choose between a pop-up form or an embedded form for your website. Select a design or keep it simple, then decide which fields are required (typically just email, but you can add first name).
Customize the button text and confirmation message. Copy the signup link or embed code—Mailchimp provides an HTML snippet you can paste into your website. Test the form by submitting a test email and verify a new contact appears in your audience within a few seconds.
Expected result: A working signup form on your website that adds new contacts to your Mailchimp list. Subscribers should see a confirmation message after submitting, and you should see them appear in your Audience dashboard within seconds.
Common problems and fixes
- Verification email not received
⚠️ Cause: Email went to spam folder or typo in address
🔧 Fix: Check spam/promotions folder; delete account and sign up again with correct email - Domain verification fails
⚠️ Cause: DNS records not added correctly or propagation time incomplete
🔧 Fix: Check DNS settings match Mailchimp’s requirements exactly; wait 24–48 hours and retry; contact your domain host for help - Imported contacts marked as “unsubscribed”
⚠️ Cause: Contacts didn’t explicitly opt in to your emails
🔧 Fix: Only import contacts with confirmed permission; use double opt-in for future signups - Welcome email not sending
⚠️ Cause: Automation not activated or email not tested
🔧 Fix: Return to Automations, confirm status shows “Active,” and test by adding a new contact - Signup form not appearing on website
⚠️ Cause: Embed code not pasted correctly or JavaScript blocked
🔧 Fix: Verify embed code is in correct location; check browser console for JavaScript errors; try pop-up form instead - Campaign stuck in review
⚠️ Cause: Content flagged by Mailchimp’s compliance system
🔧 Fix: Avoid spam trigger words; include clear unsubscribe link and address; check that contacts opted in
Verification checklist
- ✅ Account created and verified via email link
- ✅ At least one contact imported or added to your audience
- ✅ Welcome automation activated and tested with a secondary email address
- ✅ Signup form created and working on your website (or link copied)
- ✅ Email template designed with your logo and brand colors
- ✅ Sending domain verified (or using default Mailchimp domain temporarily)
- ✅ From address set to your business name, not a generic email
- ✅ Unsubscribe link visible in all emails
When to consider a different approach
Mailchimp works well for most small businesses sending newsletters and promotional emails. However, consider alternatives if you need:
- Advanced CRM features: If you want to track customer interactions, manage sales pipelines, or integrate with your accounting software, HubSpot or Pipedrive may be better fits.
- Transactional emails: If you need to send order confirmations, password resets, or shipping notifications automatically, consider SendGrid or AWS SES alongside Mailchimp.
- Complex automation workflows: If you need advanced branching logic based on customer behavior (e.g., “if they click link A, send campaign X; if link B, send campaign Y”), look at ConvertKit, ActiveCampaign, or Klaviyo.
For comparisons of these tools and when to use each, see our email marketing platform comparison guide for options that align with your specific business needs.
Frequently asked questions
Q: Is Mailchimp truly free, or will I be charged later?
A: Mailchimp’s free tier is genuinely free and has no expiration date. You can send up to 1,000 emails per month to up to 500 contacts at no cost. When you grow beyond these limits, you’ll be offered a paid plan. You control when (or if) you upgrade.
Q: Can I use a Gmail address as my “From” address?
A: You can use a Gmail address, but it’s not recommended for small business. Emails are more likely to reach inboxes if you use a professional domain (yourname@yourbusiness.com). If you don’t have a custom domain yet, you can set up one later and update your sender address.
Q: What’s the difference between an automation and a campaign?
A: A campaign is a one-time email you send to your audience. An automation is a triggered series of emails sent based on an action—for example, a welcome email sent automatically when someone joins your list, or a follow-up sent if someone clicks a link. Automations run continuously; campaigns are manual, one-off sends.
Q: Do I need to verify my domain to send emails?
A: Not immediately. Mailchimp assigns you a default sending domain, and emails will work fine. However, verifying your own domain improves deliverability and looks more professional. We recommend doing it within the first week, but it’s not a blocker for starting your first campaign.
Q: How do I know if my contacts have truly opted in?
A: Mailchimp requires you to confirm you have permission to email each contact. If you’re importing a list, you should have explicit written consent (a signup form, email request, or purchase confirmation). Use Mailchimp’s double opt-in feature (send a confirmation email and require subscribers to click a link) if you’re unsure about consent.
Recommended first 30-minute setup order
If you’re short on time, prioritize in this order:
- Create account and verify email (5 minutes) — This is the hardblock. Everything else requires a verified account.
- Set up audience and import contacts (10 minutes) — You need subscribers before you can send anything. A simple import beats manual entry.
- Create welcome automation (8 minutes) — Set up a single welcome email and activate it. This runs on its own and builds credibility with new subscribers.
- Build signup form (7 minutes) — Add the form to your website so new contacts can subscribe.
Defer domain verification, custom templates, and campaign creation until you’ve completed these four steps. You can send an effective welcome email with a basic template and verify your domain later—both improve results but aren’t required to launch.
Setup mistakes to avoid
- Importing contacts without permission. Only import email addresses from people who explicitly opted in. Using purchased lists or importing old customer emails without consent violates CAN-SPAM law and Mailchimp’s terms of service.
- Using a free email address as your “From” address. Emails sent from gmail@gmail.com or yourname@yahoo.com look unprofessional and are more likely to land in spam. Use your business domain or at minimum add a business name to your sender profile.
- Skipping the physical address requirement. CAN-SPAM law requires your physical business address in every email. Mailchimp enforces this during account setup. Not including it can result in account suspension.
- Neglecting to add an unsubscribe link. Every email must include a clear, working unsubscribe link by law. Mailchimp adds this automatically, but verify it’s visible in your template before sending campaigns.
Sources and notes
- Mailchimp official homepage — used to verify account creation, pricing tiers, and core features
- Mailchimp support documentation — used to confirm domain verification steps, automation setup, and common troubleshooting
- This guide is for general setup education and is not tax, accounting, or legal advice. Always verify CAN-SPAM and GDPR compliance requirements with a legal professional for your jurisdiction.
Last reviewed: May 2026 by the PickrTech editorial team. We use public sources only unless otherwise stated. Product names, pricing, features, and plan details may change over time — verify current details on official websites before making decisions.