TL;DR: Most first-store delays are not build problems. They are missing-data problems — a product file that will not import, a payout name that does not match the business registration, a package weight nobody measured. Work through the six preparation areas below, fill in the workbook, and clear the twelve-point readiness check before you create an account. Using US list pricing, a standard twelve-month term costs about $364 on annual billing or $484 on monthly billing, including an illustrative $16 domain budget.
Start with the workbook, not the builder
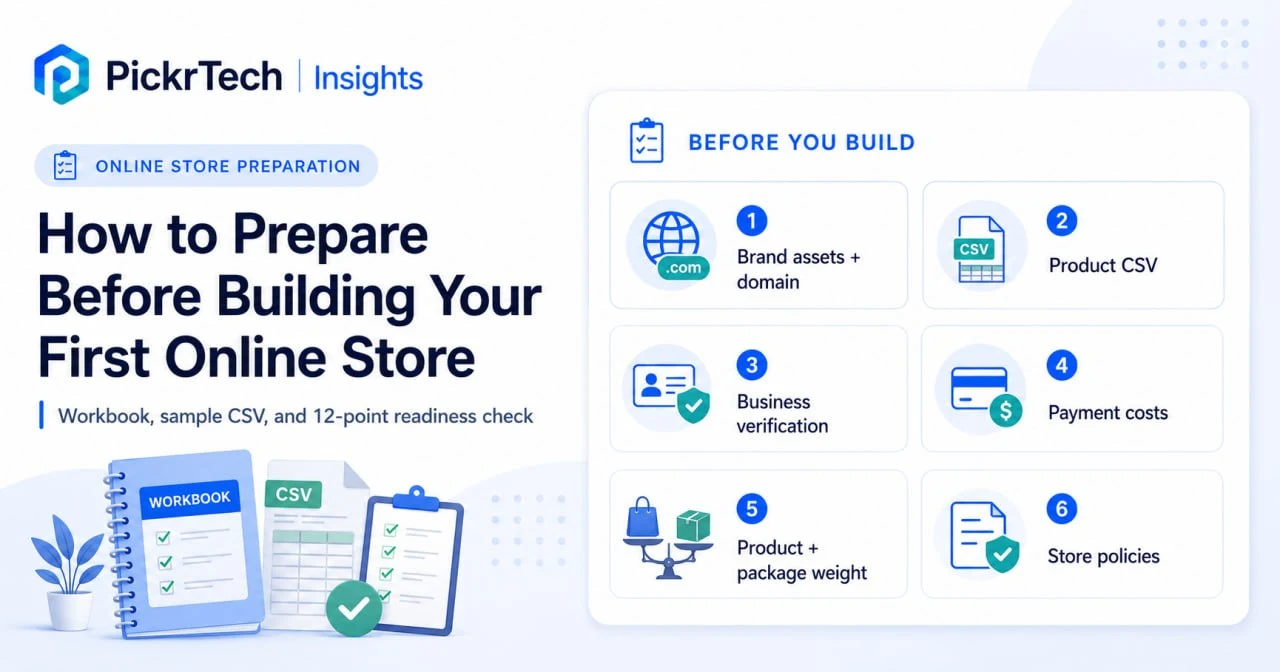
Preparation goes wrong when it has no finish line. “Gather your product data” is not a task you can complete — you either have a file that imports or you do not. So the artifact comes first and the reading second.
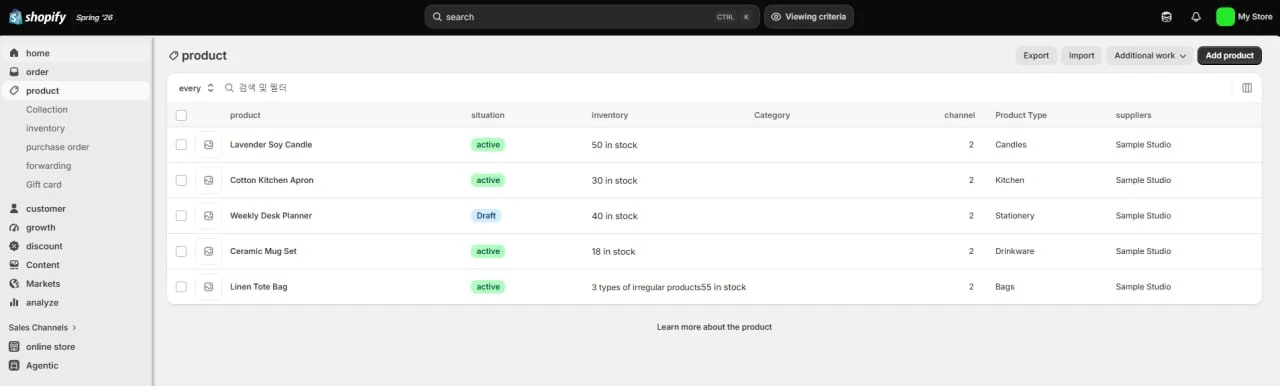
The workbook below is built on a real Shopify product export pulled in July 2026, so the columns are the ones your store will actually ask for. We imported the sample file into a live store to confirm it works before publishing it. That import produced five products and seven SKUs, and the one problem it surfaced along the way is documented in Step 2.
- Online Store Launch Prep Workbook (.xlsx) — product template, a guide to all 43 columns, shipping prep, policy drafts, and the twelve-point readiness check
- Product CSV template, blank (.csv) — headers only
- Product CSV template, filled (.csv) — five worked examples including a three-variant product
Preparation takes most people two to four hours. The build itself, once the workbook is complete, is closer to an hour.
Step 1: Lock your brand assets and domain before anything else
Two files and two hex codes. That is the whole deliverable for this step, and it is the one people most often improvise inside the theme editor.
Export your logo as a PNG with a transparent background, then open the file and confirm the background is genuinely transparent rather than white. Theme editors place the logo over a colored header bar, and a white rectangle behind it is visible on the live storefront in a way it is not in your design tool. Write your primary and secondary brand colors down as hex values — theme settings ask for #2F4F4F, not a screenshot of your palette.
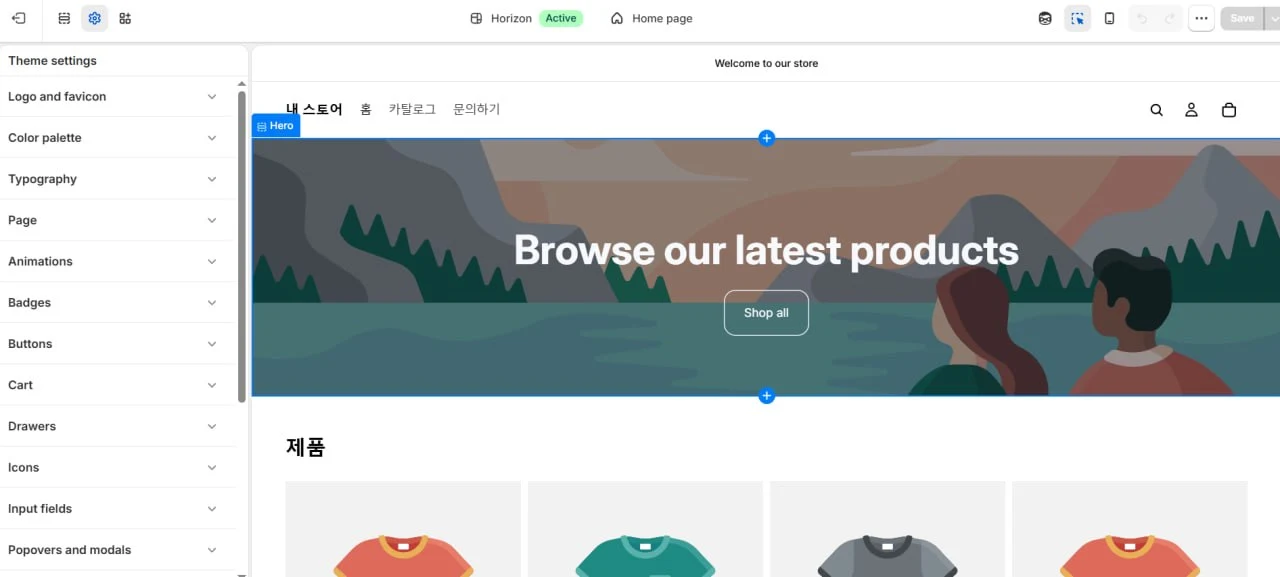
Decide the exact domain string now. Changing a custom domain after launch means redirects, broken links in printed material, and a period of split search authority — it is the one preparation decision that is genuinely expensive to reverse. A .com bought inside Shopify runs about $16 per year with SSL and WHOIS privacy included; a third-party registrar is typically $10 to $20 and adds a DNS step you will have to do yourself.
Step 2: Build a product file that actually imports
This is where preparation pays for itself, and it is the step with the most ways to fail quietly. Shopify’s importer accepts a file with only the Title column filled, but a minimal file produces minimal listings, and you will spend the time later instead.
A live export in July 2026 returned 44 columns. One of those was a store-specific metafield column, so the template above carries 43. Expect your own export to differ slightly — column count varies by store, which is a good reason to export once from your own account and compare before trusting any template, including this one.
The Handle column is what turns rows into variants
One product with three color options is not one row. It is three rows sharing a Handle, and this trips up more first imports than any other rule.

On the second and subsequent rows, leave Title, Body (HTML), Vendor, Type, Tags, Published, Option1 Name, Gift Card and Status blank. Fill only the Handle and the variant columns. Those blanks look like mistakes in a spreadsheet and are exactly what the importer expects.
Products with no options need a different marker: set Option1 Name to the literal word Title and Option1 Value to the literal phrase Default Title. That pair is how Shopify records “this product has no variants,” and it is what appears in a real export.
Three columns that behave differently than they read
- Variant Grams is always grams. It does not change when you set Variant Weight Unit to
lboroz. The unit column controls display only. Entering 8 in Variant Grams because your product weighs 8 ounces produces an 8-gram product and shipping rates to match. - Variant Price takes a bare number. No currency symbol, no thousands separator. Your store’s currency setting decides how it displays, which is why the same file produces $29 in a US store and a different symbol elsewhere.
- Variant Compare At Price should be blank, not zero, when there is no strikethrough price. A zero renders as a $0 compare-at on the product page.
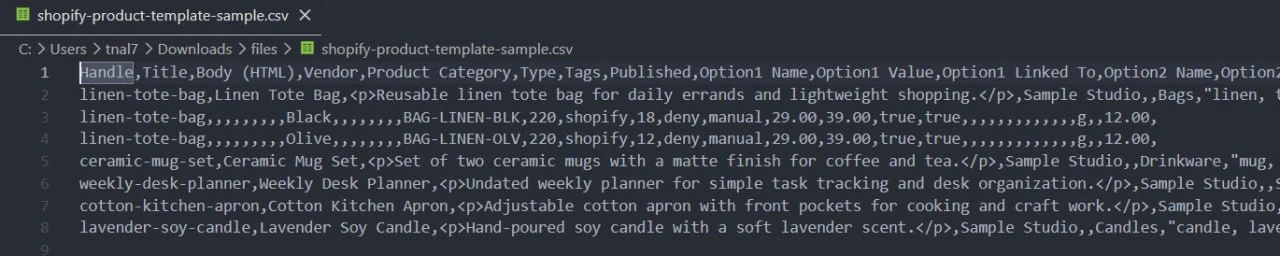
Save it as CSV, then open it in a text editor
Shopify requires UTF-8 encoding with LF-style linefeeds and caps product CSV files at 15 MB. Spreadsheet applications can alter encoding, separators, quoting, or the header row when saving, so open the finished CSV in a plain text editor before importing it.
Two import failures and what actually causes them
The category warning below was observed during the live import. The image-URL failure guidance follows Shopify’s current product CSV documentation.
An unreachable image URL — the import fails. Product image URLs must be publicly accessible direct links. A local file path, password-protected URL, or unreachable placeholder can stop the import. If your images exist only on your computer, upload them to Shopify Content > Files or another HTTPS-accessible host and paste each generated URL into the correct CSV row. Otherwise, leave the image columns blank and add images to the products after import.
An invalid product category — the import succeeds anyway. This is the more dangerous of the two, because nothing breaks. Product Category only accepts an exact path from Shopify’s own taxonomy, down to the leaf node. A plausible near-miss like Apparel & Accessories > Handbags, Wallets & Cases produces a warning, imports the products, and silently leaves the category field empty. You find out months later, when a tax setting or a sales channel needs a category that was never set.
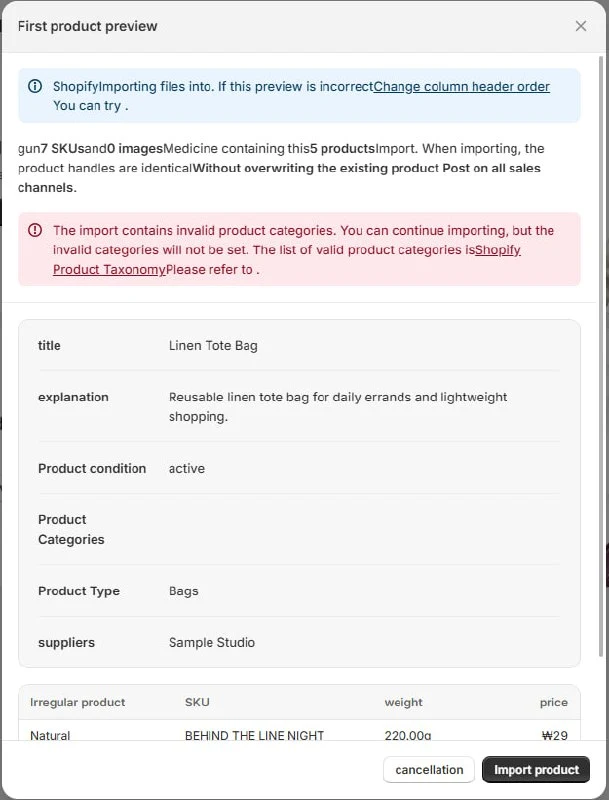
The template ships with Product Category blank for this reason. Set it in the admin after import, or categorize one product by hand and export it to copy the exact string Shopify expects. Product Type, which sits next to it, is free text and accepts anything — the two are easy to confuse.
Check the counts, then check the product list
The import preview reports how many products and SKUs it is about to create. That count is your structural check: the sample file should read five products and seven SKUs. A higher product count means variant rows are being read as separate products, which almost always means the Handle differs between them.
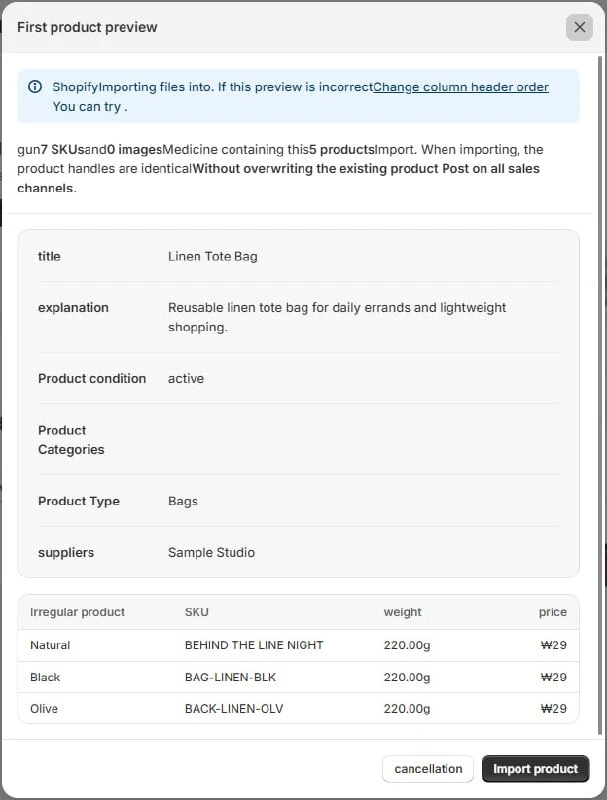
Confirm again in the product list after the import runs. The preview and the result are not always the same thing.
Prepare images alongside the file. Shopify says square product images usually display best at 2048 x 2048 pixels; accepted product images can be up to 5000 x 5000 pixels or 25 megapixels and must be smaller than 20 MB. For CSV import, paste a publicly accessible HTTPS image URL into the correct product row — Shopify does not automatically match local files to CSV rows by filename. If you prefer to upload images in the admin after import, leave the image columns blank.
Step 3: Collect your business and payout documents
Keep two matching checks separate. The legal business name, tax details, and identity information entered in Shopify Payments should match the official documents used for verification. The payout bank account holder name should match the name registered with the bank. A mismatch can delay verification or cause a payout to be rejected, but the exact requirements vary by country and business structure.
Collect your tax identification details, business bank information, identity documents, and any country-specific business or address documents in one folder. Shopify Payments availability and document requirements vary by region, and payouts can be placed on hold until requested information is verified — review the current Shopify Payments account-setup requirements before launch.
Sales tax obligations depend on where you operate and where you create nexus. Ecommerce platforms include tax calculation tools, but the platform will not determine your obligations for you — check your collection settings against official local guidance, or with an accountant, before you launch.
Step 4: Decide your gateways and what each one costs you
Where Shopify Payments is available and activated, orders processed through it incur the card-processing rate without an added third-party transaction fee. At current US list rates, online card processing starts at 2.9% + 30¢ on Basic, 2.7% + 30¢ on Grow, and 2.5% + 30¢ on Advanced. Orders processed by a non-exempt third-party provider can add Shopify transaction fees of 2% on Basic, 1% on Grow, or 0.6% on Advanced, in addition to that provider’s processing fee. PayPal Express Checkout is exempt when Shopify Payments is activated, and Stripe is available only to select Shopify merchants, so do not use either as a universal surcharge example.
On $10,000 of applicable order value processed through a provider subject to Basic’s 2% fee, Shopify’s added charge would be $200. An alternative provider can still be worthwhile when it materially improves checkout completion, but confirm whether the provider is exempt and whether it is available in your region before modeling the cost.
Step 5: Measure your packaging before you touch shipping settings
Measure the product and its packaging separately. Enter the product-only weight in Variant Grams, then record the dimensions and empty weight of your standard box or mailer in Shopify’s default package settings. Shopify combines the product weight with the package weight when calculating shipping costs, so including packaging in both places can overstate the shipment weight.
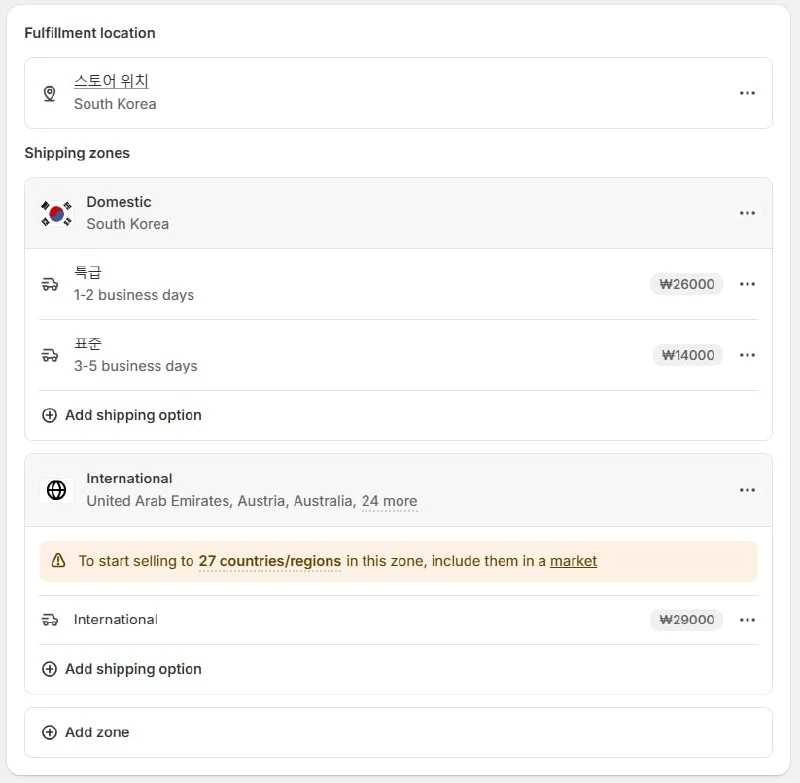
Use a kitchen scale to weigh the product, the empty package, and one finished packed order. The packed-order measurement is a validation check: it should be close to the product weight plus the empty package weight. Decide at least one shipping zone and rate, and remember that only the default package dimensions are used for checkout calculations unless a shipping app supplies another packing model.
Step 6: Fix the numbers your policies depend on
Policy templates are not the hard part — platforms supply those and link them into the footer and checkout automatically. What templates cannot supply are the numbers: your return window in days, your order processing time in business days, and your delivery estimate. Decide those three now, as numbers rather than intentions, and the templates fill themselves in.
The Policy Drafts sheet in the workbook has starter text for return, shipping, privacy and terms of service, each with the decision it depends on named alongside. Replace the wording with your own and confirm it against your jurisdiction — starter text is a drafting aid, not legal advice.
What your first year actually costs
Twelve months on Shopify Basic costs about $364 on annual billing or $484 on monthly, including an illustrative $16 domain budget. Shopify localizes plan pricing by market. The table below uses US list prices checked in July 2026; use the price shown on Shopify’s pricing page for your country. Domain pricing varies by extension and registrar too, so treat $16 as a placeholder and verify the exact quote for the name you want.
| Item | Cost (US, July 2026) |
|---|---|
| Shopify Basic, annual billing | $29/month ($348/year) |
| Shopify Basic, monthly billing | $39/month ($468/year) |
| .com domain (illustrative) | About $16/year — verify your actual quote |
| Twelve-month total, annual billing | $364 |
| Twelve-month total, monthly billing | $484 |
| Card processing (Shopify Payments, Basic) | 2.9% + 30¢ per online sale |
| Third-party provider transaction fee | 2% on Basic, 1% on Grow, 0.6% on Advanced, where applicable |
The new-store promotion changes when you pay, not what a year costs
New stores get a short free trial followed by $1/month, or the local equivalent, for three months. That is $3 in promotional pricing, after which the standard rate resumes. If you choose annual billing once the promotion ends, the full $348 annual amount is charged upfront at that point — the promotion defers the commitment rather than discounting it.
- Annual, through month 12: $3 promotional + $348 annual + $16 domain = $367 cash, with plan coverage extending through month 15
- Monthly, through month 12: $3 promotional + nine months at $39 + $16 domain = $370 cash, with coverage ending at month 12
- Compared over the same 15 months: $367 on annual versus $487 on monthly
The two twelve-month numbers look almost identical, which is why the promotion is easy to misread. The difference is what you have bought: the annual path has three more months of coverage and a year already committed, and Shopify does not prorate refunds on annual terms. Staying monthly while you find out whether the business works costs more per month and keeps the exit open.
Paid themes and apps sit outside these figures and can increase a first-year budget materially. Neither is necessary to launch — a free theme and no apps is a viable first store, and both decisions are easier once you have real orders to reason about.
Are you ready to open the builder?
Twelve checks. Each one is a yes or a no, and each no is a specific blocker you will hit inside the builder rather than a general area to think more about. The full version, with the consequence of skipping each item, is in the Launch Readiness sheet of the workbook.
- Logo saved as a transparent PNG, and you opened the file to confirm the background is actually transparent
- Primary and secondary brand hex codes written down
- Exact domain string decided, and either purchased or confirmed available
- Product CSV opened in a plain text editor with the header row intact
- CSV saved as UTF-8 with LF-style linefeeds, under 15 MB
- Variant Grams filled with the measured product weight, excluding packaging
- Public HTTPS product-image URLs are mapped to the correct Handle and row, or the image columns are intentionally blank
- Business and identity details match official documents, and the payout bank account holder name matches the bank’s records
- Documents your payment provider requires collected in one folder
- Standard shipping box measured and the empty box weighed
- At least one shipping zone and its rate decided
- Return window and order processing time fixed as numbers
Twelve out of twelve and the build is mechanical. Anything less and you will be doing preparation work inside the builder, which is slower and produces worse decisions because you are making them under pressure to finish.
Once the store is live, our email marketing checklist covers the first campaign. If you are still weighing platforms, the store builder comparison works through the tradeoffs — including when a self-hosted option costs less than a subscription.
Sources and notes
First-party testing: the product template linked above was imported into a live Shopify store in July 2026. The result was five products and seven SKUs. The product category behavior described in Step 2 — the import completing while the category field stayed empty — was observed during that testing. The image-URL guidance in the same section follows Shopify’s documentation rather than direct observation. Column names and export conventions come from an actual product export from the same store. All other product behavior described here comes from the documentation below rather than from direct observation.
- Shopify Pricing — plan prices, intro offer terms, card processing rates, third-party gateway surcharge
- Shopify Domains — domain pricing and what is included
- Shopify Help Center – Using CSV files — required columns, 15MB file limit, UTF-8 encoding
- Shopify Help Center – Product category and product types — taxonomy requirements for the Product Category column
- Shopify Help Center – Product media — image dimension recommendations and zoom threshold
- Shopify Help Center – Shopify Payments account setup — verification and document requirements
- Shopify Help Center – Setting up shipping — shipping zone configuration
- Shopify Help Center – Refund, privacy, and TOS statements — policy templates and placement
- Shopify Help Center – Billing plan changes — how billing cycles and plan changes are charged
- Shopify Help Center – Third-party transaction fees — when the additional fee applies and which providers are exempt
- Shopify Help Center – Shipping label setup — default package dimensions and weight handling
Disclaimer
This guide is an operational planning resource, not legal, tax, financial, or compliance advice. Pricing, features, and plan details were verified against official sources as of July 2026 and may change without notice. Requirements vary by location, business type, payment provider, and ecommerce platform, so confirm details with official sources or a qualified professional before launching.
Last reviewed: July 2026 by the PickrTech editorial team.